Enchanted Mommy

Pumpkin Carving – Halloween Is This Week!

Every holiday comes too fast for me.  I feel like I never get to do all that I want with the girls before it is over.  This year I wanted to let them choose what they wanted on their pumpkins.

I picked up some pretty good pumpkins at our grocery store (Harris Teeter).  They were pretty big and they were 2/$10.00 – I didn’t have to pay by the pound.

We let the girls pick what they wanted on their pumpkin.  My five month old obviously couldn’t pick, so husband just drew and carved (see middle pumpkin).  My four year old wanted Hello Kitty and my two year old wanted Dora.  I’d say they turned out pretty good.

20131026_210052_LLS

In case you’re wondering, we did the obvious (obvious that we never thought to do before) and googled “Dora pumpkin stencil”.  It took my husband to the Nick Jr. site that has a TON of characters.  He also just googled “Hello Kitty pumpkin stencil” and Ella chose the one she liked best.

Here’s Ella with her stencil:

IMG_7114

What you need for the stencil is:

  • pumpkin
  • pumpkin carver, my neighbor let us borrow her electric one.
  • Big spoon for all the guts
  • stencil of your choice
  • lots of tape
  • candle (I used votive ones)

After we carved them, we noticed a lot of light wasn’t shining through, so I had to go back and kind of thin out the inside lining of the pumpkin and make the lines a little wider.  I’m not sure if all pumpkins are really thick, but ours seemed to be.

I will say that it was pretty tedious, but I was really happy with how cute they turned out.  In the end, husband and I did all the work, while these two ran around and looked cute.

IMG_7122

This was a no brainer pic.

Here’s a close-up!

PatientRegForms0813

Happy Halloween!

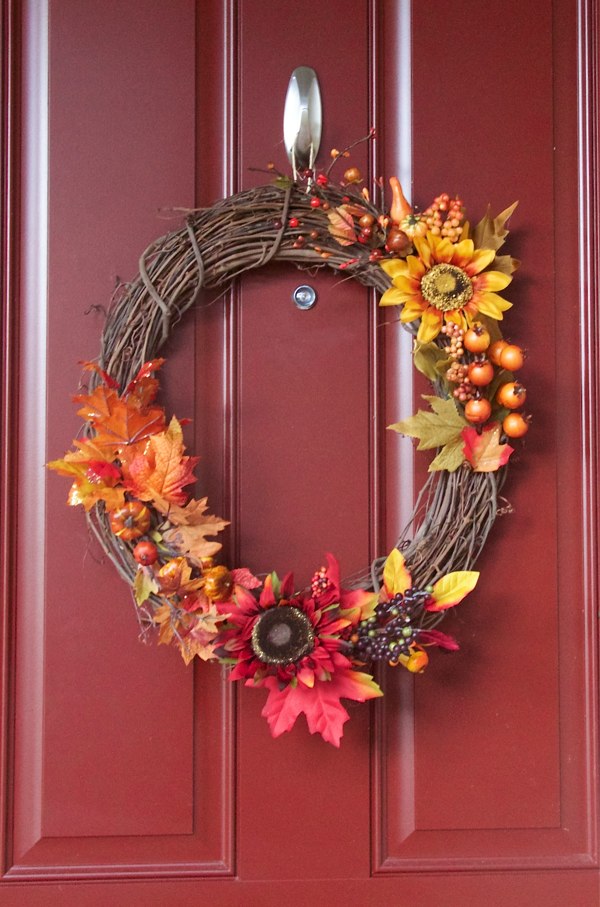
Easy DIY Fall Wreath

IMG_7502

I love making wreaths.  Every since my first wreath two Christmas’s ago, I just can’t stop!  They are so easy and inexpensive.  I give them as teacher gifts for the holidays as well.

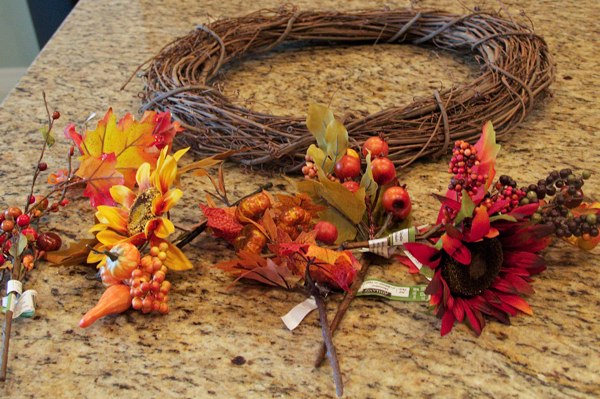
This fall wreath cost me about $5 to make.  The wreath part itself was on sale for $2.99 at Michaels.  Then you just pick out whatever accessories you want from the sale holiday isle.  They are usually range from 50 cents to $2 depending on how extravagant you get them.

I didn’t use any Halloween stuff this time, although there were plenty of Halloween items for those interested.  I wanted to be able to use the wreath through November as well so I kept it simple.

I just use hot glue and put it together how I want.  Looks great every time!

IMG_7486


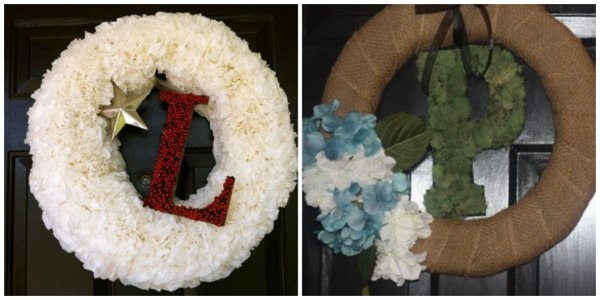
Here are a few we have made in the past:

PicMonkey Collage2 PicMonkey Collage3


DIY: Refinished Kitchen Table and Chairs

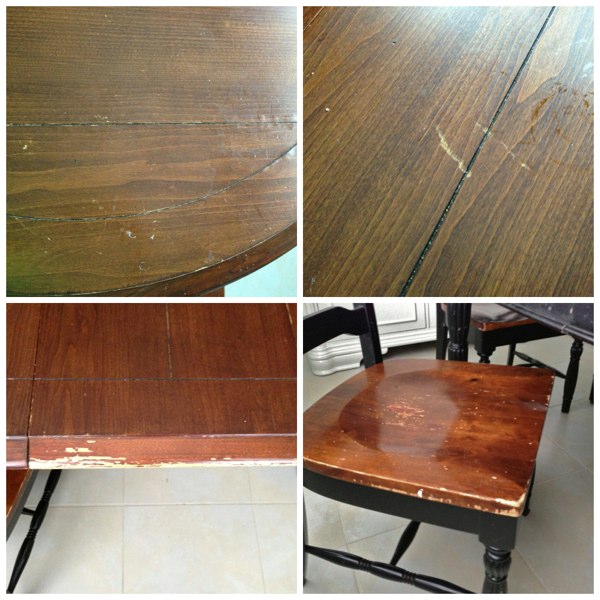
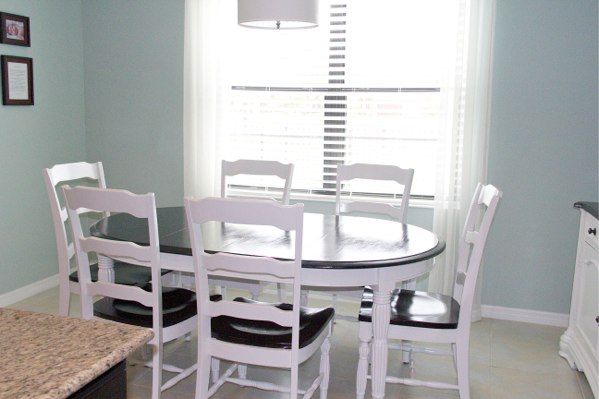
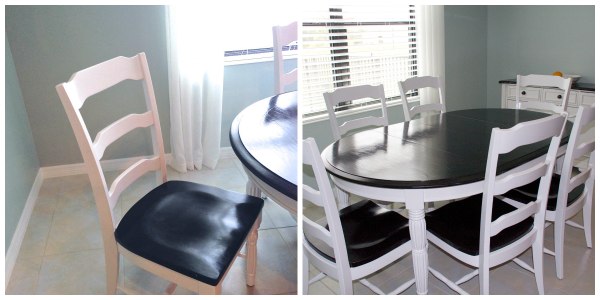
Remember when I refinished my buffet?  I ended up redoing the kitchen table and chairs to match!  This is a set we have had for quite a while now and has survived three moves and three children.

It was pretty beat up so I was really anxious to refinish it once we got settled here in Florida.

The chairs were the worst because they have spindles and took a lot of extra time to paint.  I am pretty sure I will never do chairs again!

Before and After

Before and After


This is how beat up it was!

This is how beat up it was!

Fabulous.  You can almost see the matching buffet to the right that I posted about last month.

Fabulous. You can almost see the matching buffet to the right that I posted about last month.

Supplies:

Oil based primer (I recommend Zinsser)
Sand paper and electric sander (sanding between coats and parts your are staining)
latex paint (I used a satin finish)
water based poly (I recommend Minwax Polycrylic)
Elmer’s wood filler (to fill in any grooves or scrapes)
Wood stain (I used the darkest stain I could find, Kona)

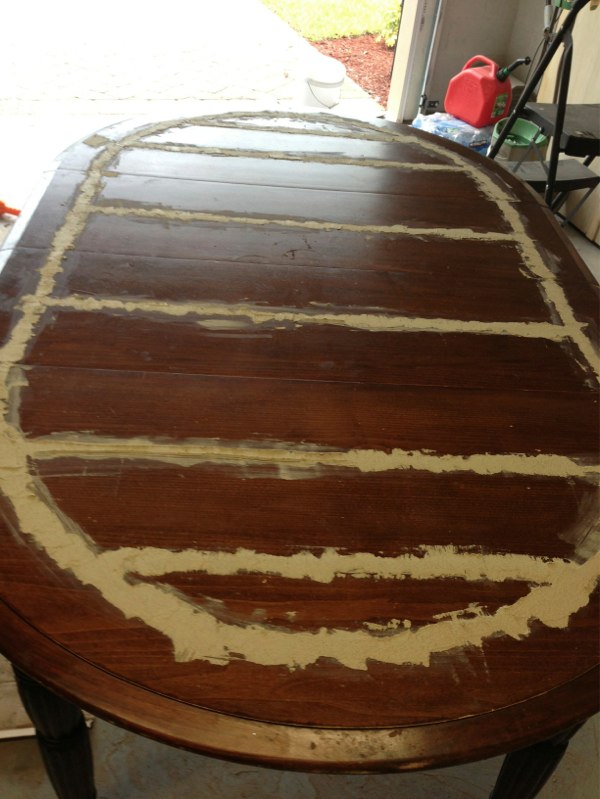
1.  Start by repairing any major scrapes or dents with Elmer’s wood filler.  I used a lot of this to fill in the natural grooves the table came with.  I hated them… food was always getting stuck in them.

IMG_4170

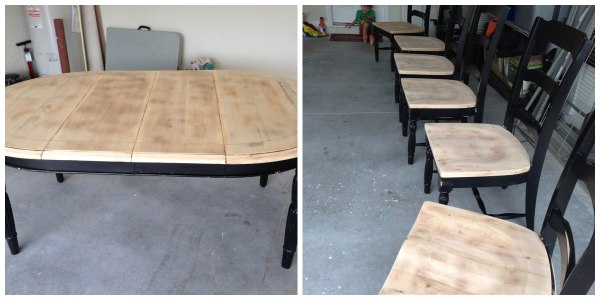
2.  Start sanding!  Use an electric sander to sand off the tops of the chairs and the top of the table.  Make sure you get all the finish off.  Do not over sand unless you are sure your table is solid wood.  I did this and could see part of the particle board show through in one part.

All sanded and wiped clean!

All sanded and wiped clean!

3.  Clean all the dust and start priming the table and chair legs.  I did two coats.  Lightly sand any drips between coats.

4.  Ready to paint!  It takes two coats of latex paint on the table and chair legs.  Work slowly and carefully on the spindles to avoid clumps and drips.  Sand any drips between coats.  I also like to add some floetrol to my paint.  This helps condition your wood and also slows down the drying time to minimize viewable brush marks.

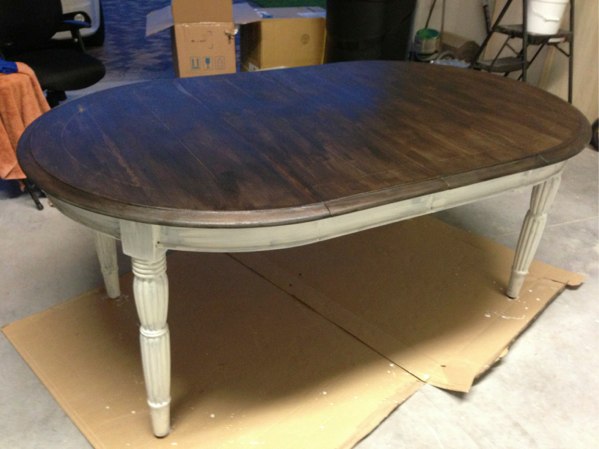
Primed on the bottom and first coat of stain done on the top

Primed on the bottom and first coat of stain done on the top

5.  Stain the top of the table and chairs.  Use painters tape as needed.  I did three coats of stain to get the color as dark as I wanted.  I used a stain called Kona.

6.  After 24 hrs I started the poly coats.  Make sure the poly is completely dry between coats.  I did three coats of poly.  Sand between coats as needed with a very fine grit sandpaper.

Make sure you wait 24 to 48 hrs before putting your table and chairs into regular use.  It turned out great!  We have been using it for a few months now and love it!

Turned out perfect!  I can't tell which chair was the one that was so beat up in picture above.  They all look perfect now.

Turned out perfect! I can’t tell which chair was the one that was so beat up in picture above. They all look perfect now.

DIY White Buffet makeover

Again, with the beat up furniture from the move!  Ha.  I am slowly moving from project to project as I get settled in the new house.  I got this buffet about 6 years ago.  It was one of my first pieces of furniture I was able to buy after graduating from college and getting married.

I sold a lot of my stuff before the move, but I always loved this piece.  It got really beat up in the move… maybe because we pack all our stuff ourselves, or maybe because it drove from Virginia to Florida in an open trailer secured with ropes and bungee cords.  Oops.

Oh well… I actually LOVE the new look.  It fits in much better with the colors of my house.
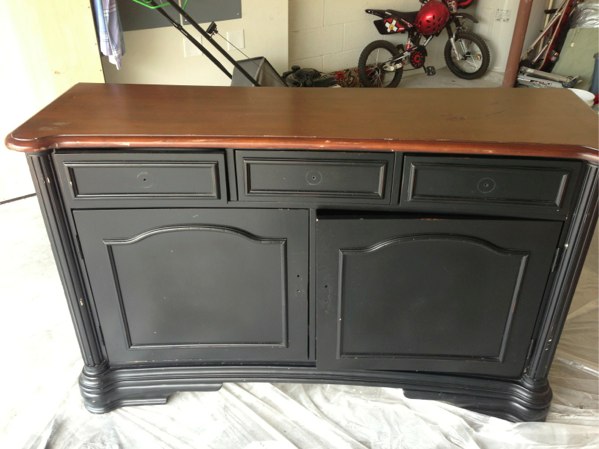
This is the buffet before.  With the black knobs and handles removed already.
This is the buffet before. With the black knobs and handles removed already.


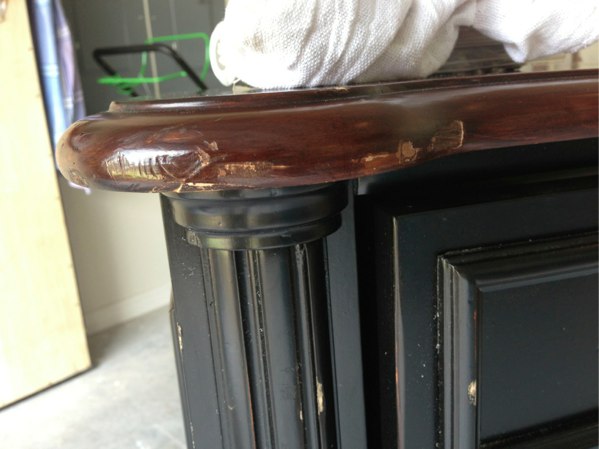
Close up of some of the worst dings.

Close up of some of the worst dings.

I started out by sanding all of the little dings until they were nice and smooth.  After that I used Furniture Refinisher with steel wool to give me a good start on getting the top finish removed.  I wanted to stain the top so I really needed all the finish completely gone.

This had a really thick finish so I used the Furniture Refinisher to keep me from sanding my life away.  Make sure you use gloves if you decide to use this product for your project.

To use this product you poor a little in a bucket, then soak up your steel wool scrubber in it and continually rub in a circular motion.  Its gooey and you will use up an entire package of steel wool.

To use this product you poor a little in a bucket, then soak up your steel wool scrubber in it and continually rub in a circular motion. Its gooey and you will use up an entire package of steel wool.  It definitely does its job.
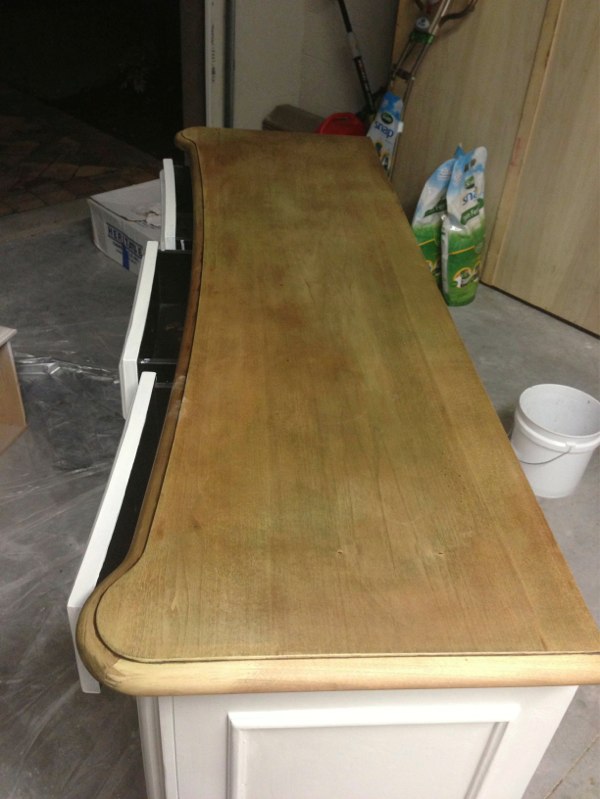
 

HEre is what it looks like after using the Furniture Refinisher.  You can tell it still has a little finish on it, but it is looking pretty good.

Here is what it looks like after using the Furniture Refinisher. You can tell it still has a little finish on it, but it is looking pretty good.  I also have a coat of primer on in this picture.  I would not recommend doing this until you are sure you don’t have to go back and sand… saves you time cleaning and dusting before starting to paint again.

Then, I took an electric sander and used a medium grain sand paper to take off the rest of the finish.  After I dusted off the rest of the mess from sanding, I was ready to put on another coat of primer.

I like to use Zinsser Oil Based Primer from Lowes.  Sand lightly between all coats of primer and paint to remove any clumps or paint drips.
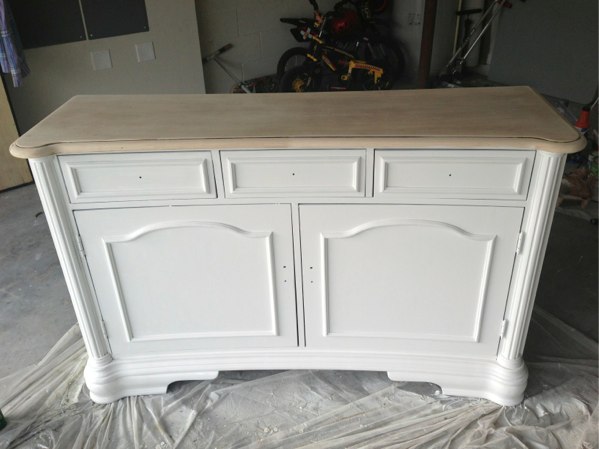
So here it is with two coats of primer and the top sanded down.  You can see the difference the extra sanding makes after using the Furniture Refinisher.  You really need to get all original finish off you plan on staining.

So here it is with two coats of primer, two coats of latex paint, and the top sanded down. You can see the difference the extra sanding makes after using the Furniture Refinisher. You really need to get all original finish off if you plan on staining.

Next, I put on two coats of white latex paint in a satin finish.  I added a little floetrol to my latex paint.  This helps condition the wood and slows down the drying time so that there are less visible brush strokes.

I used a a dark stain called Kona on the top of the buffet.  I actually did 3 coats of this stain to get it as dark as I wanted it to be.  You can always get it a shade or two lighter using less coats.  I also sanded between coats to make sure it was extra smooth.

After 24 hrs of drying I started the poly coats.  I like to use a water based poly in the satin finish.  The oil based poly’s will yellow over time.  This might not show on a darker piece, but would be terrible on this white.  I recommend Minwax Polycrylic.  Again, make sure to sand between coats to make it extra smooth.
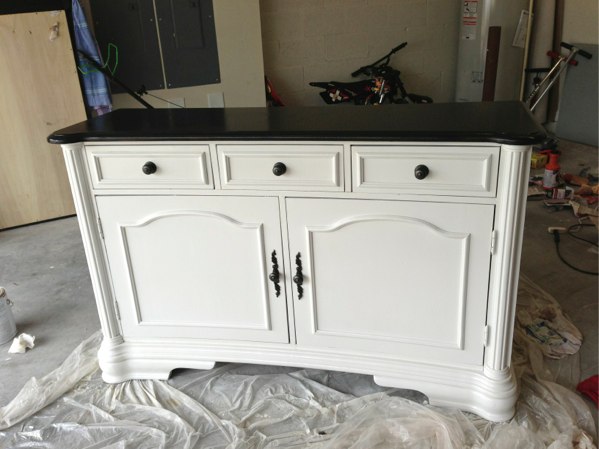
Here it is in the garage with the hardware finally back on.  I like to wait 24 to 48 hrs before putting any of my pieces to use.

Here it is in the garage with the hardware finally back on. I like to wait 24 to 48 hrs before putting any of my pieces to use.
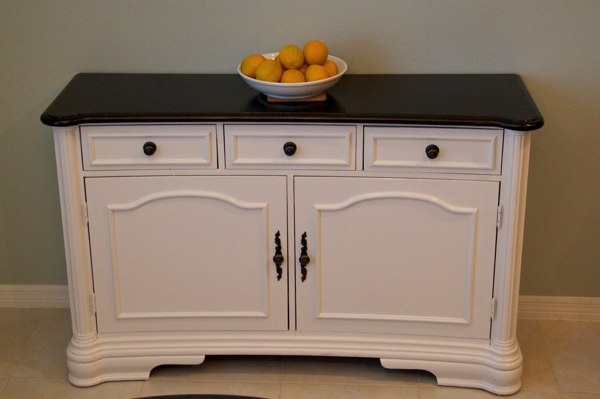
 

Finally, its in the house and looking fabulous!  Still need to figure out how I want to dress it up, but I am very happy with how it turned out!

Finally, its in the house and looking fabulous! Still need to figure out how I want to dress it up, but I am very happy with how it turned out!  Bad lighting here and the pic really doesn’t do it justice for how beautiful it turned out.
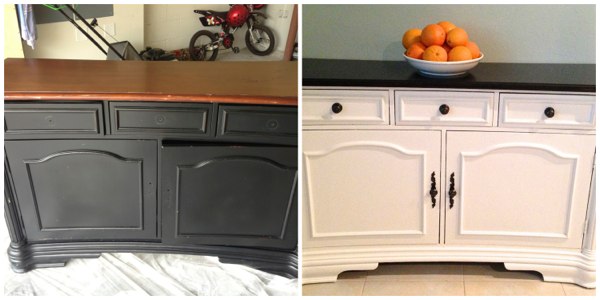
 

A quick side by side of before and after for you.

A quick side by side of before and after I decided to add at the last minute.  Please excuse the cell phone shot. 🙂


Check out my antique turquoise armoire I did as a recent guest post here.

 

DIY Burlap and Cork Board Frames

We are finally settled into the house enough for me to start doing some crafts!  Yay!  I hope to never ever move again.  It is so much work and its seems that all my furniture gets a little bit more beat up with each move.

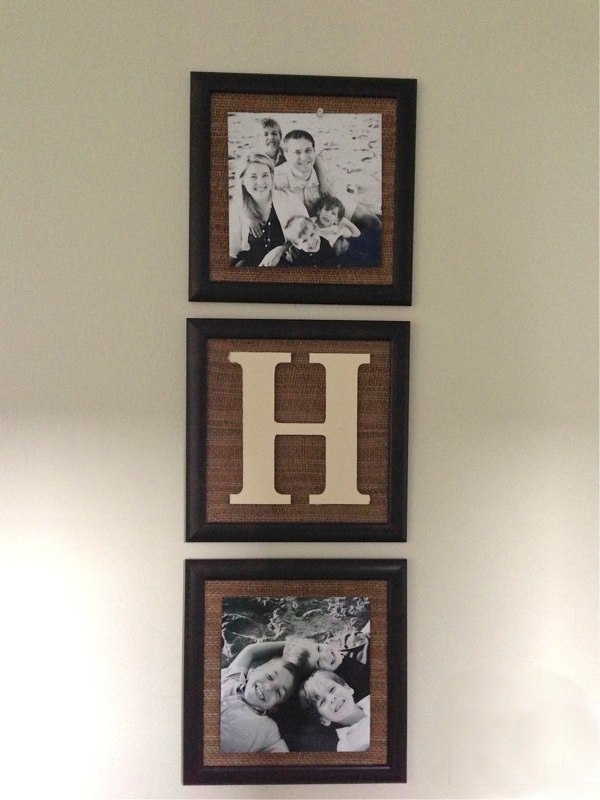
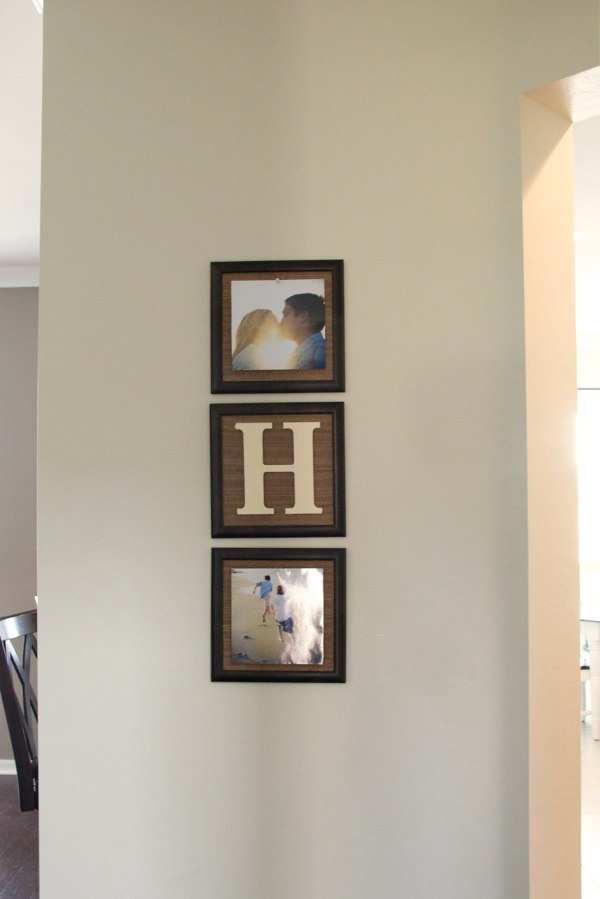
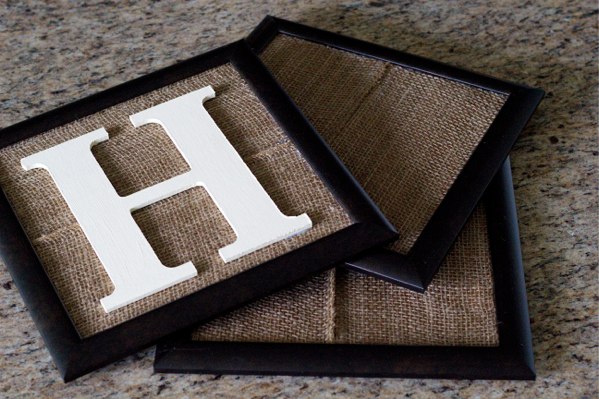
Anyway, you might have seen this project floating around pinterest from shopcraftwarehouse.blogspot.com.  I love it!  I love how easy it is to change out the pictures!  I have such a hard time choosing between pics anyway so this display makes it super easy to switch out picutres.

IMG_4156-1

IMG_6674-1

The original blogger used spray paint, magnets and metal sheets, but I didn’t want to deal with that so I used cork board under mine so that I could pin up the pictures instead of put them up with a magnet.  It just seemed a lot simpler.

IMG_6252

SUPPLIES

  • 3 Square frames (I used 10 x 10 with 8 x 8 photos, but 12 x 12 would look great too)
  • Wood letter of your last name (found at any craft store)
  • Acrylic paint color of your choice (I used beige)
  • Cork board roll or squares (found at any craft store or on Amazon for $5.94)
  • Burlap roll (found at any craft store)
  • Hot glue gun

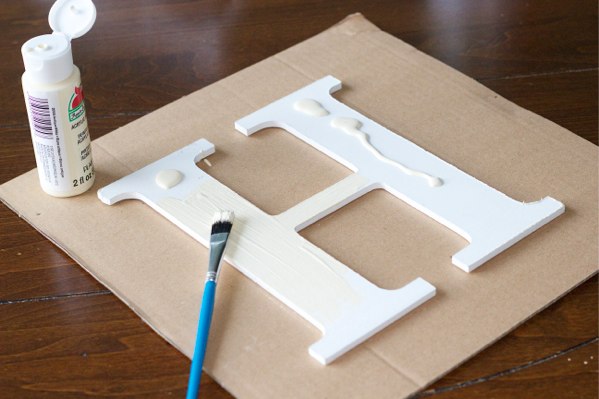
*** Paint your letter.  Carefully remove glass from all three frames.  Cut cork into squares to fit your frame and glue to inside cardboard backing of the frame.  Cut burlap to fit the frames you picked out and glue the corners unto the previously glued cork board squares.  Glue your wood letter to the middle of own of the cork squares.  Put your frames back together again and use any thumb tac to put up your square photos.

IMG_6270

DIY Earring Organizer!

jewelry

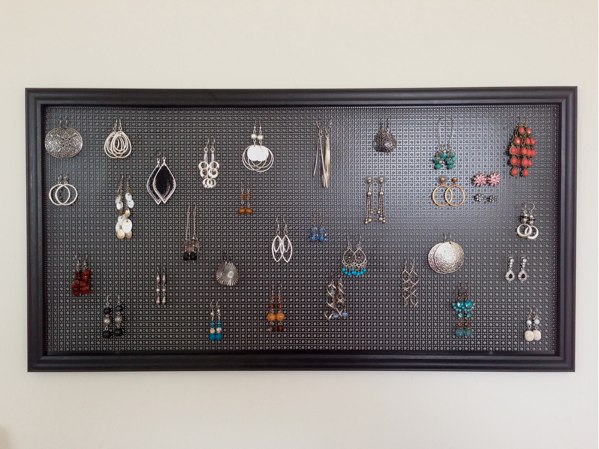
Isn’t it fabulous!  I am so in love with it!  Previously all my earrings were thrown all together in a jewelry box drawer.  I would have to shuffle through them digging for a match and could hardly even see all the earrings I had .

I admit, I probably spent more money on this than I would have liked.  I do LOVE it though and once I committed to making it work there was no stopping me.

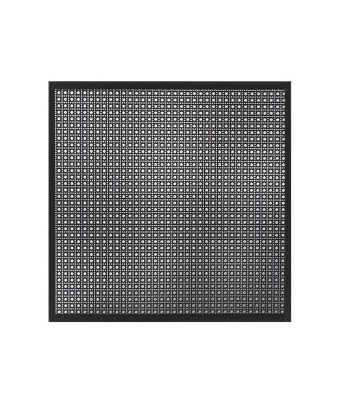
I went to homedepot planning on getting chicken wire for this project and ended up finding this aluminum sheet in the roofing section that I loved instead.

I used a lincane aluminum sheet similar to this one from Amazon.

I used a lincane aluminum sheet similar to this one from Amazon.

I had the frame made to fit the 12″ x 24″ aluminum sheet at Michael’s using a 60% off coupon.  I had them make the frame, but told them not to cut any glass for it.  Then I used a glue gun to glue it in place before mounting it on the wall.

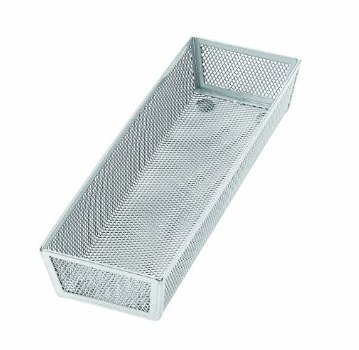
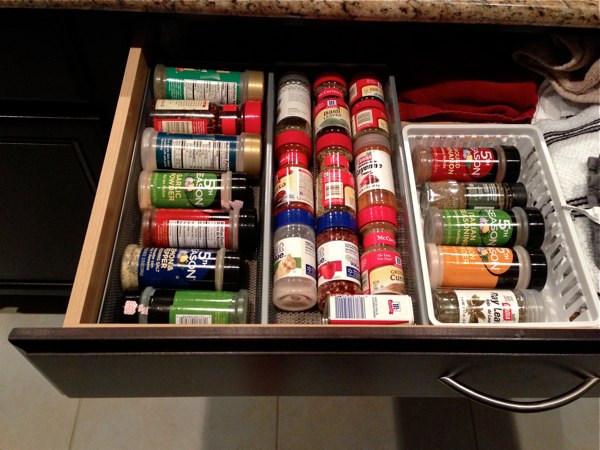
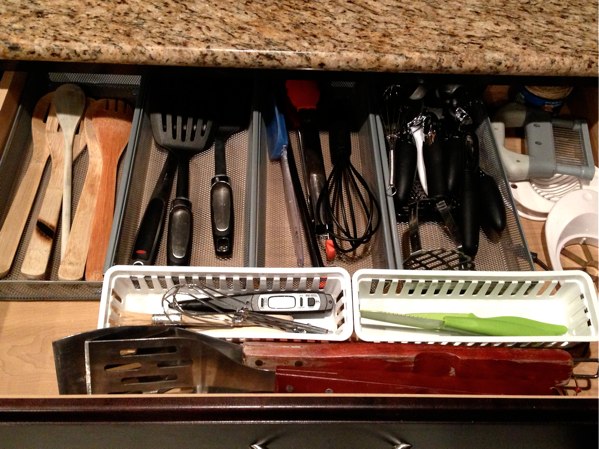
One thing about moving that I love is starting fresh and getting organized.  I organized both my spices and cooking utensils using these inexpensive drawer organizer from Walmart.

Amazon.com_ Copco 4-Inch by 12-Inch Mesh Bin Organizer_ Home & Kitchen

Love having my spices in a drawer instead of upright in a cupboard.  I get to them so much easier!

Love having my spices in a drawer instead of upright in a cupboard. I can get to them so much easier!


This use to be one  big messy drawer with everything all mixed together.

This use to be one big messy drawer with everything all mixed together.


DIY Canvas Prints

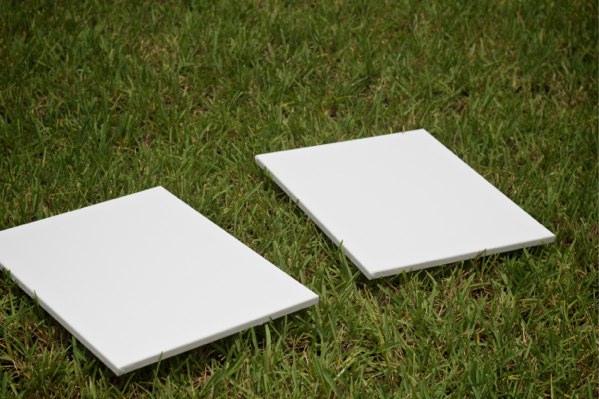
Michael’s Doller days is this week!  Yay!   This is like Christmas for a crafter like me!I have already gone twice this week!  My favorite deal this week is the two pack 16in x 20in canvases for $5.  If you dont like that size, you should know all the other canvases are 40% off this week.  Check out their dollar deal sale here.
So I bought a canvas for each of my boys to have fun with and then a pack for me to play with.

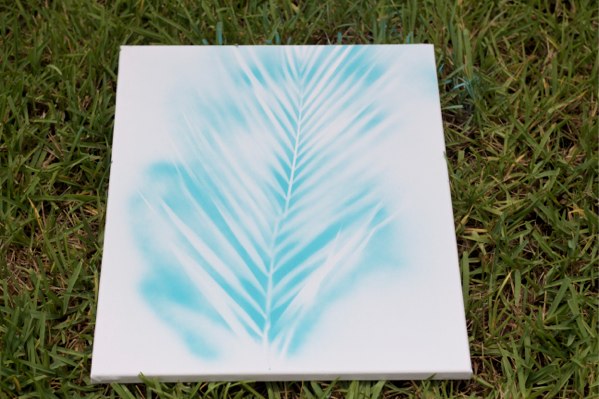
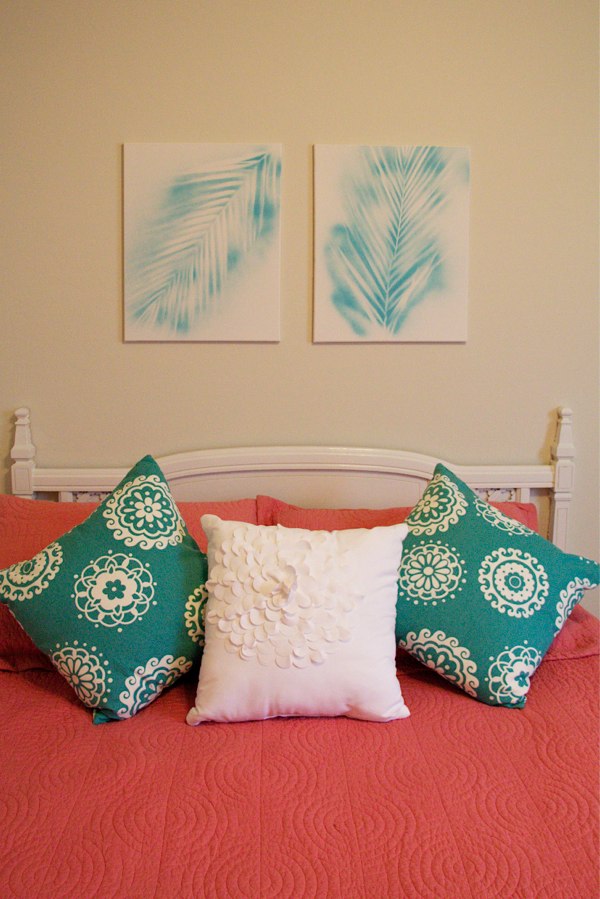
I made these easy tropical leaf prints for $8 total.  $5 for the canvases and $3 for the spray paint (after using my 40% off coupon found here).  My guest room walls were pretty bare so I am thrilled to have something to put on them and give the room some more color.  They took all of one minute to make.
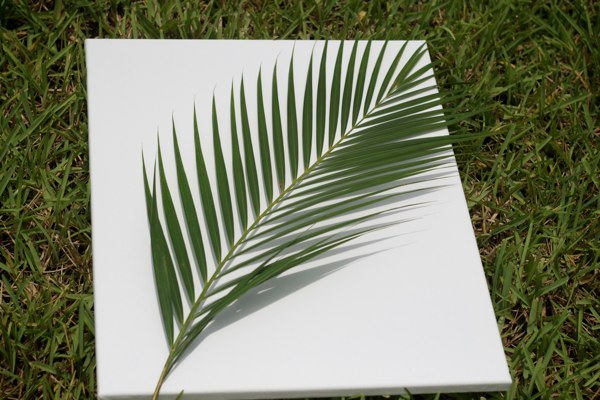
1.  Pick a leaf with come good texture to it and grab your canvases.
IMG_6675

2.  Put your leaf on your canvas

IMG_6677

3.  Spray paint around it

IMG_6682


IMG_6678

Seriously, that is it.  Quick, easy, and inexpensive.

IMG_6705


Here are the boys’ creations.  I hung them in the toy room.  They look great and the boys were excited about having them hung up.

IMG_6691

Enchanted Mommy’s Easter Crafts

Below, I’m linking to three Easter crafts and two yummy treats. Easter is right around the corner (March 31), so live it up before it gets here!

eastercupcraft

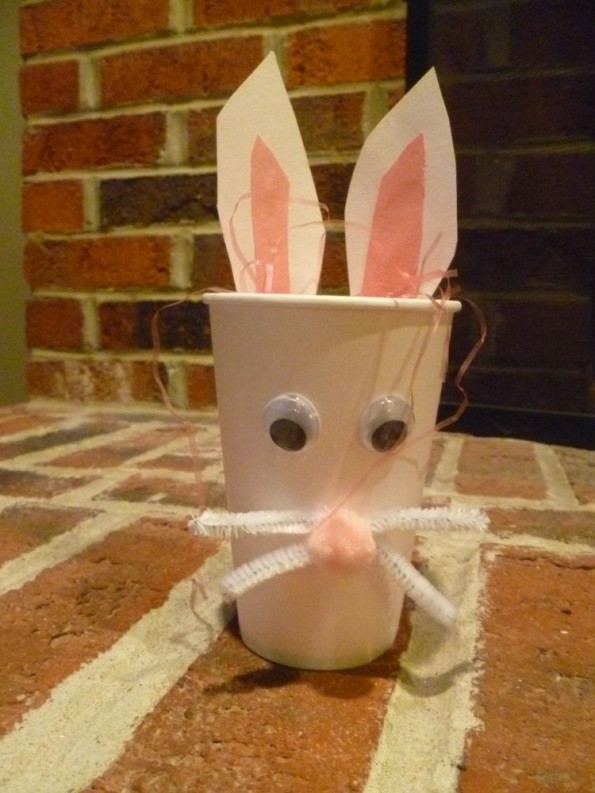
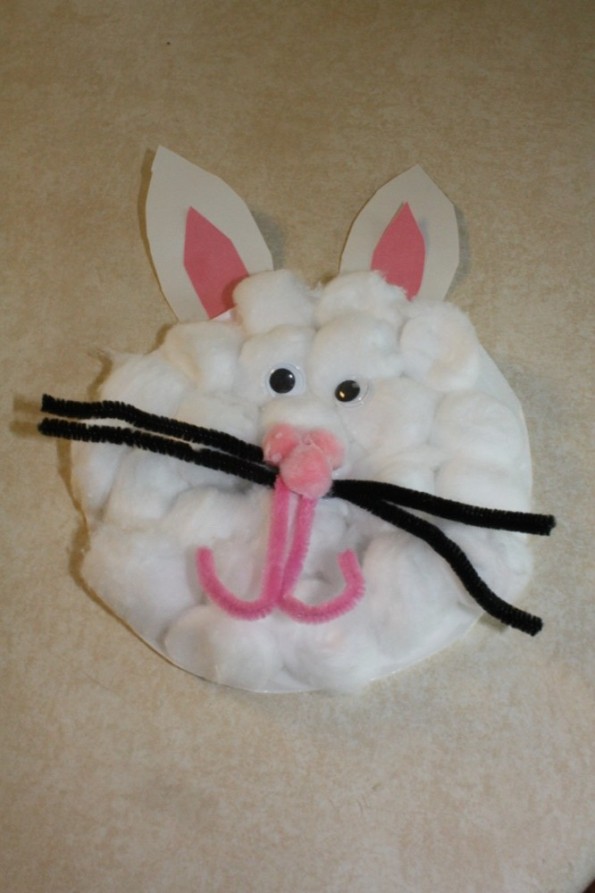
Easter Bunny Cup Craft – So adorable!

I just think this craft is so adorable.  It would even make a great party favor with some candy in it!


This is made out of a paper plate, cotton balls, pipe stems, construction paper and googley eyes.

This is made out of a paper plate, cotton balls, pipe stems, construction paper and googley eyes.

Check out this Bunny craft!


popcorncake

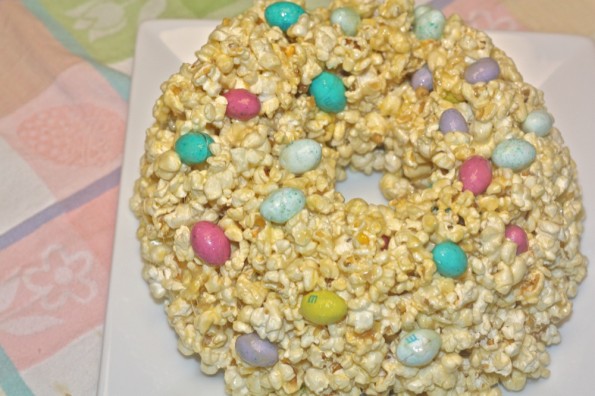
Such a delicious and adorable Easter dessert!

Click here to find out how to make this yummy popcorn cake!


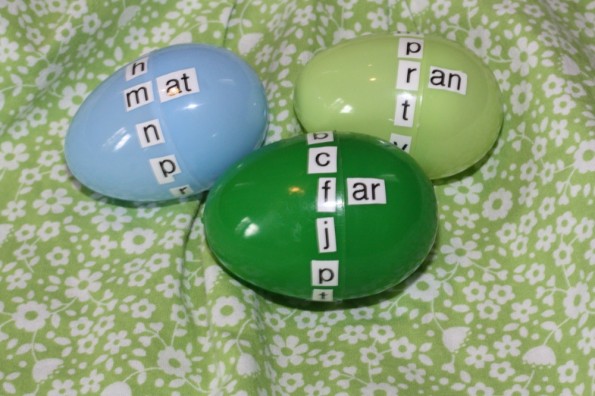
Learning words with Easter eggs!

Learning words with Easter eggs!

This is such a fun way for kids to learn words that rhyme and how to sound out different words!  Check it out!


Easter Egg "Nests"

Yummy Easter Egg “Nests”

Look at these adorable little nests for candy eggs!


easterpuppet

Easter Puppet!

I just posted this two weeks ago, but it’s a good chance to pull out all those craft supplies!

It’s amazing how quickly the holidays come and go the older you get.  I feel like I get so caught up in time (and possibly the fact that I’m 29 weeks pregnant) that I forget to do things with my kids.  I hope everyone has a wonderful Easter!

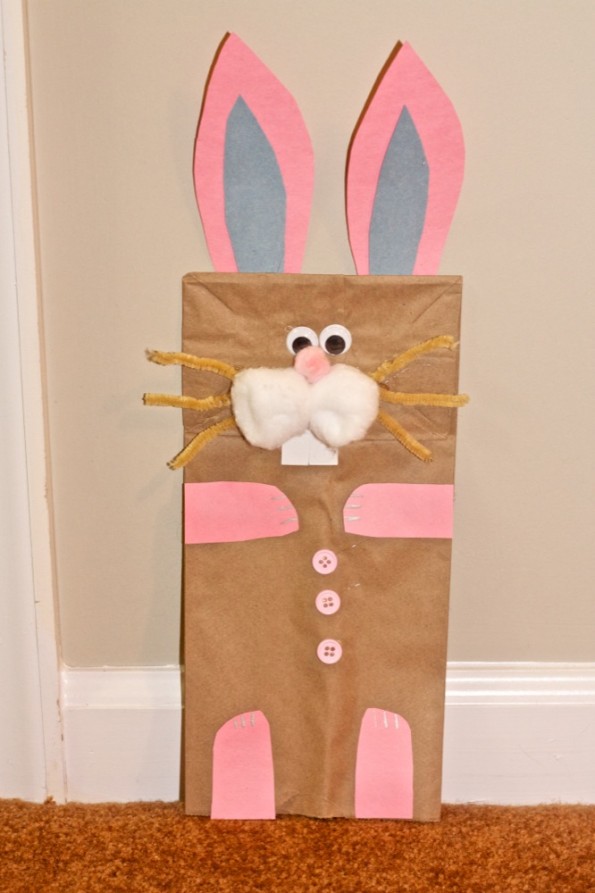
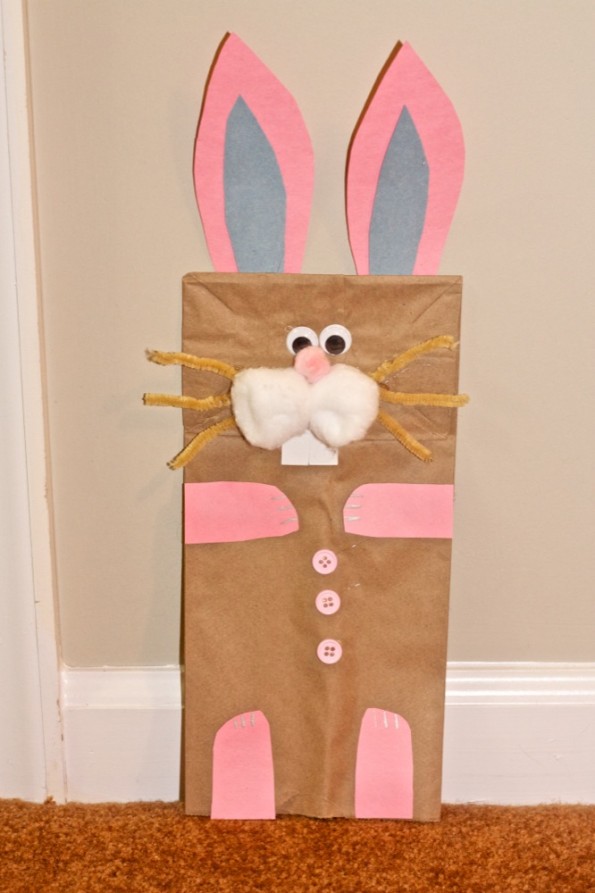
An Easter Craft – Bunny Puppet Made Out Of A Paper Bag

Winter can seriously peace out.  I’M OVER IT!!!!  While being stuck in the house today, my 3 year old and I made this cute bunny that I found here:

So simple and so adorable!

So simple and so adorable!

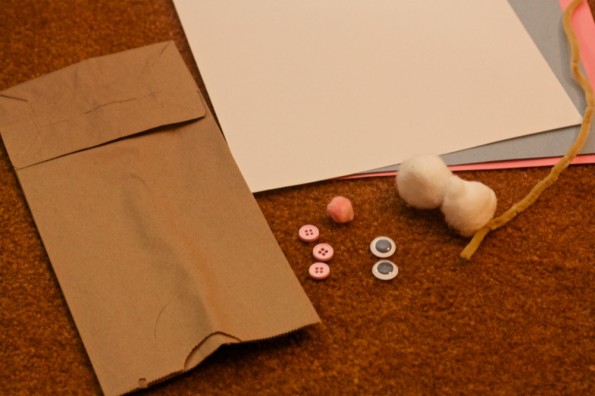
All you need is:

All you need is a paper bag, googly eyes, pink pom pom, two cotton balls, pipe stem, white and two other colors of construction paper and three buttons!

All you need is a paper bag, googly eyes, pink pom pom, two cotton balls, pipe stem, white and two other colors of construction paper and three buttons!

Plus, you’ll need some scissors and a hot glue gun.  So simple to make, yet so adorable!

After this, I just got out a bunch of craft things and just kind of let her go at it creatively on a new paper bag.  She loved it!  Happy Easter, a little early!