Enchanted Mommy

DIY: Easiest Way to Paint Stripes!

I had been wanting to do a striped room for a while, but was too intimated.  My sister-in-law did her nursery in stripes and it finally motivated me enough to give it a try.  It was surprisingly easier than I thought it would be.

Looks great right!

All done and looks great!  I get so many compliments on it!

All done and looks great! I get so many compliments on it!

Supplies Needed:
Latex paint
Roller/paint brush
Painter’s tape
Chalk line tool
Ruler or measuring tape

I did 12 inch stripes just to make the measuring simple.  The most obnoxious part is the taping.

First I used a 12 inch ruler and marked every 12 inches on both sides of each wall. Then I used a chalk line tool to mark the stripes.

Basically, you put this dry chalk in the tool and shake it up.  Then you use a thumb tac to tac the end of the chalk line to your first 12 inch mark on one side of the wall.  Pull the chalk string out until it is the length of the wall and hold the other end tight at the other 12 inch mark you made on the other side of the wall.  Make sure the chalk line is wound tight.  Then just use your free hand and snap the line up.  It will snap back down and leave an easy to see line across your wall.  Repeat this for all your lines.

Here is one wall after making chalk lines.

Here is one wall after making chalk lines.

This is what the chalk line tool looks like.  It is sold with the chalk and costs around $10.

This is what the chalk line tool looks like. It is sold with the chalk and costs around $10.

Once I had my chalk lines I put painters tape along the lines, making sure that the stripes I would be painting had the painters tape on the outside of the lines and not the inside.  I also put x marks with painters tape on the stripes that I would not be painting just to make it easier not to make any mistakes.

All taped up and ready to paint!

All taped up and ready to paint!

Painting time!  I was very careful to make sure I used the roller very lightly near the tape so that paint wouldn’t seep under the tape.  You can also push a credit card end along the painters tape to seal it to the wall better before you start painting.  Make sure you peel your painters tape off the wall before your paint is dry.   If you wait until it is too dry be very carefully peeling it off as it can start to tear the dried paint off with it.

All done and looks great!  I get so many compliments on it!

All done and looks great! I get so many compliments on it!


Here is the other side of the room... I know bad lighting. Sorry.

Here is the other side of the room… I know bad lighting in this pic. Sorry.


Pinkalicious 1st Birthday

I cannot believe it, my youngest princess turned the big 1.  We decided to do a Pinkalicious family party.  Here she is!

marinbdaypic

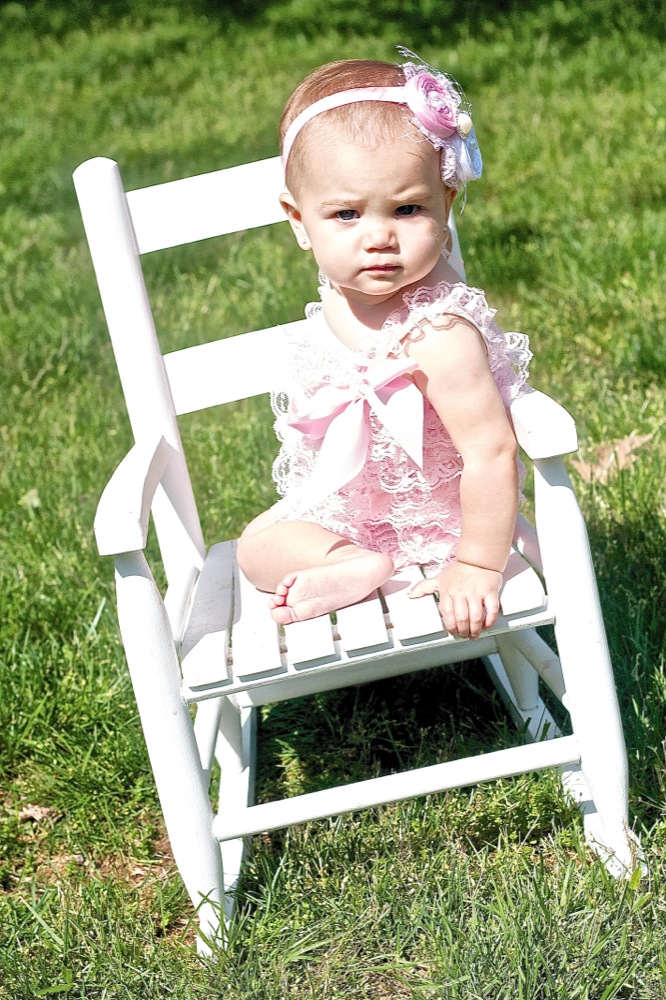
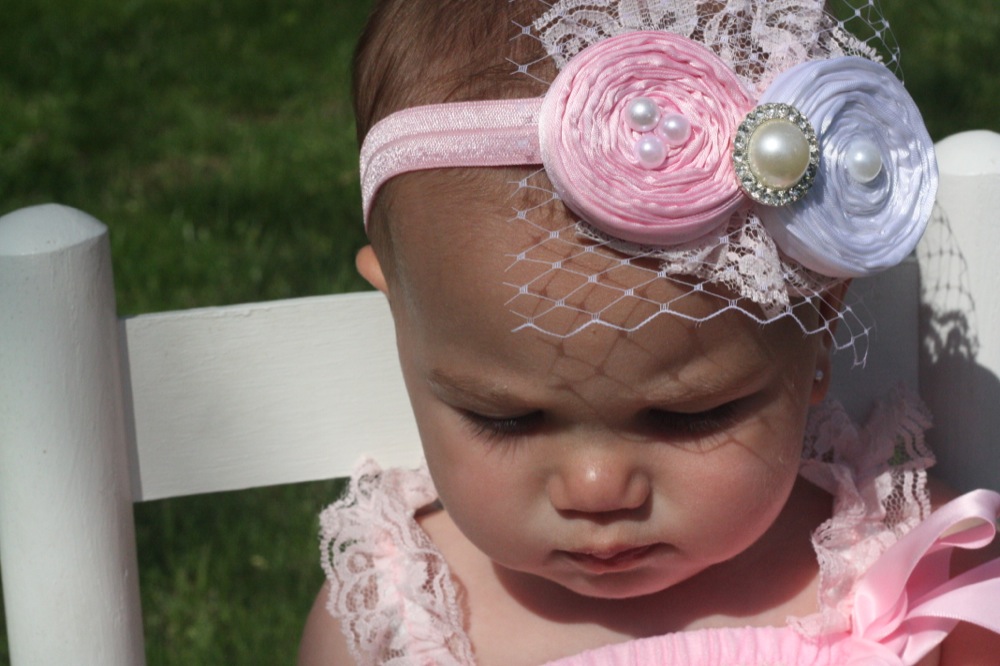
I always take 1st birthday pictures of my kids.  I quickly did this one two days before her birthday so I could display it at her party.  In case you’re wondering, I got the romper and headband here.  It fit her perfect and ran true to size (she’s 17 lbs and I ordered 6-12 months).

I’m so mad at myself for not taking pictures of the food, but it included:
– chicken salad  and egg salad croissants
– butterfly pb & j sandwiches for the kids
– lumpia
spinach dip
 buffalo cheese ball
– veggie tray
– fruit salad
sausage cheese dip

I also took pictures of the drinks kind of late so they didn’t look the prettiest at this point:

IMG_8517

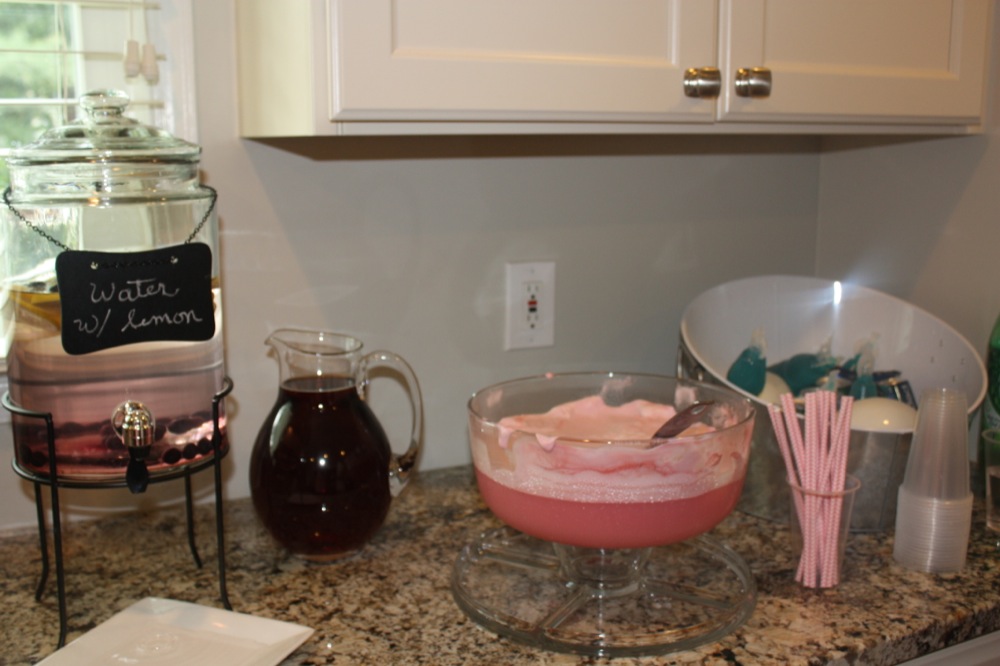
The best was the pink punch!  I thought it tasted so delicious!  I scooped the sherbet into the punch with an ice cream scoop.  The pink chevron straws are from Target.

My favorite was her “1” cake because it looked so cute, but was SOOOOOOO easy to make!

IMG_8468

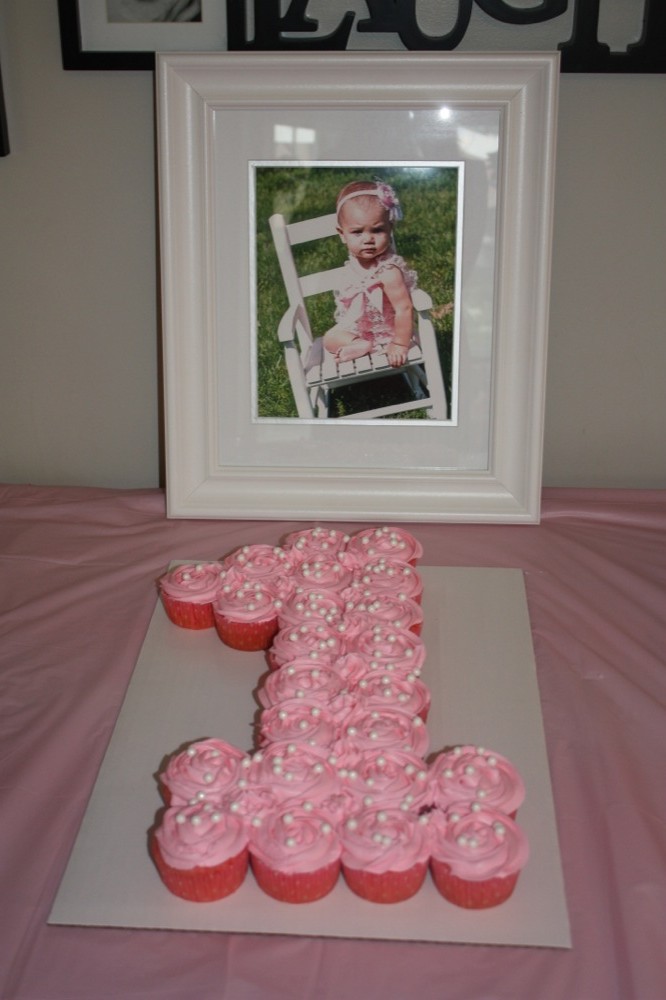
I used a strawberry cake mix and funfetti icing.  I dyed the icing pink with icing dye.  It was so easy!  I did have to put the icing in the fridge for like 30 minutes after I mixed it because it was a little too loose.  I used a wilton 1M tip and started in the center and worked my way around.    I filled in the holes with the same tip in between the cupcakes.  It took me probably 10 minutes to ice!  I also put these edible pearls on there for a little extra touch.

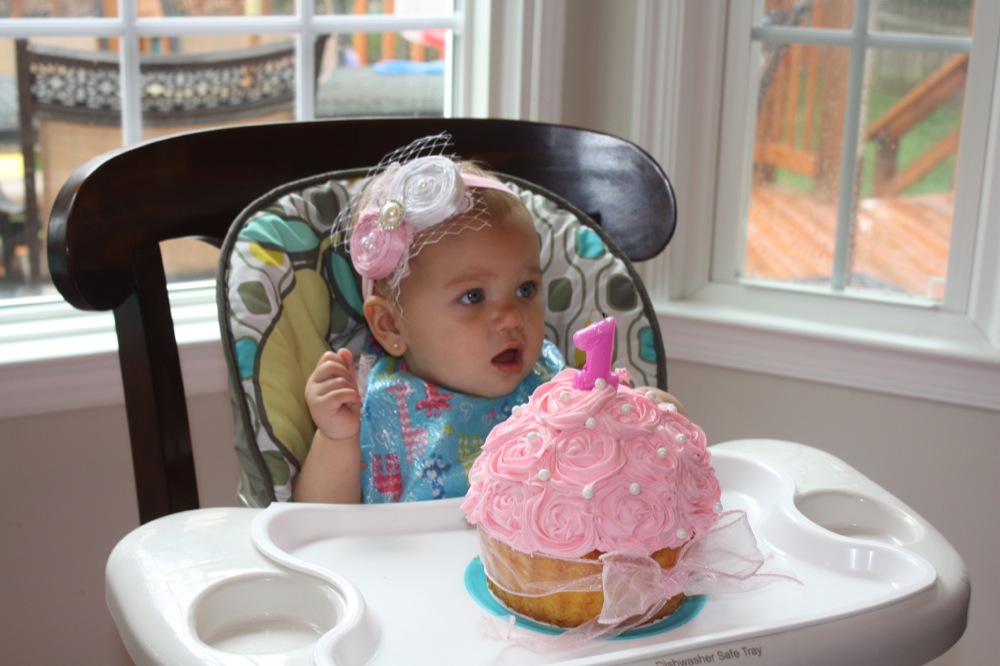
Her smash cake looked very similar!

IMG_8469

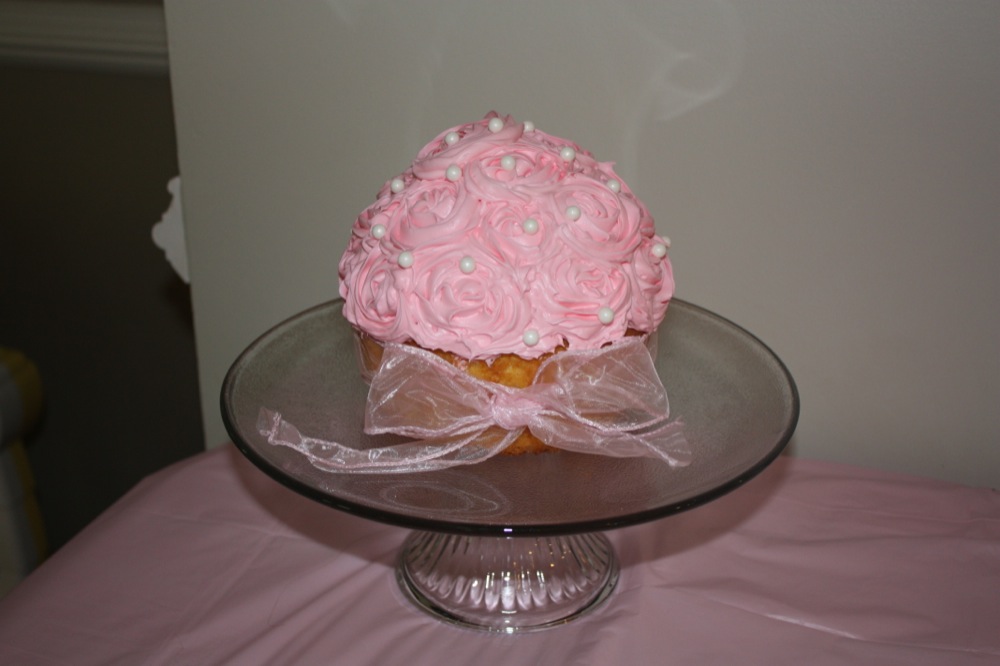
This probably took me 5 minutes to ice.  I used this cupcake cake mold.  First, I put icing in between the two layers of cake and then did a very thin layer of icing on the top with a butter knife so the roses would stick well.  I used the same icing tip as above and just did little roses all over and added the pearls.  Remember, the rose starts in the center!  I bought the ribbon at A.C. Moore.

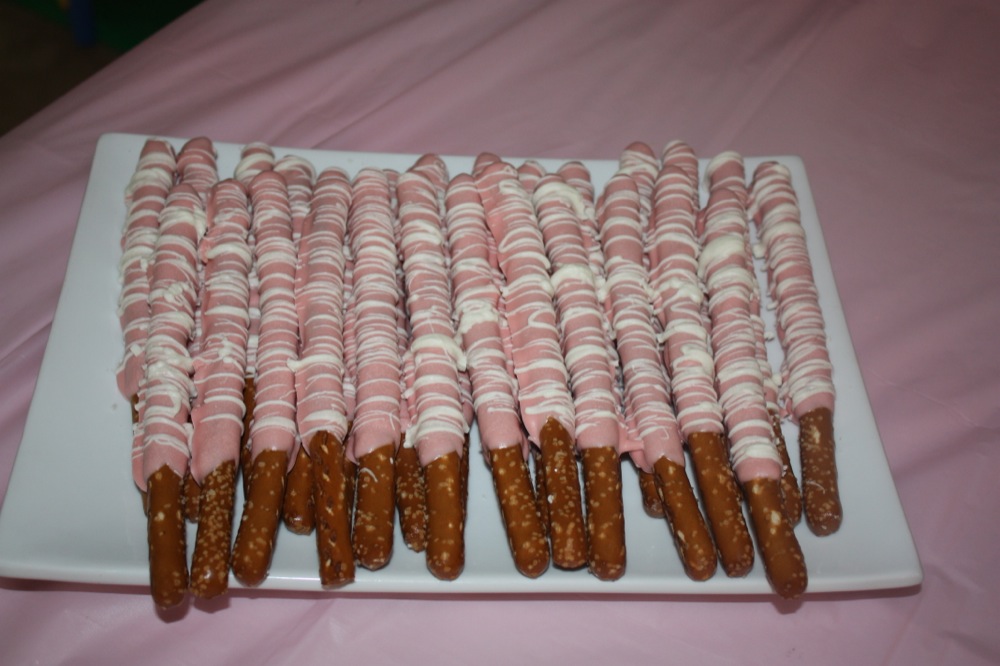
I also made chocolate covered pretzels and sugar cookies.  My mother in-law also made a delicious cheesecake.

IMG_8471

IMG_8472

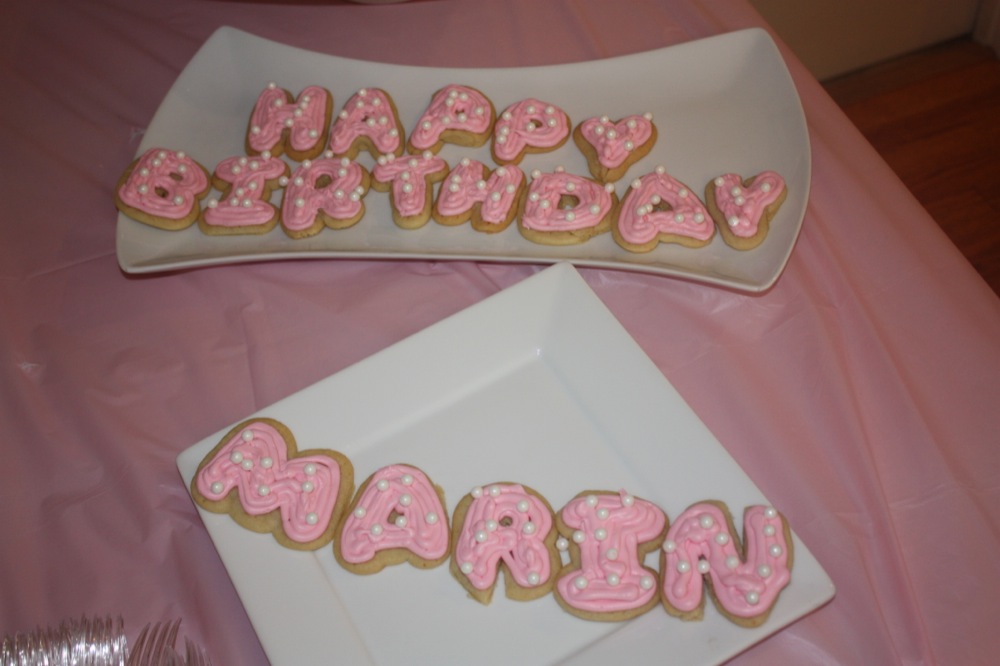
I used my cookie cutters from my kit that I wrote about before.  I actually just bought pillsbury cold dough.  The letters looked rough until I iced them!  I thought they turned out pretty cute!

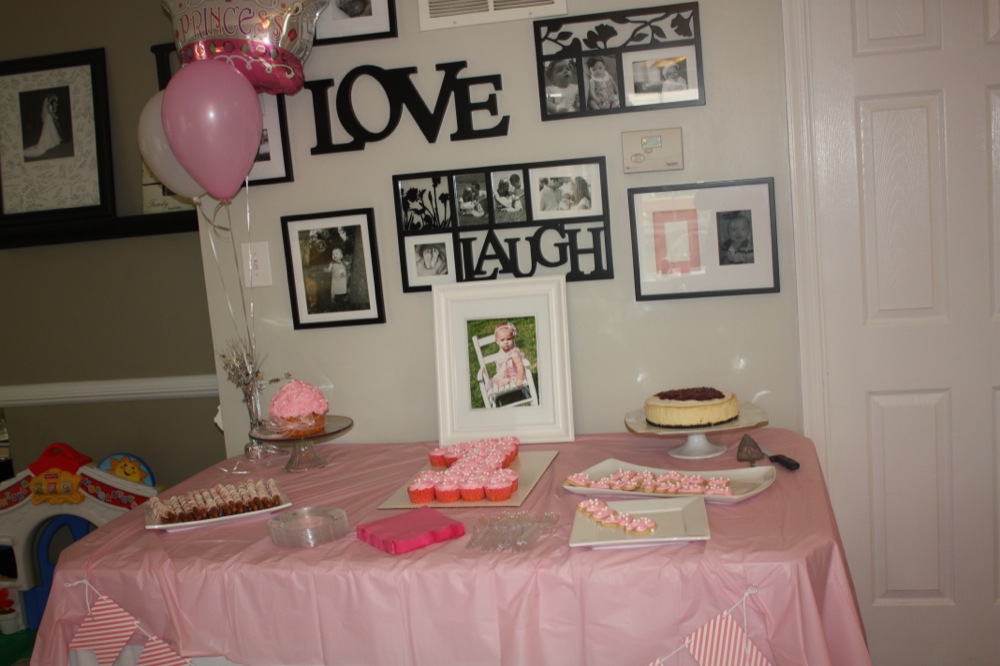
Here is the display of her “pink sweets” table.

IMG_8510

I’d say she enjoyed her cake!  I love how her handprint is on her face.

IMG_8548

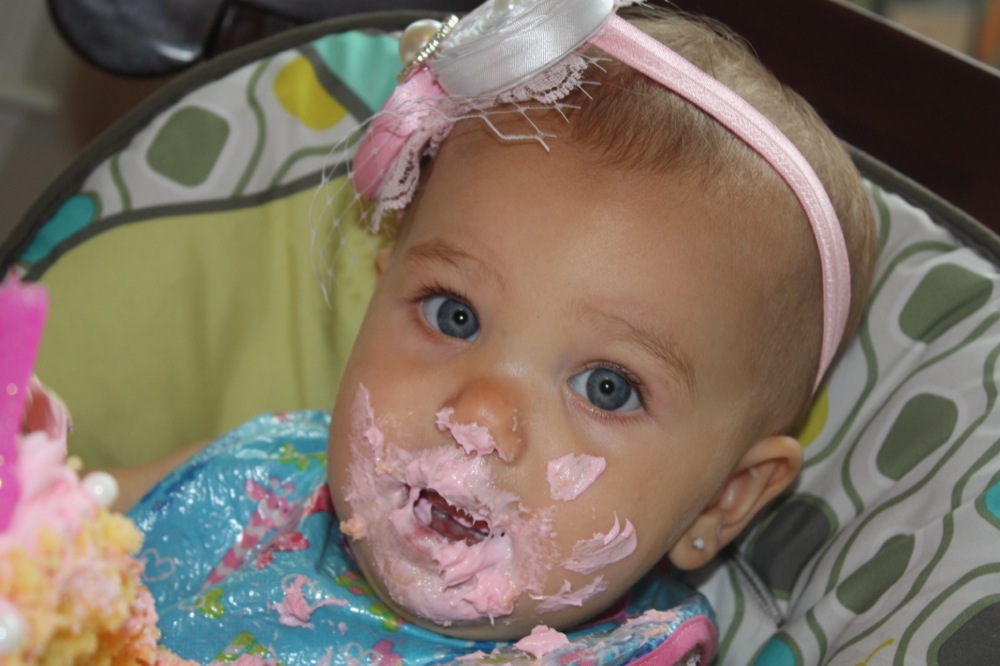
Okay, so one more…..

IMG_8527

I also made cute pom poms for above her!

IMG_8559

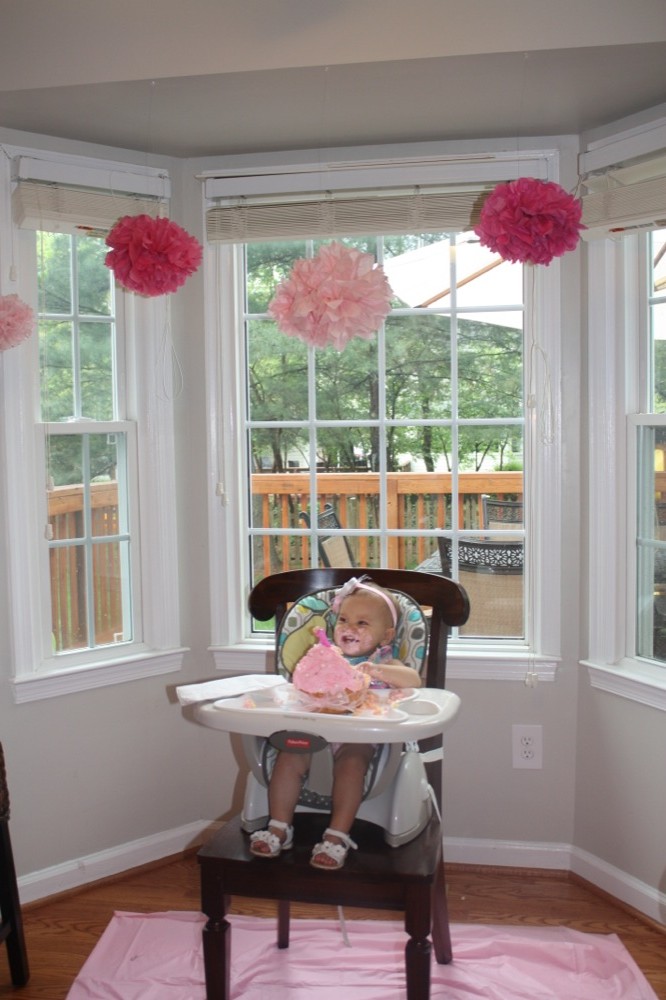
I used 8 pieces of tissue paper for the center one, 7 for the dark pink ones and 6 for the small ones!

I’d say she had a pretty good 1st birthday!
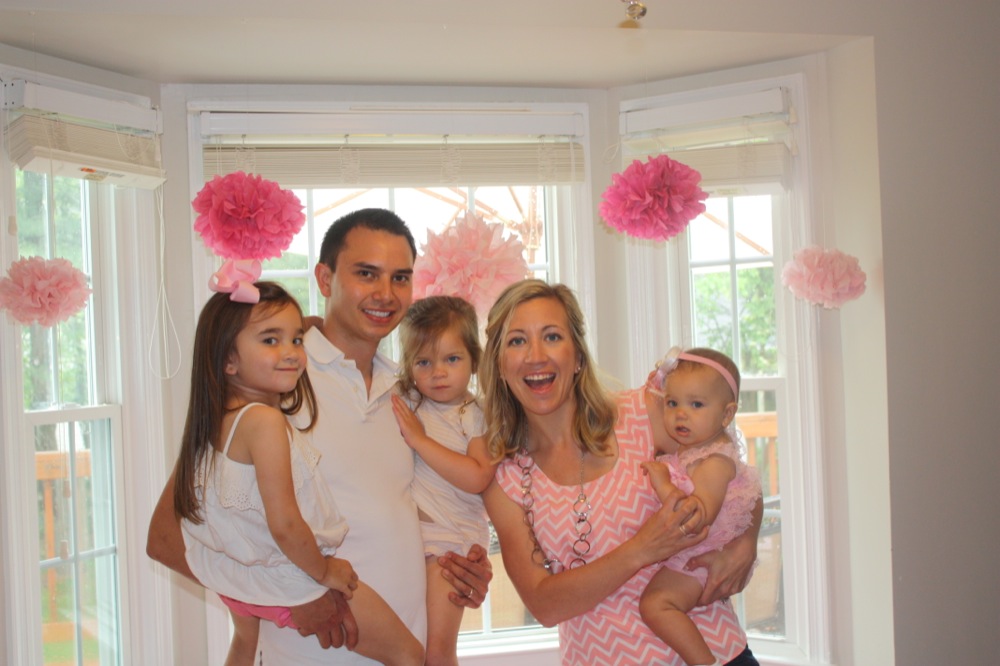
IMG_8520

IMG_8466

Be still my heart!

I hope you have as much fun planning your little ones’ birthdays as I do!

Butternut Squash Brisket Chili

I have this favorite brisket recipe I love making.  The problem is, it always leaves us with a ton of left overs!  I often like to make it when I am cooking dinner for a new neighbor or a friend who just had a baby.  It easily feeds two families.

This time I tried something different.  I made chili out of it!  I was inspired by this recipe from epicurious.com, but ended doing my own things since I didn’t have all of the other items needed for their recipe.  Plus, it just doesn’t feel like chili to me without some beans in it!

I feel like the butternut squash really made the chili!  It was delicious! I will be making this again probably every time we have left over brisket!

photo 2 (3)-1

Butternut Squash Brisket Chili
 
Author:
Recipe type: Crockpot
Ingredients
  • Beef Brisket (cooked cut into small chunks)
  • 1 can black beans (rinsed and drained)
  • 1 can diced tomatoes
  • 1 can tomato sauce
  • 1 large onion (diced)
  • 1 butternut squash (peeled, seeded, and cut into cubes)
  • 2 tb chili powder
  • 1 tb cumin
  • 1 tb minced garlic
Instructions
  1. Throw all of the above ingredients into the crockpot and stir it a bit. Cook on low for 4- 6 hours. Yummy!


Review: Alba Botanica Body Wash

showergel

Husband and I went on our honeymoon to Hawaii.  It was pure bliss.  Three kids and almost eight years later, I feel like I can only dream about going back to the Grand Wailea in Maui.  Well, let’s just say this body wash takes me back every single day because it smells just like the shampoo, conditioner, and body wash that I used there.  It smells so good, unbelievably good.

I buy this Alba Botanica Honey Mango shower gel on Amazon.  It is a little pricey, but it is the perfect Mother’s Day gift or the special “I deserve a treat for myself”.  Try it, you won’t be disappointed.

Sorry for the lack of posts lately, three kids under five make me feel like I’m playing catch up like all the time.

Bumbo Chair Recall Updates

A recent stop at my local thrift store scored me a brand new looking baby bumbo seat for $3.  I am stoked!

The bumbo seat retails for $40 to $45 and $50 if you buy one with the attachable tray.  Clearly the Salvation Army had no idea what this bumbo chair was or they would have priced it higher.  In the check out line the cashier actually asked, “What in the world is this???”

Bumbo Play Tray - Ivory _ Target

Anyway, this bumbo did not come with the new saftey belt bumbo added (along with the safety warning sticker) from the 2012 recall.

Just in case you have a bumbo that was bought between 2003 and 2012, you should know you can go to this link and fill out a form to have them ship the safety belt to you.  It was super easy to do and my belt came in 2 weeks.  It is very easy to install and takes only a couple minutes.

Here is my kit!  It arrived in less than two weeks!

Here is my kit! It arrived in less than two weeks!

My new seat belt!

My new safety belt!

My kit came with this warning sticker for the back as well.

My kit came with this warning sticker for the back as well.


This belt works great!  Snug as a bug!

This belt works great! Snug as a bug!

Easter Basket Cake!

I saw this cake Allrecipes magazine.  Its pretty cute and easy to make.  I had some out of town company come for a few days so I made this for dessert for everyone.  The kids loved the M&M’s on it.

Sorry about the cell phone shot.  My camera battery wasn't charged and the kids couldn't wait any longer to eat the cake!

Sorry about the cell phone shot. My camera battery wasn’t charged and the kids couldn’t wait any longer to eat the cake!

I used M&M’s on the sides (took 1.5 bags), marshmallow easter candy on the top, and coconut flakes mixed with a little water and green food coloring to look like Easter grass.  I also cut a small round piece out of the top to fill with the “easter grass.”

The handle is just rolled up tinfoil wrapped with some ribbon.

Happy Easter!

Exercise with a Cause

Spring is upon us, and for many of us that means getting back into the swing of a regular exercise schedule. One of the most recent trends in the fitness industry has been ‘Tough Mudders’ and ‘Spartan Races.’ The idea for these is pretty straightforward; take a standard running race and add a variety of obstacles to challenge participants to add a unique spin to a running race. Of course, standard running and cycling events aren’t hard to find either, and can be just as fun. Many of these races have a great cause, too. Using race registration revenue to make donations, these races can act as a platform for charitable organizations to collect funding, and are a great way for you to give back to the community.

Training Tip: To train for one of these things, you’re going to want to incorporate a lot of running. No matter how you spin it, you’ll be running a lot at these, and running is also a great way to brush up your fitness. A little calisthenic work will also go a long way: you don’t want to be underpowered in the obstacle course.

Choosing the race/event is the next priority. Be mindful to pick an event that is funding a cause that you would like to support. Most charities are clear with the destination of their donations, so check to see what is going on behind the scenes if you’re curious. The truth is, these charities have a lot more manpower to make sure the donations are going to the right places, and more so, are increasing visibility for the cause, so signing up for a reputable event is money well spent. This way, you’ll be able to knock out two things at once: you’ll get exercise with a goal in mind, and you’ll be giving back to the community at the same time. These races are a great solution for working parents struggling to find time or motivation.

If you want to go the extra mile, ask your employer what they do to support charitable causes. It’s not far fetched for companies, like this health insurance company, to have some charitable outreach. Asking your employer to start a similar program could be great for them and for your community.

No matter what type of race you participate in or how quickly you are able to reach the finish line, you’ll feel better afterwards. These races are beneficial for you and your community, so do some research and find the right race for you.  

Refinished Antiqued Night Stand

I already took of the handles of the top drawer before remembering to take a picture.

I already took off the handles of the top drawer before remembering to take a picture.

This was a really fun project!  It was one of my first pieces to refinish when we moved to Florida.  I recommend starting with something small to work on for your first project.

night stand

This is my Mother-In-Laws 30plus year old night stand.  They gave it to us several years ago with a matching armoire.  It might look outdated, but it is very good quality and still in great conditions.  I love how it turned out!

1.  First I sanded the top of the night stand to remove all the finish.  I also sanded down the tops of the drawers and took off their handles.  I painted the bottom  white and technically didn’t need to sand the drawer tops as much as I did, but I wanted it to be nice and smooth.  You really only need to sand places that have scratches or places that you are going to use a wood stain on.  I also spray painted the handles with a silver metallic spray paint.

night stand2

2.  After this, I cleaned off all the dust and put on two coats of primer (I recommend Zinsser oil based primer) to the bottom and started my first coat of stain on the top.  Make sure you wait until everything is completely dry before giving 2nd coats.  I actually did 3 coats of wood stain on the top to get it as dark as I wanted it to be.  I used the stain color called Kona.

night stand3

3.  Next, I put two coats of regular white latex paint.   I also mixed my paint with a little floetrol.  This helps slow down the drying process to decrease the visibility of brush strokes.

4.  Next was the fun part!  I used Valspar pre mixed antiquing glaze from Lowes.  It is very easy to use.  Paint it on with a foam brush, then use a lint free rag to wipe it off.  I actually used the antiquating glaze on the handles as well.  You can put on as much or as little as you want to get the desired effect you are going for.

5.  Finally, I did three coats of a water based poly (I recommend Minwax  polycrylic).  I also waited a good 24hrs before doing the first poly coat.  It is not recommend to to do more than 2 coats of poly in a 24hr period.

nightstand 4

I also waited 48hrs before putting my nightstand to normal use.

Simple Tips to Save Money for Your Family

It has become especially stressful in recent years with the struggling economy to support a family. From the overwhelming cost of hundred of diapers to the money you need to save for their future college educations, there are so many things to consider. That is why my family focuses on saving money in as many ways as possible. Over time, we’ve really fine-tuned our savings approach and found several unique methods for cutting costs that I think could benefit any family. Below, you’ll find some of my favorite tips for saving.

Stay in the Know

It’s no hidden secret that you can clip or print coupons for your shopping trips. However, a lot of your favorite stores have deals that you’re missing out on. Many companies have started offering special deals through sms marketing. For instance, if you sign up to receive texts from Redbox you can save on entertainment for your family when they text you deals like “rent one dvd get one free” throughout the month. Signing up for text alerts can help you to avoid paying full price for things that are marked down on a regular basis.

Set Up a Babysitting Swap

Unfortunately, date nights can really add up and put a huge dent in your bank account. It’s still very important to maintain a healthy relationship with your significant other. I read all about how babysitting swaps worked for other families and we decided to try it out with some friends of ours. It’s been one of the best money-saving changes we’ve made over the years. You still get some alone time from the kids, but you don’t have to add $40 or more to your date night when you come home and pay the babysitter. Instead, you find other parents who are willing to watch your kids for the evening in exchange for you doing the same on one of their date nights. If you haven’t tried this yet, email your friends ASAP and set something up!

Master your Gardening Skills

Having a family can significantly increase the total of your grocery shopping bill each week. But, you can avoid having to purchase certain produce items if you simply learn to grow them in your own home. Starting a vegetable garden in your back yard has more benefits than just saving you money. The produce is extremely fresh and delicious and I’ve grown to find my time tending the garden to be relaxing and therapeutic.

Declutter Your Closets

There are many ways that going through your closet can help you to save money. First, you can list items that you no longer wear on sites like poshmark and make money from home. We’ve all tried those consignment shops, but often leave disappointed in the money that we receive in return for our clothes. Poshmark allows you to set your own price and bargain with those near you. When going through the kids’ closets, you may also run across great pieces for hand-me-downs that you forgot even existed. Take the time to sort through all of the closets in your house on a regular basis and I guarantee you’ll start saving some money.

Having a family can be expensive, but we all know it’s so worth the price in the end. We can all use new ways to save some money every now and then. Whether you sign up for text marketing from your favorite companies or you learn to grow your own tomatoes and cucumbers, following these tips will surely help you to increase the money in your savings accounts.

80’s Fireplace Redone – White Wash

We are still in the process of updating our home.  As mentioned before, it was a short sale that needed TONS of “help”.  It was at the top of our budget, so we slowly have to update.  This project only cost $43 and so many people have commented on how great it looks.  I got the idea here from my favorite home blog, The Yellow Cape Cod.

Here’s the fireplace before:

fireplace2

I hated the black brick showing with the 80’s red.

Here’s the process:

dipticfireplace

Step by step process:

1. Go to Sherwin Williams and get a gallon of white Cashmere paint.  You can only get it in a gallon, that’s the only way they sell it.  You will also need a paintbrush if you don’t have one.  Make sure you check online for a coupon, I found a 30% off paint one!

2.  Remove mantle and clean your fireplace out.

3.  Clean off your fireplace by vacuuming it well.

fireplace3

3.  Mix half paint and half water.  You really only need like a pint so your container doesn’t need to be that big.

4.  Start Painting.  One person brushes and another comes behind with an old rag (we used one of my husband’s old white t-shirts) to smooth things over.

You can tell we had a lot going on at once.

You can tell we had a lot going on at once.

It was that easy!  I wanted it white washed so you could still see the brick through it.  You can always add less water or do an extra coat.  I’m SO happy with it.  I would love a new mantle, but that isn’t quite in the budget just yet.

Looks completely different!

Looks completely different!

The whole project took less than three hours.  WHY DIDN’T I DO THIS SOONER?!?!  I love it and I love it even more because we did it ourselves!  Thank you Yellow Cape Cod!