My parents had an accidental house fire recently sparked from their fire place that spread through their living room last fall. Although the fire damage was minimal, the smoke damage was terrible. They had to get their entire house scrubbed from top to bottom and repainted.
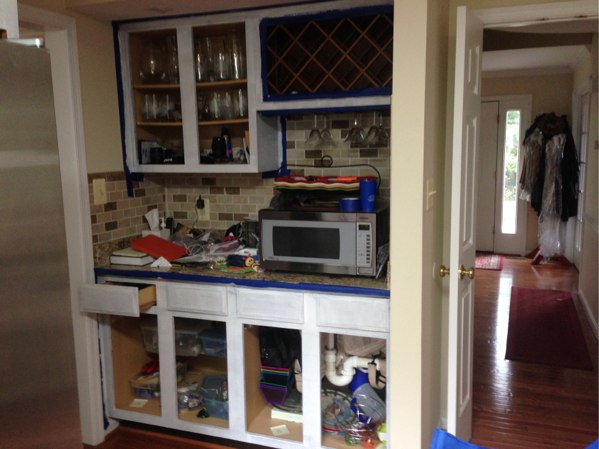
During this cleaning process their kitchen cabinets were damaged. The wood finish was stripped in several places.
I decided to be brave and offer to repaint them… I couldn’t make them any worse after all! Ha. After a lot of research I finally got around to the task a few weeks ago. They turned out GREAT! They look brand new and way better than they looked even before the fire.
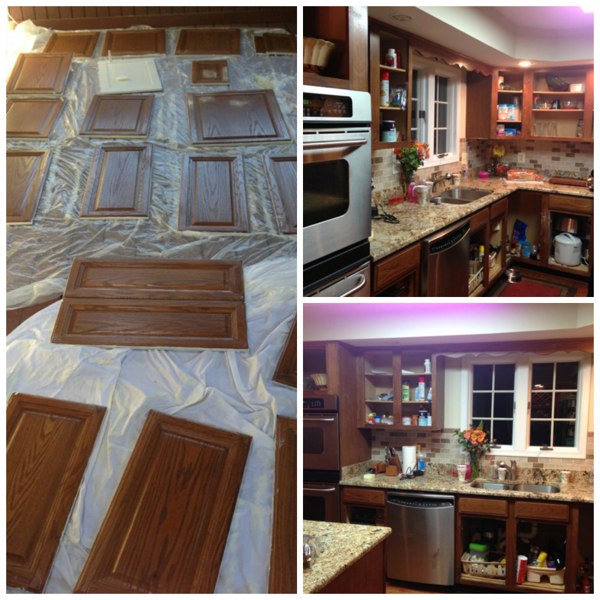
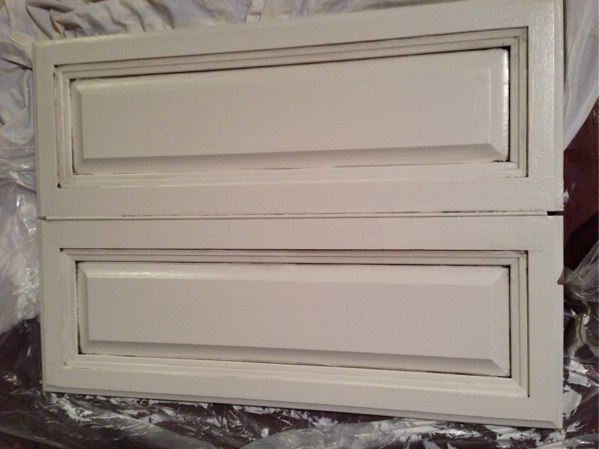
I regret that I forgot to take a picture before the cabinet doors were removed, but here is the before pic with the doors already off.
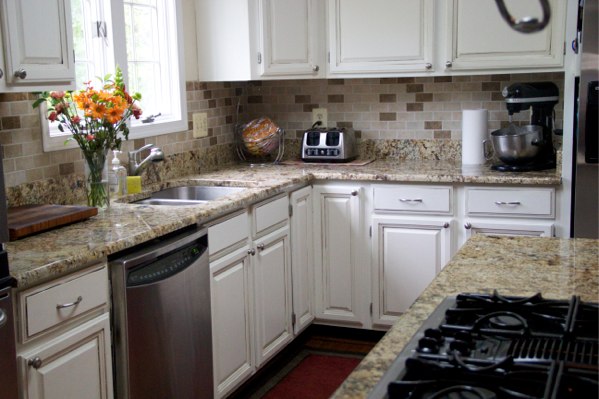
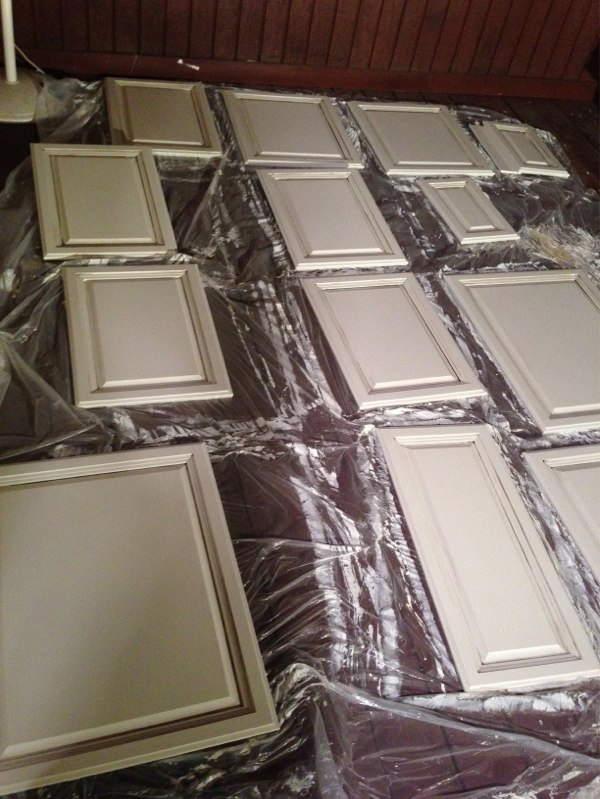
And now for a few of the After pics….
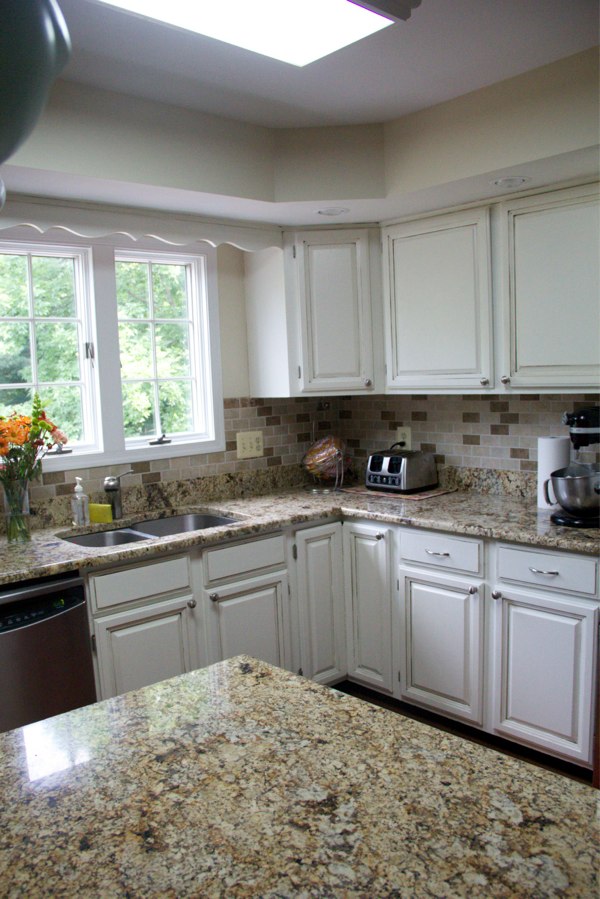
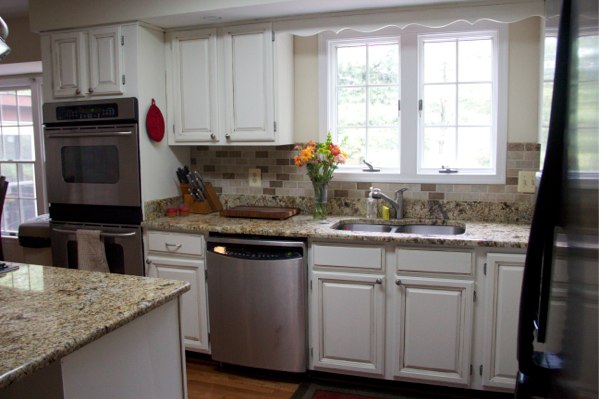
Awesome right! It changes the entire look of the kitchen! Did I mention that the entire project cost less than $300. That included all the paint/primer, glaze, supplies, and hardware.
So here are the basics of what I did:
1. Remove all the cabinet doors and hardware. I numbered all the doors using post it notes first. I put one post it note on the back of the cabinet and one with a matching number where the cabinet door was removed. This saved me from having to puzzle through figuring out where each door went when I was finished.
2. The hardware was spray painted with a metallic spray paint after we soaked them in vinegar and water to clean them. It took three coats of spray paint.
3. I sanded down any visible blemishes and wiped everything clean. Part of the island and even some of the long sides of the cabinets is not real wood and more like thin particle board. I sanded this down as well as possible to really get it scuffed up a bit so that the primer would stick better (actually, I delegated this part to my Dad since I hate sanding!).
4. Priming time! I started with priming the inside of the cabinet doors so that I would be doing the outside part that everyone will see last. I figured that I would rather have the back scraped from being turned over than the front. I didn’t work on the front of the cabinets until 24hrs after the back was completely done (primed and painted). I only did one coat of primer. I recommend Zinsser Oil based primer with stain blocker. Just a warning… it is strong smelling!
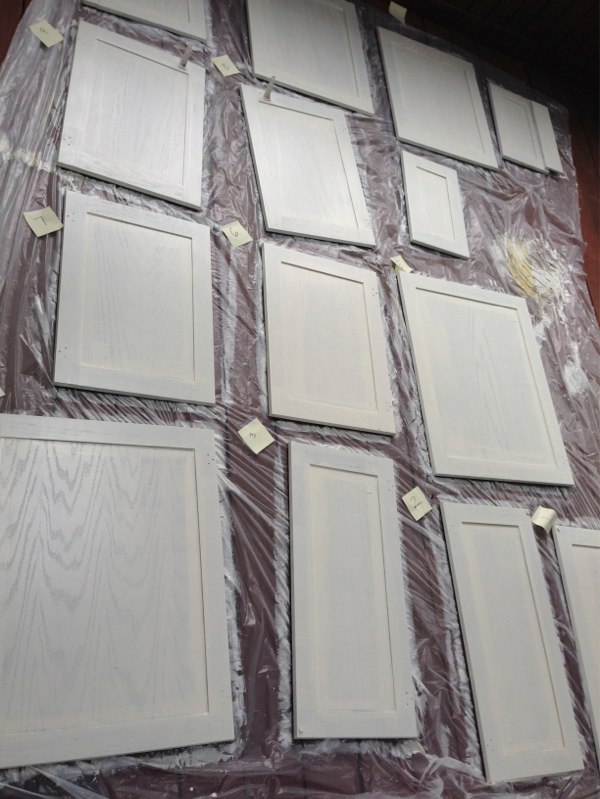
One coat of primer applied
5. I then did two coats of paint. I used an off white color and got the Benjamin Moore Active paint in the satin finish. Satin so it is easy to clean food and spills and the the Benjamin Moore Active brand because my research showed me that this paint hold ups really well on cabinets and has a really nice finish to it making a poly coat unnecessary. I was wary of doing a poly coat on white cabinets as it often yellows over time. After waiting 24hrs from the last paint coat on the back of the cabinet doors I turned them over primed and then painted two coats. Oh, I almost forgot… I added Floetrol to my paint each time I put pain in the roller pan. This slows down your drying time which will decrease any brush or roller marks on your cabinets.
6. After waiting another 24hrs, I used Valsar antiquing glaze to antique the drawers, cabinet doors, and trim. I use the Valspar gel because it is already mixed and ready; no need to add a thing to it. This is really the fun part. Use a foam brush and paint a thin coat over the desired area (I really only focused on the crevices as I wanted it to be a very light antique look), then using a lint free rag, wipe it all off. Some of the glaze will remain giving it an antique look. You really can’t screw this one up since you just keep wiping it off if you want less and repeat it if you want it more heavy. I keep a wet rag nearby also so that I can wipe parts even cleaner if they look smudged.
7. I waited another 24hrs before putting the cabinet doors back on and installing the knobs and handles. The easiest way to install the knobs and handles is to make a template of the corner of the cabinet door and of the shape of your drawers. Then measure exactly where you want your knobs to go on the template and mark them. Use this template on each drawer and door so that the knobs and handles are all in the same spot. I know they sell these templates at home depot, but it was simple enough to make my own out of construction paper. You will need a power drill and an electric screw driver for this step.
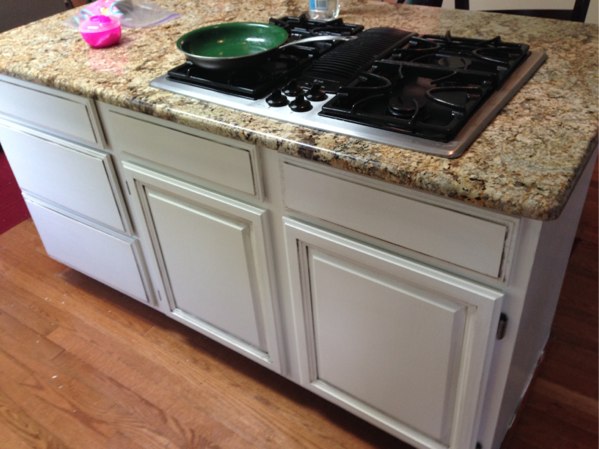
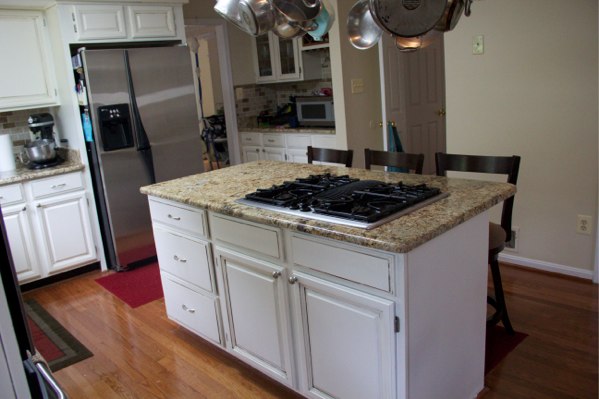
The island without handles/knobs
The island with handles and knobs
All done! This was a very tedious task and cannot be rushed. If you decide to do this, make sure that you have enough time to give to the task. I recommend at least a full week. The more you have to rush each step, the sloppier your work will be.