by Jamie Hinckley on Oct 11, 2012
I am so in love living in Florida lately! Took the boys to the beach yesterday… the beach in October! Awesome, right?! The best part was how clear the water was. I could stand neck deep in the water and look down and still see my blue toenail polish. LOVE!
As I type this, my boys are out swimming in my sister’s pool with my brother-in-law. I am just loving the outdoor life here! My sister keeps trying to get me to go kayaking with her (apparently that is really big down here too), but I admit that I have this unnatural fear of gators and can’t get myself to go anywhere near a body of water that is not the ocean. Ha! I have convinced her that we should take up paddle boarding in the ocean instead! I will let you know how that goes once we get going!
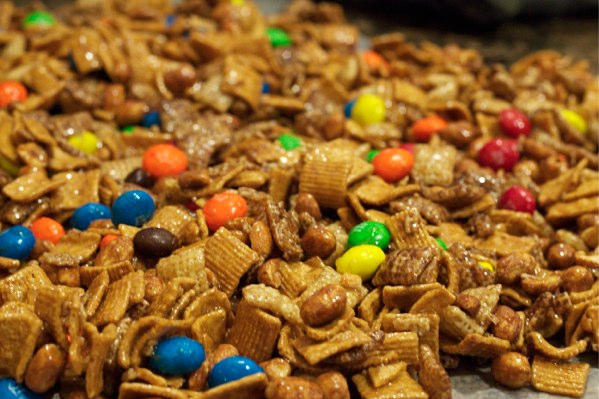
Anyway, I finished off a nice family fun weekend with this yummy chewy chex mix! It is similar to this one that I posted in the past, but a little different variation. After I posted the last chewy chex mix I got a few emails of different variations others like.
This version is from my sister-in-law and is oh so yummy! It’s made with chocolate chex, honey roasted peanuts, and peanut butter M&M’s instead of corn chex, slivered almonds, and peanut M&M’s.
Chewy Chex Mix
1/2 box of Chocolate Chex cereal
1/2 box of Golden Grahams cereal
1 cup Karo syrup
1 cup granulated sugar
1 stick of butter
1 package of peanut butter M&M’s
1 package of honey roasted peanuts
***Mix the cereals together in the largest bowl you have. Melt the butter, karo syrup and sugar together in a medium sauce pan stirring constantly. Bring mixture to a boil for several minutes. Poor over cereal mixture and stir until completely combined and starting to cool. Add the M&M’s and peanuts and mix completely. Lay wax paper across your counter and spread chex mix across it until it dries.
My sister-in-law likes to bake hers in the oven at 275 degrees for 10 minutes to dry it out faster. My mom likes to just keep stirring hers in the bowl every few minutes until dries. I admit, I am lazy and just spread mine out on some wax paper and let it sit. It only takes 20 to 30 minutes.
by Dana Patterson on Oct 08, 2012
I make this often in the fall because it’s so delicious and so simple to make. It also has a great pumpkin flavor in it. I love fall!
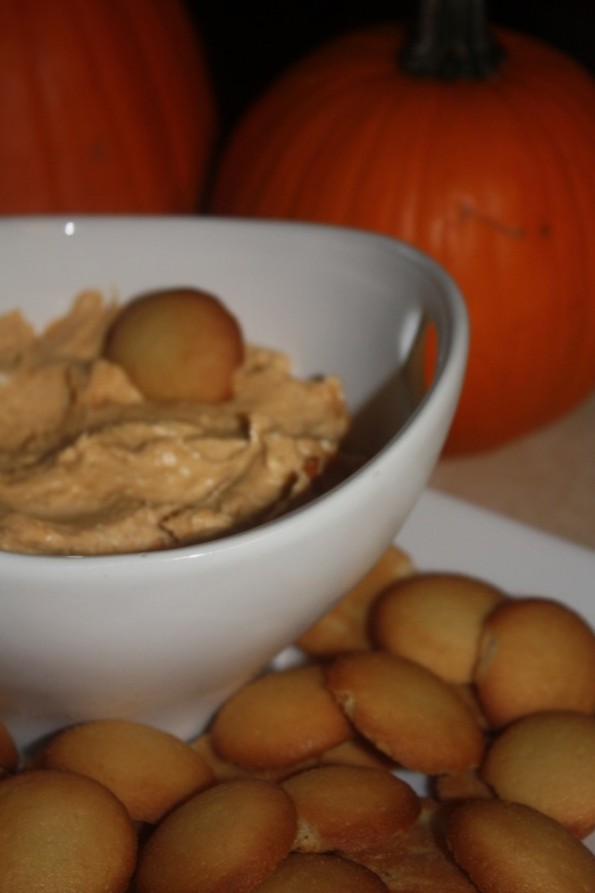
You can serve it with vanilla wafers, ginger snaps or apple slices.
I promise if you take it to your next get together that it will be all gone! Here’s the recipe:
Pumpkin Cream Cheese Dip
- 1 8-ounce package cream cheese, softened
- 1/2 cup canned pumpkin
- 1/4 cup sugar
- 3/4 teaspoon pumpkin pie spice
- 1/2 teaspoon vanilla
Mix ingredients together…. and there you have it!
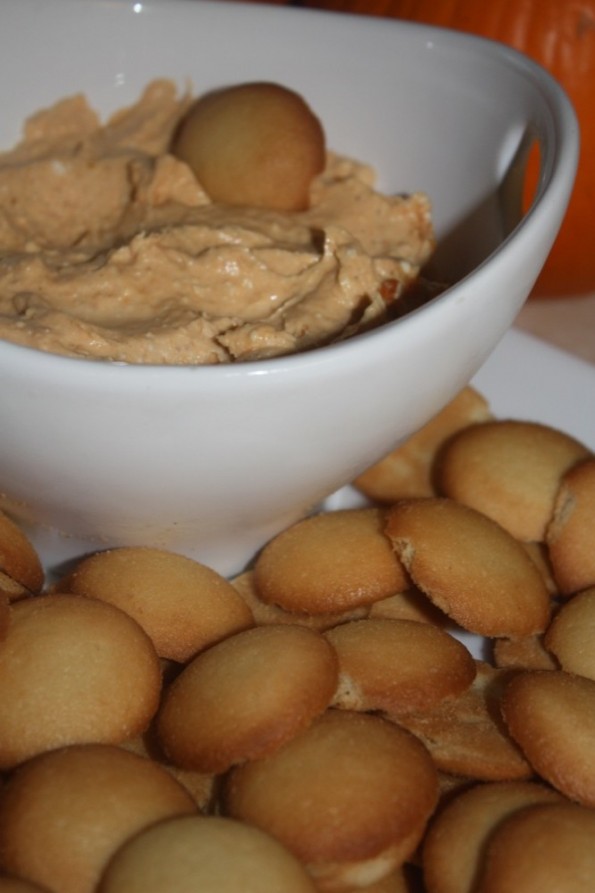
Such a quick, great fall recipe!
Happy Fall!!!!!!
by Jamie Hinckley on Oct 04, 2012
My life is so crazy busy right now! Those of you out there with three boys during soccer season know exactly what I am talking about! We have four soccer games a week! That makes for a lot of muddy laundry, sunscreen, sweat, and gatorade! I have to say though, I LOVE IT!!!!! Today my little soccer man scored his first goal in a real game. He was giving me a thumbs up as he ran down the field after his goal.
So dang cute! I did experience something new tonight… after my 4 yr old scored his second goal in his game, he didn’t look over to see if I had seen it. What!!!! I was so sad… Silly of me I know, but I just love when my boys still wave and give me a thumbs up during the game. Not the second time around though, he just ran on by and high-fived his teammates! How dare he not want/need his mommy’s praise anymore! Ha! It is bad enough that my seven year old has grown out of this, but now my little four year old too! Doesn’t seem right in my opinion (says the mom who can’t let go!). Good thing I still have the three year old to blow me kisses from across the playground!
Anyway, I was at my youngest nephew’s birthday party on Saturday and loved their adorable monster cupcakes. You can get the monster leg cupcake holder at any craft store. First take a # 12 tip and make a hershey kiss sized glob on the top of the cup cake. Then use your a 133 icing tip to make the “monster fuzz” on the top of the cupcake by stringing the frosting from the bottom of the cupcake to the top of the hershey kiss. Work your way around the hershey kiss making the frosting evenly distributed around it. If you use too much on one side you risk a lopsided cupcake that could tip over in the monster shoe base. She used oreos and licorice to make the face.
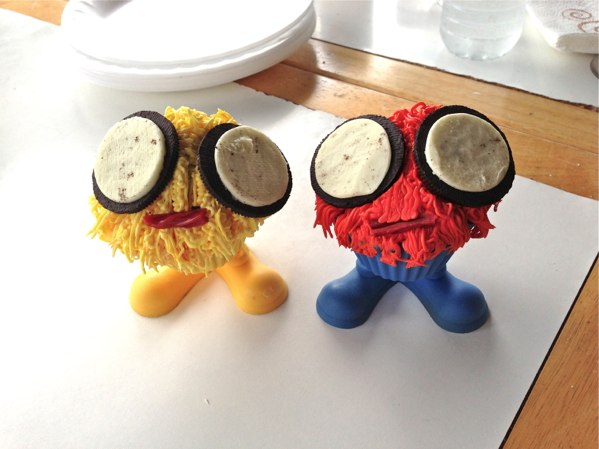
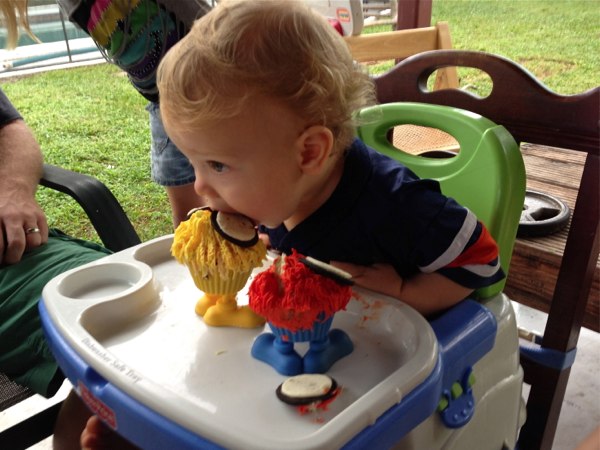
This is how a one year old Birthday boy eats a monster cupcake!!!!!
by Dana Patterson on Oct 01, 2012
If you’ve ever been on a cruise, it’s so fun coming back to your room after they’ve made it up each evening to see what towel animal you get. Well, I came home and was dying to know how they made some of the animals and thought it would be cute to have a surprise waiting for my guest. All you need is a hand towel and bath towel of the same color.
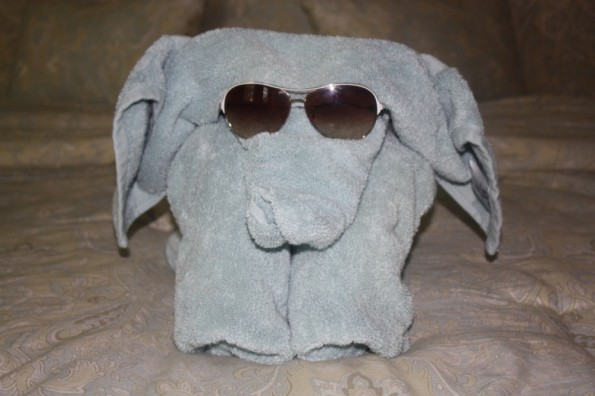
Add some sunglasses too!
I found this easy tutorial of how to make an elephant!
http://youtu.be/TwtH533brAc
Try it and I bet your guests will remember your house for sure!
by Jamie Hinckley on Sep 28, 2012
Today was a very interesting day. My 3yr old lost his mind and started acting like a maniac after his bath. He was running around dancing and this singing-yelling thing. It was crazy, but also hilarious! I would love to post the video, but considering he was only wearing his undies and a green Luigi hat I wont… hope you can imagine it though!
So he ran around crazy like that for about an hour, then asked for some fruit snacks. “Sure buddy, but you didn’t eat enough of your dinner yet. Take another bite for me.” He takes a bite of ravioli… makes a disgusting face then pukes all over the floor. Awesome right. That is actually what I said, “awesome.” Boooo! 30 Seconds later, “Mommy, I have fruit snacks now?”
So cool. Not. Just another day in my crazy world! Haha. After this I realized I was supposed to post something… Hmmmmm. Luckily I cooked these awesome Steak and Cheese Stuffed Peppers last week. They were a huge hit for all of us here trying to eat less carbs.
Very easy too… I got the idea from this Peace, Love, and Low Carb blog.
Grab some green peppers, shredded mottz, sliced roast beef, onions, and mushrooms.
Cut your peppers in half and put some shredded cheese in each one.
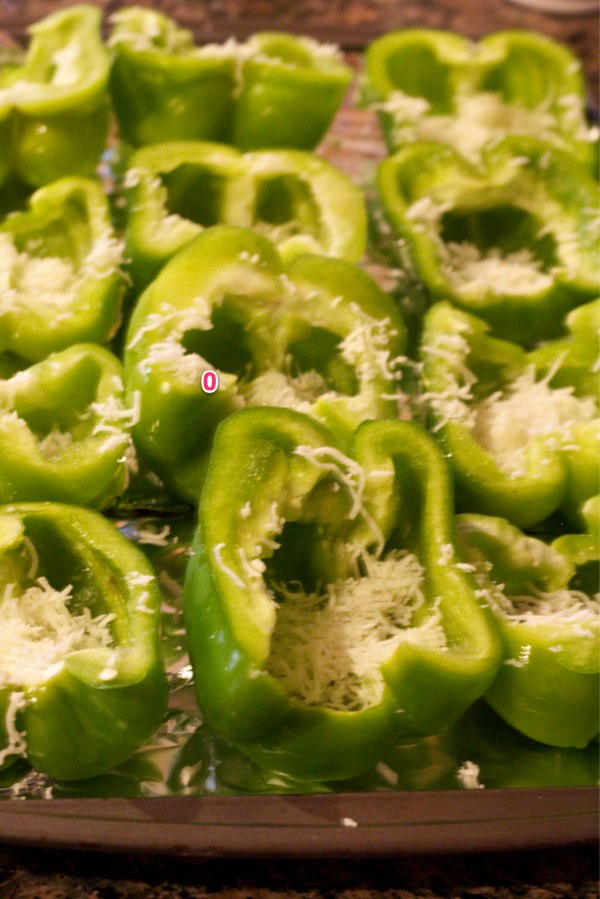
Slice up your roast beef and saute it with mushrooms and onions. Sadly, I had to leave the mushrooms out as I didn’t have any at the time.
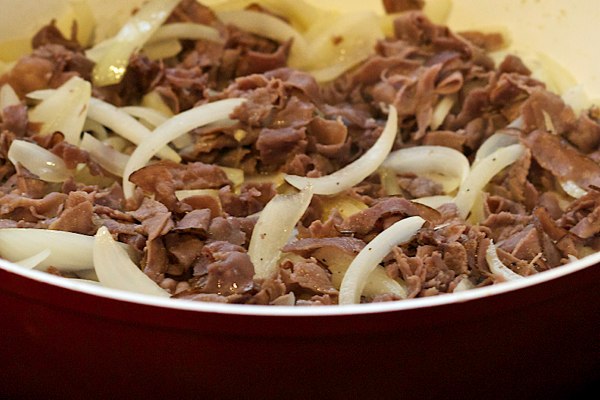
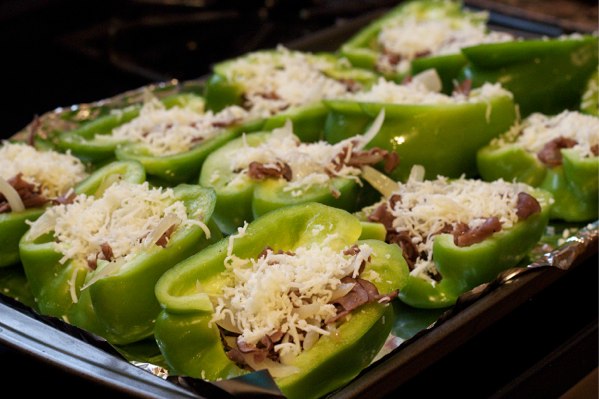
Fill your peppers as much as possible with your roast beef, onions, and mushroom mixture.

Top it off with more shredded mottz and bake for 15 minutes at 400 degrees or until your cheese is melted and bubbly.
by Dana Patterson on Sep 26, 2012
Wait for it, wait for it….. It’s a ketchup packet! They work perfect.
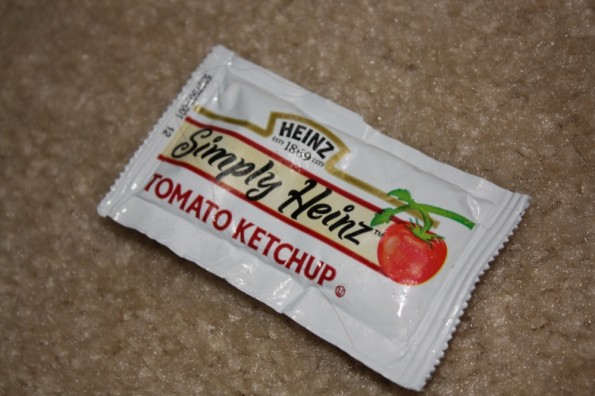
Use a ketchup packet as an ice pack.
It doesn’t completely freeze so you can still squish it around and mold it to their boo boo. Look at my sweet one being the model.

It’s the right size for those little hands and bumps!
Thanks Parenting Magazine for the tip found here.
by Dana Patterson on Sep 24, 2012
My husband sent this to me and I had to share! It’s so true! What do ya think?!
http://www.dailymotion.com/video/xsw18k_parents-rap-about-maintaining-their-household_music
by Dana Patterson on Sep 20, 2012
My husband and I work on our finances together in our household, and I’m fully aware of what is going on with our savings efforts. My husband and I work on things together and make decisions together. One thing we are always talking about is saving for retirement, IRAs, 401ks, and not expecting Social Security to be there for us. So, I wasn’t all that shocked when he sent me the link to the picture below – but I did think it was a great reminder to share and pass along. I hope it is a nice reminder for you as well.
Read More
by Jamie Hinckley on Sep 20, 2012
My sister scored this great glass table for $60 at a used furniture consignment sale. It was a bit scuffed, but very sturdy. We easily fixed it up as good as new with a few cans of spray paint, some 50% off fabric, and a staple gun!
First we unscrewed all the cushions from the chairs and took the glass top of the table. Then we carefully spray painted all the chairs and the base of the table a nice sage green color. We did two coats just to make sure it was completely covered.
Second, we reupholstered all the cushions with new fabric. We got the fabric at Joanne’s Fabric Store using a 50% off coupon. This part was a lot easier than you would think. We Just measured out the fabric making sure it covers the entire cushion with room to spare so that it can be stapled securely to the back of the cushion.
Finally, we reattached all the cushions back to the chairs. Easy and simple!
A brand new table for $60! You may also like this article on Reupholstering Dining Room Chairs and Spray Painting Bathroom Accessories.
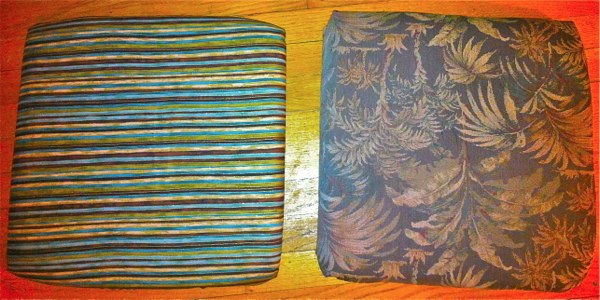
Before and after image of the cushions.
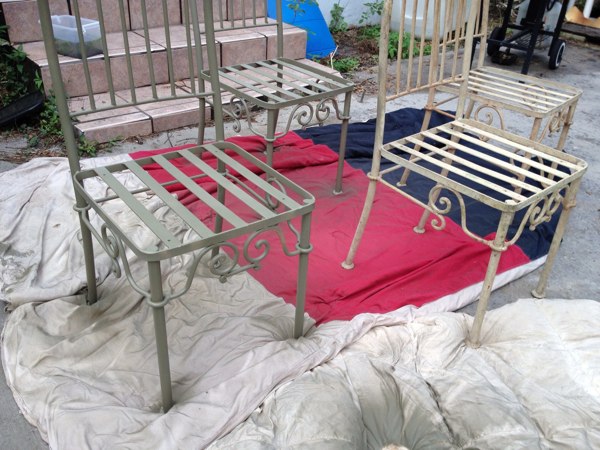
Before and after view of the spray painted chairs
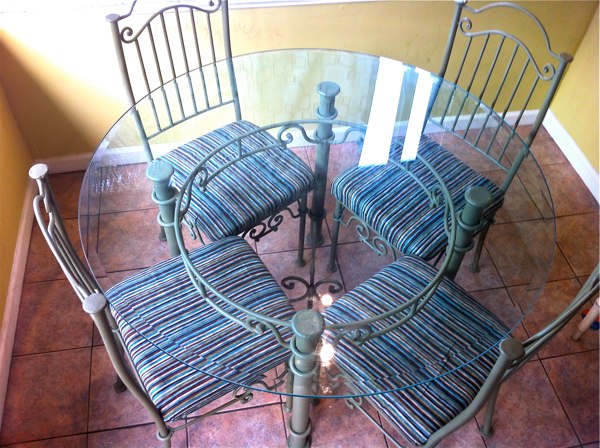
Here is the table all finished. Spray painted base and chairs and reupholstered chairs.
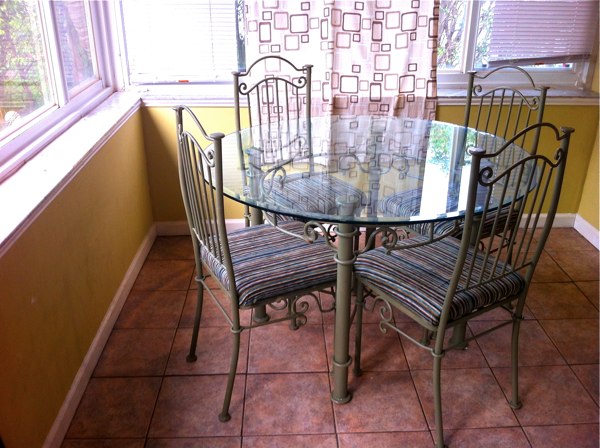
Another view of the table all finished. Perfect table for $60. Fits great in this little breakfast nook.
by Dana Patterson on Sep 17, 2012
I’ve made this several times and every time it’s been a huge it! Everyone loves it because you can enjoy it after a meal that is filling.
Here is the beauty….
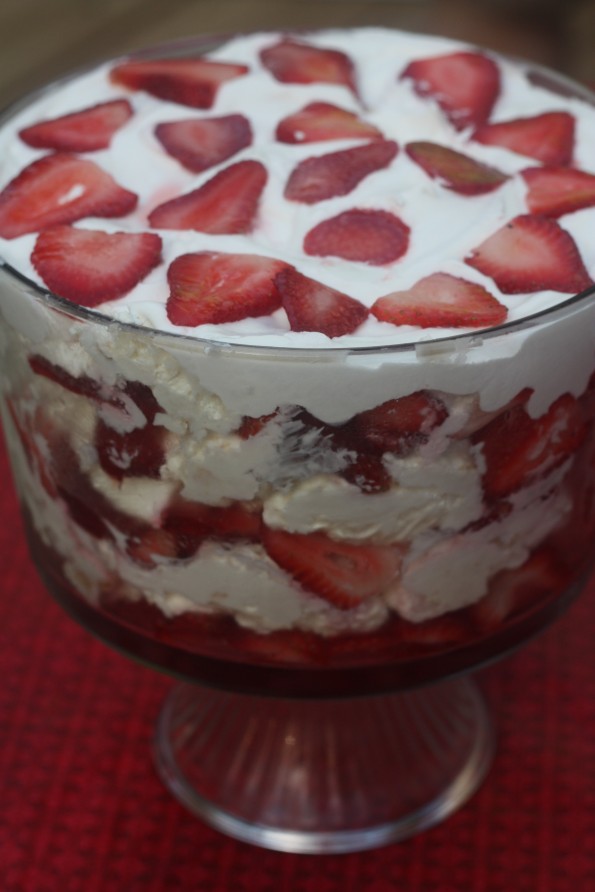
A quote from my 5 year old nephew “This is the greatest dessert on earth”.
I love trifles and this one has to be at the very top of my list! Try it before summer is over. You’ll be amazed!
Here is the simplicity of the trifle:
All you need is:
2 (8 ounce) packages cream cheese, softened
2 cups powdered sugar
1 (8 ounce) container sour cream
1/2 teaspoon vanilla
1/4 teaspoon almond extract
1 cup Cool Whip, thawed
4 tablespoons sugar
1 angel food cake, torn into bite-size pieces
2 quarts fresh strawberries, thinly sliced
Here are some thinly sliced strawberries.
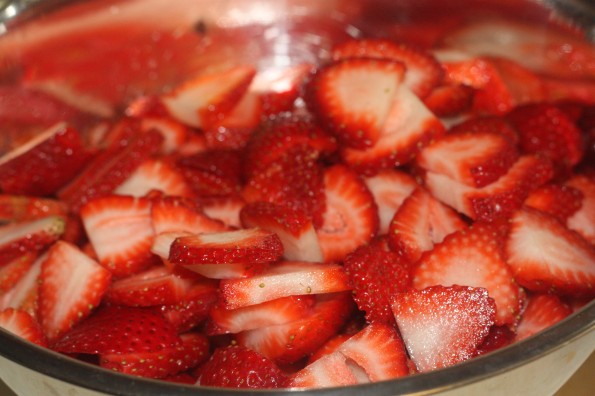
Make sure your strawberries are sliced thin.
All you do is:
1. In a large bowl, beat cream cheese and powdered sugar until
fluffy; add sour cream, 1/2 teaspoon vanilla and the almond extract;
set aside.
2. Fold the cool whip into the cream cheese mixture.
3. Gently stir in cake pieces; set aside.
4. Combine strawberries and sugar, stirring until sugar is dissolved.
5. Layer in a large glass bowl, starting with 1/4 of the strawberries, then adding 1/3 of the cake mixture.
6. Continue layering; finish with strawberries.
7. Cover with plastic wrap; and chill several hours.
It’s so dang good!
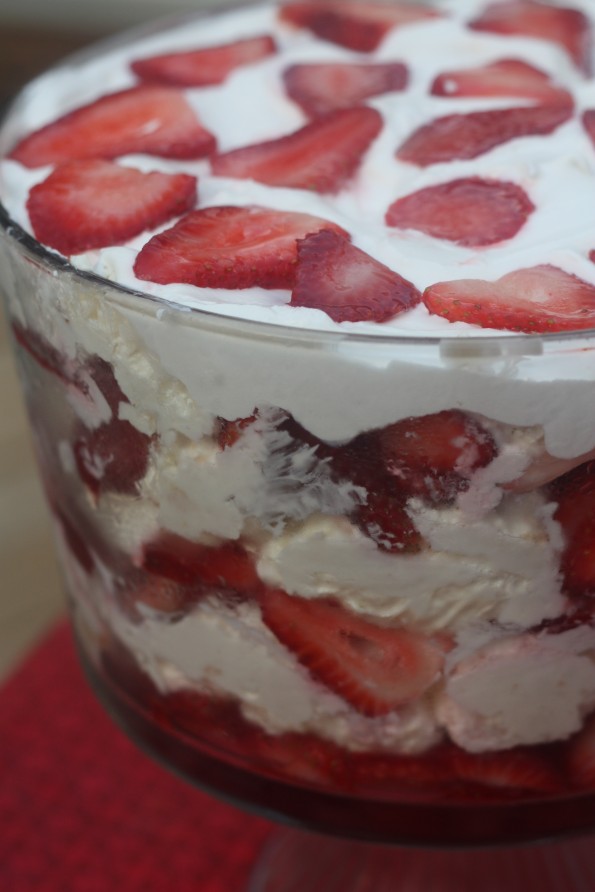
Oh meeeeeeeee.
So good! My five year old nephew said “This is the greatest dessert on earth”. Also, below is my one year old great nephew enjoying its deliciousness.

This is my great nephew enjoying his!
Go make it now while the strawberries are still somewhat fresh! You won’t be disappointed, I promise.
Check out our other trifles:
Banana Pudding Trifle
Red, White and Blueberry Trifle
Peanut Butter Fudge Brownie Trifle