Enchanted Mommy

Making Your Own Foam Hand Soap

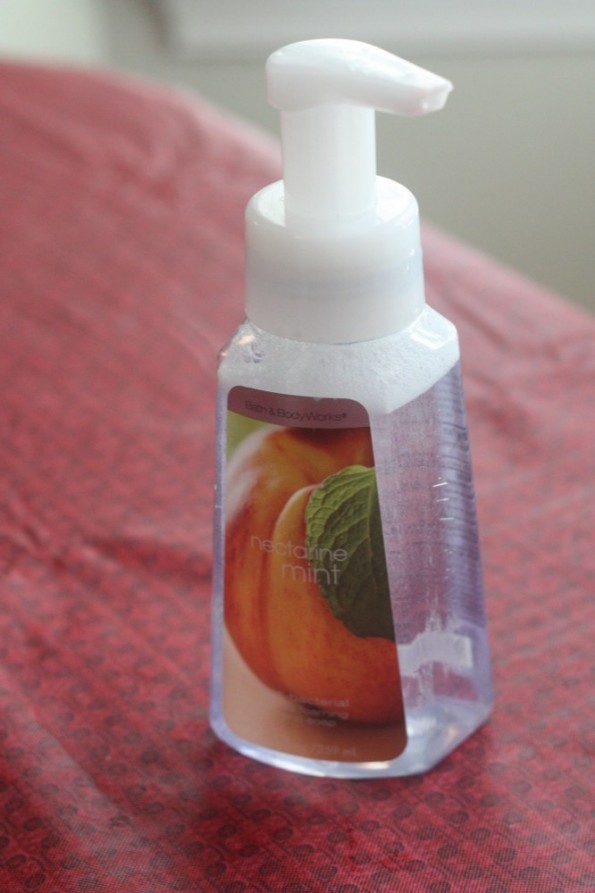
Foam hand soap

Just as perfect as if you bought it, for probably 1/10th of the price!

This is SO easy!  Now that I know how it is made, I’m in shock that places charge the same price for the foam soap as the regular.  I always buy the foam soap any way because it never leaves clumps in the sink and it always seems to last longer.

All you need is:

  • Any of your favorite nonfoam hand soap (enough to cover 1 inch in your foaming soap bottle)
  • Foam soap bottle
  • Water
Directions:
  • Fill foam soap bottle with 1 inch of your desired soap.
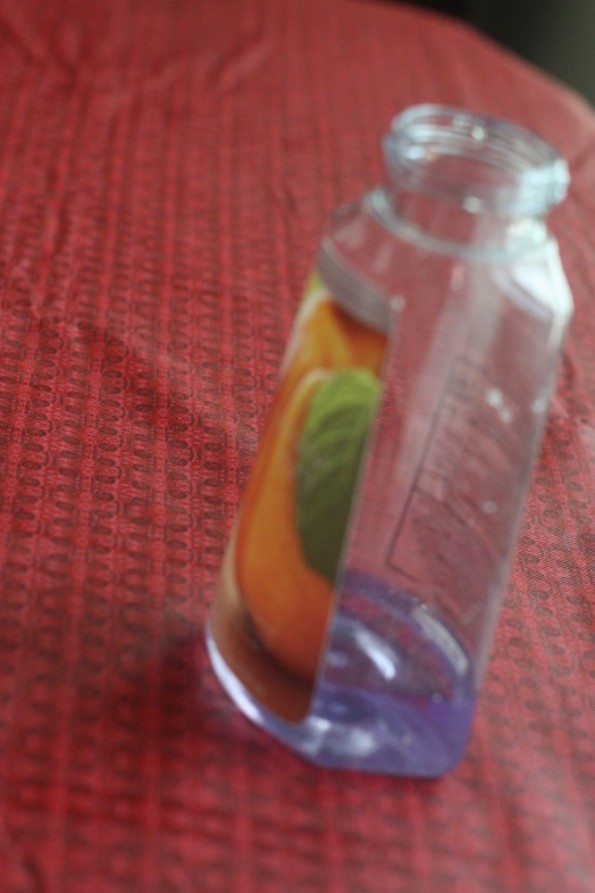
MAking foam soap

All you need is 1 inch of your favorite hand soap and water!

  • Fill the rest with of bottle with water.
  • Mix around slowly from side to side and up and down (I wouldn’t shake because it will get all sudsy).
You’re done!
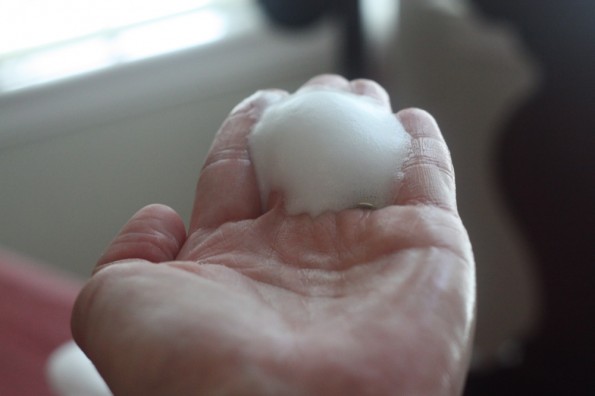
perfect homemade foaming hand soap

See how perfect it comes out!

Here’s a fun tip:
Go buy one regular bottle of foam soap and then buy the regular (nonfoam) in that kind.  Then, you can make 10 bottles for the price of two!


Easy No Sew Tutu Tutorial! A tutu for $3 and an hour of your time!

Have I mentioned that I have three boys and NEVER EVER get to do anything girlie? My life is fun and full of sports, bruises, grass stains, dragons, knights, and complete adventure! I love it and am not complaining, but sometimes I dream of a day I can crawl into bed without laying on a match box car or  put on my shoes just to find them stuffed with legos and plastic dinosaurs!

Okay, I guess I should just admit that I sometimes watch in wonder as my nieces or friends little girls play sweetly with their dollies while they rock them in their rocking chairs pretending to feed and care for them. I then look over at my boys who are usually smashing their toys together, rough housing, or jumping off the couch to wreck their large block towers…. and well sometimes I just want a moment of frilliness!

I decided that if I ever did have a baby girl she would have to wear a tutu every day of her life!!! With this in mind, I decided I would learn to make tutus!!! So my dear friend (and co-author of this blog) has two little girls and she is really good about humoring me and letting me play dress up with her girlies from time to time so I started with making one for her sweet Anna Belle’s first birthday!

This ended up being so easy… really not sure why anyone would spend money buying one when they are so simple! Let’s start with the supplies!

Supplies:
3 yards of tulle
Ribbon
1 elastic headband

You need 3 yards of tulle. Any color, multiple colors doesn’t matter as long as you have 3 yards total. I found mine for $1.49 a yard at Jo-Ann Fabric and used a 50% off coupon you can get in every weekend paper or online.  Add some 50 cent ribbon from the sale rack and you have spent a whopping $2.75. Not bad huh! For the elastic I just used an elastic headband I already had in my collection. You could use regular elastic if you need too, but the head band is really the perfect size already!

Step 1:  Cutting your tulle
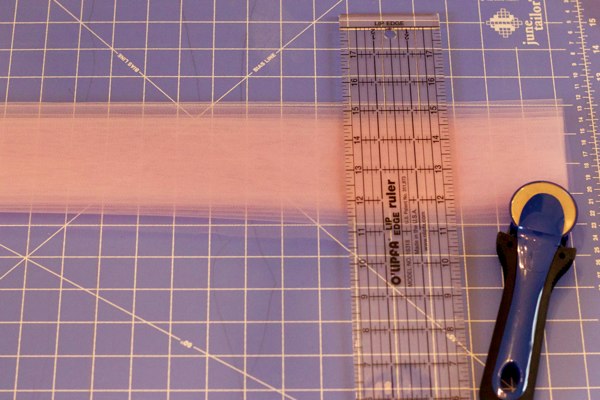
The easiest way to do this is the roll your fabric up 1 yard at a time, cut the end so it is even and then cut strips every three inches. Then you take each individual strip you cut and cut that exactly in half.  Yep… that’s it!  Very easy!

You don't have to use a rotary cutter for this. Scissors would work just the same... It's that simple really.

Step 2:  Tie your tulle around your elastic
This is the most time consuming part of the tutu, but it is pretty mindless really.  I just sat myself down in front of the tv and tied it all up before the half hour TV show was finished.  So, all you do is take a strip of tulle, fold it in half, then pull the ends up around the fabric and through the loop you created by folding it in half.  Think of attaching a ski lift pass to your coat when they use to use the bands instead of the metal hooks.  Super easy!  Here is a good video that demonstrates how to loop tie if you aren’t quite getting it from my description.

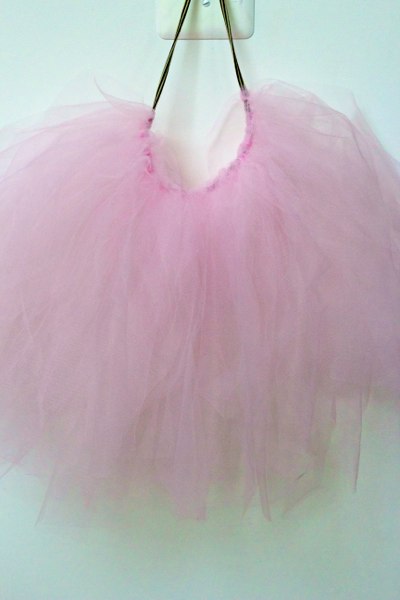
About half way done here and it is looking nice and frilly already!

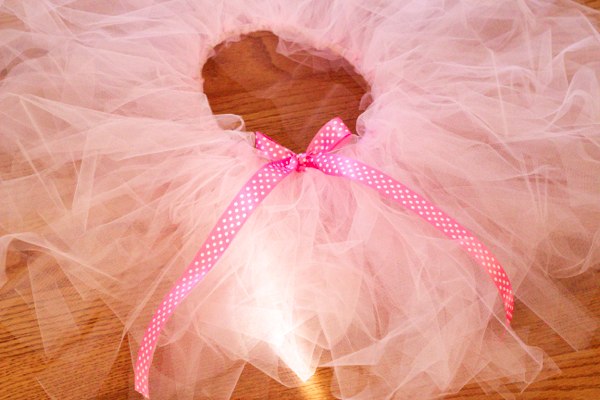
That’s it really.  You are done.  If want to tie a ribbon with bow around it go for it, but it isn’t absolutely necessary.  Some people like to put the tutu under something heavy to flatten it out a bit, but personally I love it all frilly and fluffy looking!  There are a ton of variations you can do here too.  You can use all one color of tulle and lots of different colors.  You can also tie strands of ribbon through out the tulle too.  

Very easy and very inexpensive!  Just look at this little princess… sigh!  Isn’t she perfect?!  Maybe one day I will have one of my own I can gush over… doubtfully, but hey one can dream!

Making Dishwasher Detergent: So Easy and CHEAP!!

This works great!!!  Here is what you need!

cheap way to make dishwasher soap

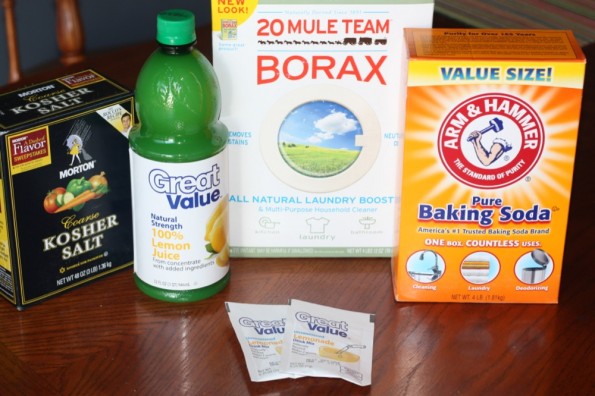
borax, baking soda, salt, 2 lemonade kool-aid packets, lemon juice

Ingredients:

1 cup borax
1 cup baking soda
1/4 cup salt
2 lemonade kool-aid packets (I used store brand, almost half the price as kool-aid brand)
30 drops of lemon juice

Directions:

Mix together in a sealed container and wahlaaaaaaa.

I had to run to Wal-Mart to return something for my daughter, so I decided to pick up the ingredients there.  They had all the ingredients and it cost about $8.00 and I can probably make it 10 times for that total.  I would say it cuts your price to about 1/10th of  the average dishwasher soap.  It is SO easy!  It made me feel great and my dishes turned out just as clean or even cleaner than if I used Cascade or Finish.

Couple of side notes:
Borax is found with the laundry detergent.
I also found the big baking soda in the laundry detergent aisle.
Must use lemonade kook-aid mix, other flavors could stain your dishes.
Use about a tablespoon in each compartment.

Have fun and get happy when you’re saving so much money!!!!!!

Saturday Night Idea in December!

You don’t have to do this on a Saturday night, but it was a great relaxing way to end our busy day (and it’s free).  I was a little bummed when we couldn’t find a sitter so we could go out for my friend’s birthday, but I didn’t let that get the total best of me. We ended up making a family night out by looking at all of the incredible Christmas lights.  It’s amazing how much time and effort people put into their lights and decorations.

Here are a few of the houses we drove by:

pretty Christmas lights

I love this picture. Look at the reflection of the moon!

I purposefully took a picture of this house because of the Grinch.  I always joke with my daughter saying my husband is the mean Grinch.

Christmas lights

Simple and nice!

This is a lot of work!

lighted christmas tree

Neat idea!

I thought the tree was really cool.  Creative!

Lighted Manger

The real meaning of Christmas!

I loved this!  Sometimes we get so caught up in the hustle bustle of Christmas that we forget why we celebrate it.


We stopped by the grocery store on the way home and I picked up some ice cream and whipped cream.  We came home and my 2 year old watched Rudolph, my husband played with the baby while I made these:

Yummy milkshake

Perfect ending to a perfect evening!

Wow, what a fun night as a family!

Sweet Anna’s Consignment Finds!

I love all of my consignment finds!  I usually save 70% plus than store sale prices and everything is in great condition.  Here are my consignment finds for my baby girl.

I spent $4 on this outfit for Anna.  Under her sweater she’s wearing a long sleeve onesie that was Ella’s along with her shoes and tights.  Her sweater and hat cost $3 and her skirt was $1 at the dollar dash.  I don’t think there could be a happier baby!

Baby girl with consignment clothes

Can't get much happier than this! Sweater, hat and skirt costs $4.

I got her several Carter pajamas!  I even found her these cute Christmas pjs!  $2 each.  Sadly, I couldn’t hand down Ella’s because they are opposite seasons.  Yes, she is a girl, should have thrown a head band on her!

Christmas pajamas

Christmas jammies for $2!

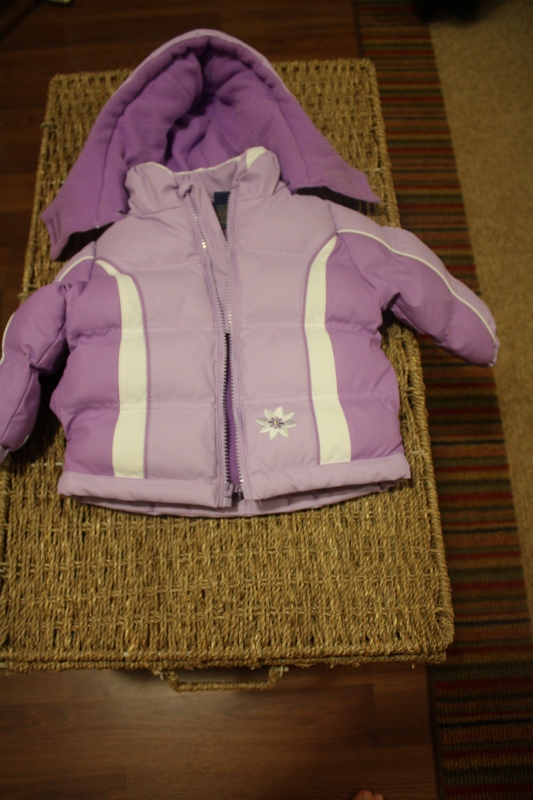
My favorite purchase was this “like new” Oshkosh coat.  I recently went with my sister to Sam’s club and she got my great nephew an Oshkosh coat and spent $30.  That was actually a good price for it.  I paid $7 for this perfect condition coat.  It’s so adorable too!

consignment winter coat

Probably never worn Oshkosh coat for $7.

Check out my other consignment finds too!

Here are the toys that I found!
Ella’s finds!!

Saving Money While Being a Stay at Home Mommy!

I’ve sort of eased my way into become a full time SAHM.  I used to be a full time PE teacher.  Once I had my oldest, Ella, I started working part time (every other day).  Then, when I had Anna, I became a full time SAHM.  I say full time because it is a full time job, just different.  I’m going to share with you ways that I have saved money and it’s almost as much money as I used to make (and I’m not kidding in the least bit).

1. Find fun free or almost free stuff to do with your kids.
Sometimes free stuff is the best.  We have a great library here that has two story times a week, lots of parks, a mall that has an indoor play area, and a website that has a ton of inexpensive things to do with your child that has a calendar of all the things that are going on in the area.  I also take my girls to the gym almost everyday.  It definitely isn’t free, but if I’m using it everyday, they have a lot of new toys to play with and they get to be around a lot of other kids (much cheaper than preschool at this age where they learn by play).  Also, plan some play dates at different houses!  It’s fun for the kids and moms!

2.  Limit eating out to almost never.
Now that I stay at home, I can usually cook or prepare all meals myself.  Eating out adds up SO fast.  Even if it’s fast food.  The other day I picked up McDonalds for my brother and his three kids and it was $20 just for them.  NO JOKE.  I can make an awesome home cooked meal for way less than that and have enough for leftovers the next day for lunch.  When I worked, I was tired when I got home, so we ate out so much more frequently.  Also, if we do eat out, it’s because I’ve gotten an amazing groupon, living social or restaurant dot com.  I can’t remember the last time I’ve eaten out without a coupon.  Wait, I take it back.  I will pick Ella up a 4 piece nuggets every once in a while for $1 (she’s never once had a kids meal except at chick fil a where I’ve had a coupon).  Remember, I also make my own baby food!

3.  Compare coupons with the sale items.
I always clip the coupons and even print a ton off the internet.  It does take time, but I have it.  This month for all four of us, I’m spending about $75 per week on groceries AND as mentioned above, we aren’t eating out. I usually buy my meat in bulk at the beginning of the month at Sam’s and then buy the rest at the store with what is on sale that week.

4.  Plan your grocery list out before you go to the store.
If I don’t plan out every meal before I head to the store, I randomly grab things that we don’t need and they go bad quickly.  Wasting food adds up so fast!  I even plan my meals around what is on sale at the store or for what I have coupons for.  Over the course of the year, I save so much on groceries than your average person.  Also, if I know I have an event coming up I buy nonperishable items far in advance if they are on sale (for example, I knew we were having a BBQ for Ella’s 2nd birthday and Teets had chips buy 2 get 3 free, I bought them 6 weeks in advance).

5.  As annoying as it is, subscribe to store email lists and “like” them on Facebook AND subscribe to money saving blogs.
I know, I know it’s so annoying, but I’ve gotten amazing deals at high priced stores for being on the email list. I always get an extra 20 or 30% off with free shipping.  I love it too because I can shop without the girls pulling things off the shelves and squeezing between racks with a huge double stroller.  It’s also helpful when you “like” them on Facebook because they also give out promo codes to fans.

Money saving blogs are awesome.  There are so many out there that do the work for you!  They will give you meals on a budget or will compare the grocery lists with coupons for the best deals.  Ha, on here you can even learn how to cut your husband or sons hair!

6.  Budget Budget Budget and check credit card statements often.
We have a budget for everything. We have a limit each month what we can spend on the credit card and you better believe I’m on top of every charge.  If I notice we are spending too much on let’s say “fun stuff”, I nip it right there.  We are done for the month and find other fun free things to do.

7.  Get rid of your huge car payments if it’s possible.
Our cars are completely paid off AND they are older.  Both of our cars are ’03s and uncool, but we are fortunate that they are paid off and still in great condition.  We do try to take good care of them with keeping up with the maintenance.  I know several of our couple friends that have two car payments (spending close to $1,000 per month on payments + the extra insurance for being a nice new vehicle).

8.   Don’t be afraid of Craigslist, Ebay or Consignment Shops/Sales.
I’ve talked so much about consignment sales, but really I have saved so much money with my girls clothes AND toys.  I also sell and buy things on Craigslist.  It’s so convenient and a lot of my items are in “like new” condition.

9.  Stock up on sale items.
For example, I bought dog food the other day when it was on sale AND if you spend $50 at this store, they gave you a $10 gift card.  So, I bought enough sale items (including dog food) that I will for sure (I didn’t buy it just because it was on sale) use and got a free $10.  I did this twice so now I have two free $10 gift cards when I just bought things that I would buy any way!

10.  Shop around for the best deals.
You might have to go to two grocery stores because one has veggies on sale where another has fruit.  Plan it into your day.  Or, you might call around to get the best deal on car or life insurance.  Trust me it’s SO worth it.


My pay was public so I don’t mind sharing.  We live in northern Virginia.  When I worked full time I made right at 50k and half that when I switched to part time.  Child care is also expensive, it’s around $500 a week for two kids (give or take $50).  So, you can immediately subtract that from my salary and all of the money I save. Surprisingly enough, we are saving as much money per month as we did when I was working.  You can do it!
A Super Hero Birthday Party for only $45!

So excited, so excited!  After a lot of planning and anticipation, It was finally time for my little monkey’s 4th birthday party!!!   It was so much fun.  We did a lot of cool things and the entire thing from decorations, party favors, and food cost just $45.  You will love this…  here are the details:

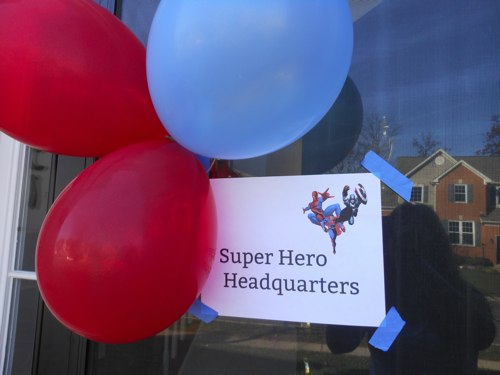
The Invitations:  I used an e-vite.  Simple, free, and easy to track the guest list.  The invitation went a little something like this:  “Calling All Super Heroes!  We must all unite to help defeat the evil villain trying to destroy Tyson’s birthday party.  Meet at hero headquarters at 3pm for some fun super hero training!  Hosted by Wonder Woman (aka Tyson’s Mom).”The Decorations:  I put a home made printed sign saying “Super Hero Headquarters” with a couple balloons on the door. Used some dollar table clothes and balloons, and hung a few streamers.

  • 3- $1 table cloths form the dollar store (one for the play dough table, one for the cake table, and one as the back ground for pictures)
  • 2 – $1 streamers (one red, one blue) from the dollar store
  • 1 – $1 hanging party centerpiece from the dollar store
  • 2 – $1 packages of balloons (one red, one blue) from the dollar store
    TOTAL:  $6 plus tax on decorations

The Party:  As the kids arrived they were greeted and invited to play at the super hero play dough table.  The table had lots of play dough and even more super hero action figures of every type to play in the play dough with.

After all the kids had arrived I sat them all down together and told them that there was an evil villain lurking about trying to ruin the birthday party.  I needed all of them to use their super hero strength to defeat him.  Then I called them each up one at a time to receive their super hero rings (plastic superman rings I got in a 12pack on Amazon).

Just as the last child got his ring, the evil villain (my hubby dressed up and wearing a mask) showed himself while doing an evil villain laugh.  He had two large trash bags full of black balloons.  He told the kids they were bombs and that he would use them to destroy the party of they could not diffuse them in time.  The kids took a couple minutes jumping and popping all the “bombs.”

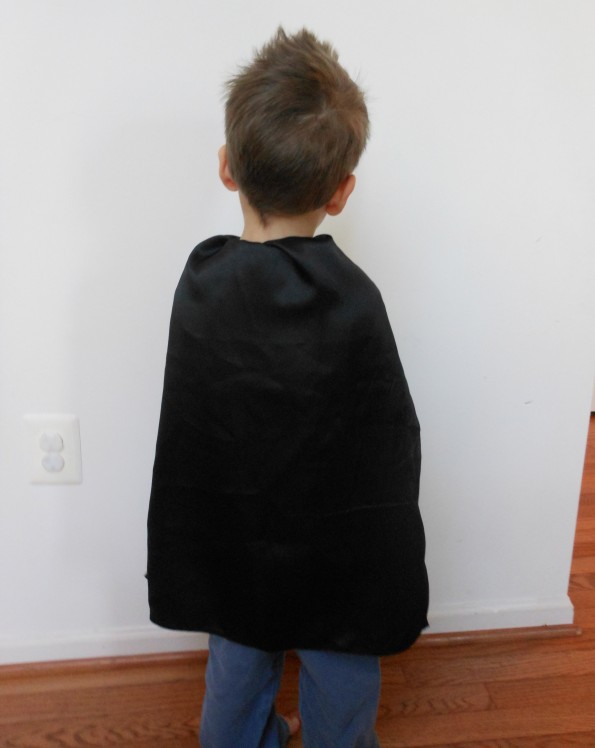
After all the “bombs” had been defused I told the kids they had all won a super hero award for their work diffusing the bombs.  I gave each child a super hero cape.  They were all pretty pumped to get their capes!  I then told them that the evil villain would be back and that we need to do some special super hero training to prepare.  The Kids went down to the basement for a special obstacle course.  The course ended with a pop up tent full of balls.  Each child had to search through the balls to find their super hero wrist bands with their initials.  (Note:  I just tossed one in before each person started the obstacle course).

One of the party guests during the super hero training course

The kids completed the course to find that they had earned their super hero masks.  The kids now had a ring, cape, wrist bands, and a mask.  They all put them on and posed for pictures in front of a blue background (a plastic $1 tablecloth from the dollar store hung on the wall).  After the pics the evil villain dared to show himself again.  Each of the kids rushed to grab a ball from the pop up house to throw at him.  The birthday boy was given silly string to spray to defeat the villain.

The birthday boy spraying (with a little help from his mom) the evil villain

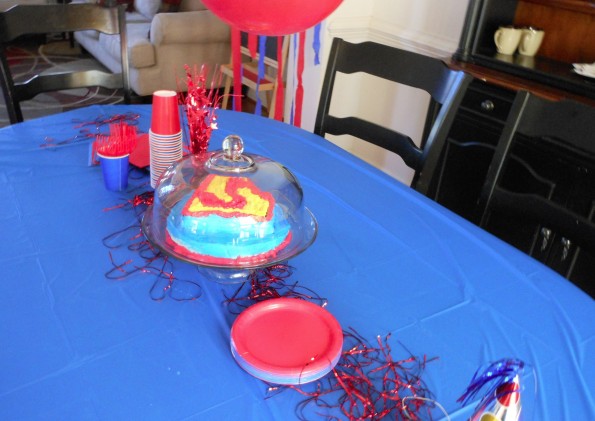
The super villain was defeated and the birthday party was saved.  Time for cake!  I always make and decorate my own cakes with the birthday boy.  It makes it that much more special.  This was a super man cake.  I also had incredible hulk juice (green sherbet, sprite, and green food coloring – all in a large punch bowl).  It was a big hit.

My sweet sweet birthday boy!

After cake, the kids all ran around playing and pretending in their super hero gear.  I also had a good friend who is awesome at tying balloons do me a huge favor and come help.  He tied a couple balloons for each child.  The boys mostly picked swords and sheaths and the girls picked flowers and animals.

The kids had so much fun, but even better, the birthday boy had a blast and declared he wants a super hero party every year!

Here is the price break down:

  • $6 on decorations
  • $2 for 2 bags of black balloons (used as bombs) from the dollar store
  • $2 cake mix
  • $2 frosting
  • $2.19 2-liter of sprite
  • $2.15 green sherbet
  • $1 for 2 paper cups (one red, one blue) from the dollar store
  • $1 for 2 paper plates (one red, one blue) from the dollar store
  • $1 for red plastic forks from the dollar store
  • $1 for 2 napkins (one red, one blue) from the dollar store
  • $1 for silly string (to spray the evil villain) from the dollar store
  • $10.91 masks and wrist bands
  • $6.68 capes
  • $3.40 superman rings

TOTAL COST OF THIS PARTY:  $45.33

How to Make Super Hero Capes

I am almost done preparing for my soon-to-be-4 years old’s Super Hero birthday party.  One last detail to make it perfect… super hero capes!  After rummaging through my local party store after Halloween looking for inexpensive capes to use for the party, I realized that it would be easier and more cost effective to make my own.  Then I would get the ones I wanted and spend less money for them.

I collected my 20% off coupon from Joannes Fabric store and headed over.  I found a nice black costume satin material on sale for $1.99 a yard.  I got 4 yards and used my 20% off coupon for the total.  Besides the material, I used some fabric iron on velcro left over from making the super hero wrist bands.

Using a satin material instead of a stretch fabric was a little more difficult to work with. The satin tends to fray a bit around the edges and takes a little more effort hemming. The satin look was worth it though.

Step 1:  Make sure the fabric is pre-washed and ironed before starting.  You want to make sure the fabric is already shrunk before you cut the fabric to the correct size.  Cut the fabric in the the shape of your rectangular cape.  I used a plain rectangle size 2′ by 3′.  TIME SAVER HINT:  Fold your fabric in half when you begin measuring and cutting so that you are cutting two capes at once.
Step 2:  Fold over the sides of fabric and pin down.  Using a overcast stitch, hem all four sides of your quilt.  You can do this by hand, but I highly recommend using a sewing machine.  Almost all machines have and overcast stitch setting.
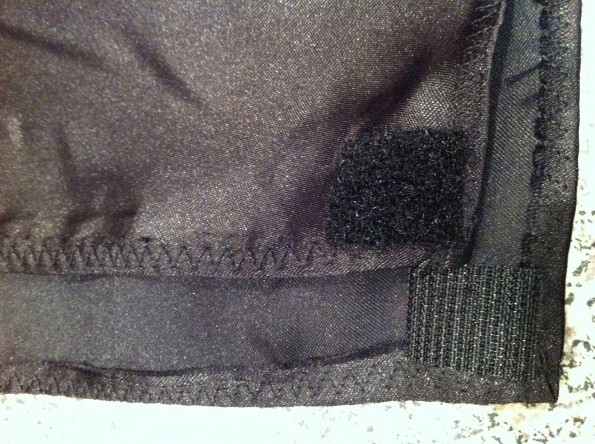
Step 3:   Cut your velcro into small one inch pieces and iron on to the corners of your cape.

Hemming the egdes was quick and easy. I spent less than 10 minutes on each one and got them all finished during my little guys nap.

So there you go… I made 10 capes and had plenty of extra material.  I could easily have made 2 or 3 more capes out of the extra material if I needed to.  The total cost after taxes for this project was $6.68 since I already had the velcro from making the super hero wrist bands.  If you need to buy the velcro you can get a large package of it for $8 (using the 40% off one item coupon at Michaels).  The velcro will last a long time.

Easy Dining Chair Re-Upholster

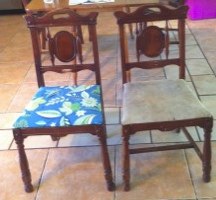
These dining chairs had gotten pretty grubby, but the chairs are solid so we didn’t want to replace the whole set.  We decide to see how hard it would be to re-upholster them.  As it turned out, this was so easy and cheap to do!

Total time for all 4 chairs: 20 minutes!  Total cost:  $20

The before and after!

All you need to do is measure your chairs so you know how much fabric you need.  You might want to get a little extra in case you make a mistake or want to have some material leftover to make future repairs using the same fabric.  1 yard for every 2 chairs will be plenty!

If you don’t get the Jo-Ann’s Fabric circular, just google “Jo-Ann’s Fabric coupons” to get a 40% off coupon.  Then, go pick out a canvas fabric that you love.

Here is what you do in five quick and easy steps:

Step 1:  Measure your fabric.  Make sure you have enough fabric to cover the enire seat part of the chair with 2 to 3 inches extra around all four sides.  Time saver hint:  Fold your fabric in half when cutting it so that you are cutting the fabric for two chairs at once.

Step 2:  Remove the seat part from the chair

Here are the grubby seats removed and ready to be worked on.

Step 3:  Place your fabric on the floor with the pattern side down and place the chair seat down in the middle of your fabric so that the bottom of the chair is facing up.  You should still be able to see several inches of your fabric from all four sides of your chair.

Step 4:  Fold one side of your fabric over the bottom of the chair seat and use a staple gun to secure the fabric in place.  Repeat for each side.

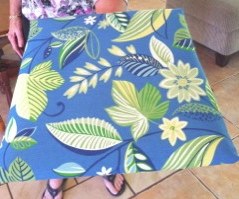
All fresh, nice, and fun! Ready to be put back on the chair!

Step 5: Replace the seat back on the chair! That’s it, you’re done!  So easy!!!

All done and fabulous!!!

Harris Teeter’s Frugal Finds

Now that I’m a SAHM, we need to save in any way possible.  We try to eat out like never.  If we do, we mostly have restaurant dot coms, groupons or living socials.  I also try to save as much money as I can on groceries.

Let me tell you straight up… I’m no extreme couponer, but I do love getting good deals. This week, Harris Teeter will double all of their coupons up to $1.99 (meaning if you have a $1.50 coupon, it is now $3.00 off).

I did my research and clipped out a lot of coupons and printed a lot off coupons dot com.  I honestly hate signing up for subscriptions to get a coupon, it’s not worth it to me for them to fill my inbox and then me finally getting to it months later to unsubscribe.  So, this is my first trip this week.  I think Jamie is going too and I’m excited to see her finds!

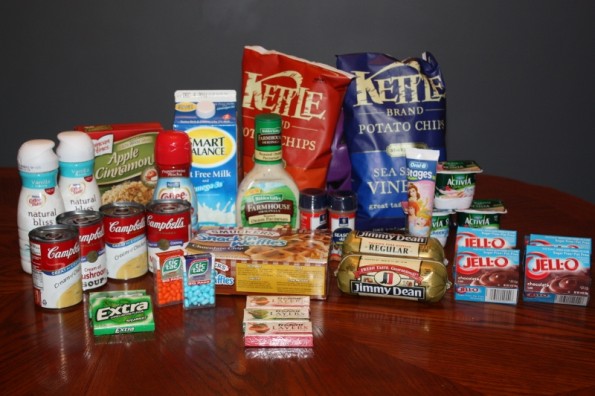
Groceries for cheap

Total for all of these groceries = $19.92

I got all of these groceries for $19.92.  Some of the free items were the jello, chips, tic tacs, and the extra gum.  All of these items were on sale at the store, plus I had the coupon.

Some of the great finds:
The two natural bliss creamers were $.29 each.
Dressing was $.14.
Activia was $1 for all three.
Season all was $.29 each

The rest was really good deals, just not crazy good deals like above.  My worst find was the sausage where I still spent $2.50 per sausage, so that is $5.00 of the bill right there.

If you don’t have a Teeter, I see blogs all over that use many of the other grocery stores as well (Publix, Bloom, Kroger, etc).  You can do it!  It takes effort, but you will be so happy you did it when you are all done shopping!