Enchanted Mommy

Cinnamon Rolls From Scratch!!!

When I asked my hubby what memories makes him think of family, in particular his mom, he told me he remembers how his house smelled of yummy food cooking when he came home from basketball practice or from a friends house.  For some reason, the smell of delicious food baking gives us that warm comfort feeling of home.

The best cooking in my family comes from my Grandma.  My siblings and I (there are seven of us kids) would cheer when we found out we were going to visit grandma because she is the super hero of cooking.  Now that we are all grown (the youngest of us is now 20 years old) we have been begging for all the memorable meals we remember having at Grandma’s.

We must have finally put enough pressure on her because she finally put together her own cook book of her most trusted and go-to recipes she has used over the years.  It is family recipe book now that she gave each of us grand kids for Christmas.

My sisters and I always laugh because sometimes recipes in my grandma’s book have strange instructions we feel are unnecessary, but every time we choose not to follow them to the exact detail the recipe is off just a bit.  Trust me… Grandma knows best when it comes to cooking and baking!

So this Cinnamon Rolls recipe can be found in this oh-so-coveted book of recipes.  I am told it is not an original recipe of my Grandma’s, but one she got from someone who got it from someone else, who may have gotten it somewhere else.  My mom has been baking them for years now and has taught me all the tricks!  Mom’s best advice:  It’s all about how much flour you add.  If you add too much the rolls will be too dense and stiff.  The key is to add just barely enough (the lease amount of flour you can get away with without the dough being too sticky to work with), so that you rolls will be soft, chewy, and fluffly.
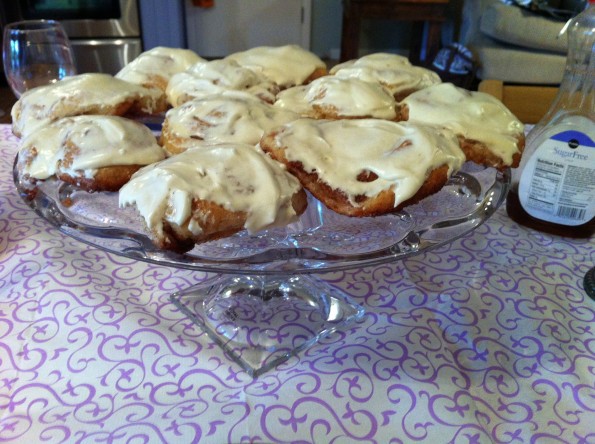
By the way, this recipe makes 4 to 5 trays of cinnamon rolls (48 or so rolls) so if you don’t have a big crowd to feed (with seven kids and all the friends coming in and out we always did!) I would strongly recommend cutting this recipe in half.

Cinnamon Rolls
Makes 48+ rolls

  • 1/2 Cup sugar
  •  2 T yeast
  • 2 C warm water (not too hot or you will ruin your yeast)
    ***let this mixture stand 5 minutes until it looks a little frothy from the yeast
  •  2 Cups scalded milk (or 2/3 Cup powdered milk with 2 cups warm water) -my mom prefers to use powdered milk, although I have never been sure if that was a Mormon thing (recycling her food storage) or a baking thing, either way I have been trained to use the powdered milk.
  • 1/3 Cup oil
  • 1 1/2 T salt
  • 1/2 – 3/4 cup quick oats
  • 9ish Cups flour
    ***Mix in all ingredients but the flour.  Using your dough hook, add one cup of flour at a time, mixing well (on the lowest speed) between each cup.  Once you get up to 5 cups or so, pay very careful attention while you add your flour.  You want to add enough so that the dough is soft, but not sticky.  It is a good sign that you are close to the desired flour amount when you see that the dough is all staying together and no dough is left on the sides or bottom of the bowl.  Knead dough in mixer with dough hook for about 7 minutes (yes my mom and grandma use to always do the kneading by hand, but even they agree that it just isn’t necessary to do it that way anymore).

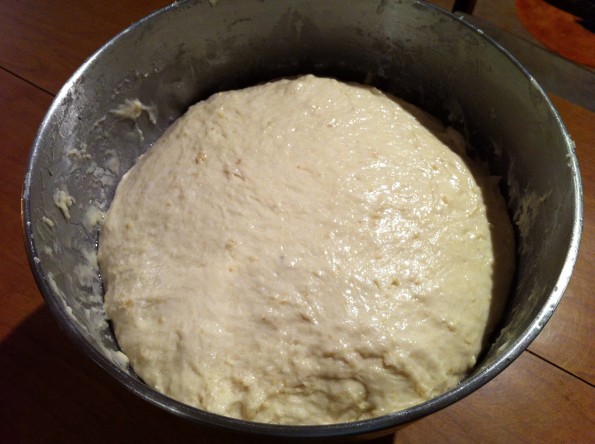
Here is the soft, but not stick dough ready to start rising

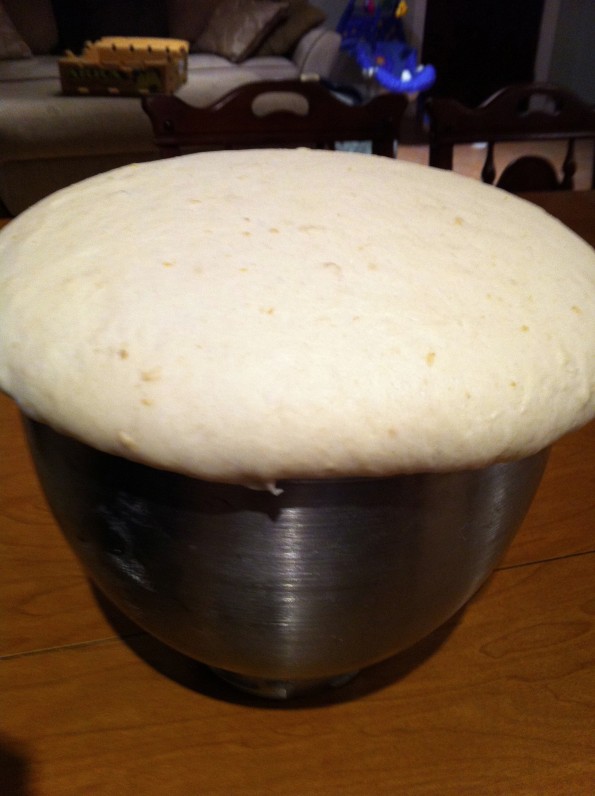
Step 1:  After you have your dough ready, put about a tablespoon of oil on it and softly spread it across the surface of your dough.  Try to get it on the sides and bottom of the dough as much as possible.  Put a clean cloth over the top and let it rise until it is about double the size (30 – 45 minutes).  If it is a cold day or you are in a hurry you can use my quick rise method.  I put my oven on the warm setting until it is preheated, then turn it off and put the rolls in the oven where is it perfectly warm for them to rise.

This is what it looks like after it is done rising when you use the smaller sized kitchen aid bowl

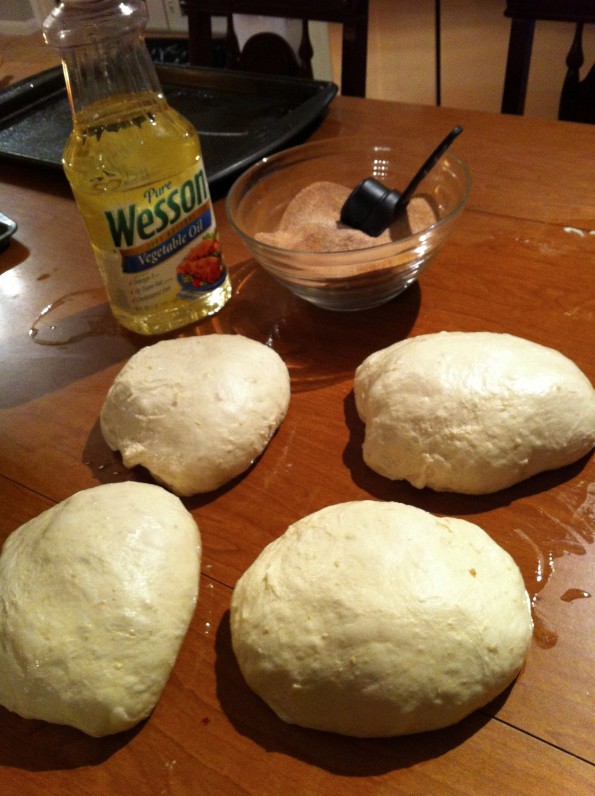
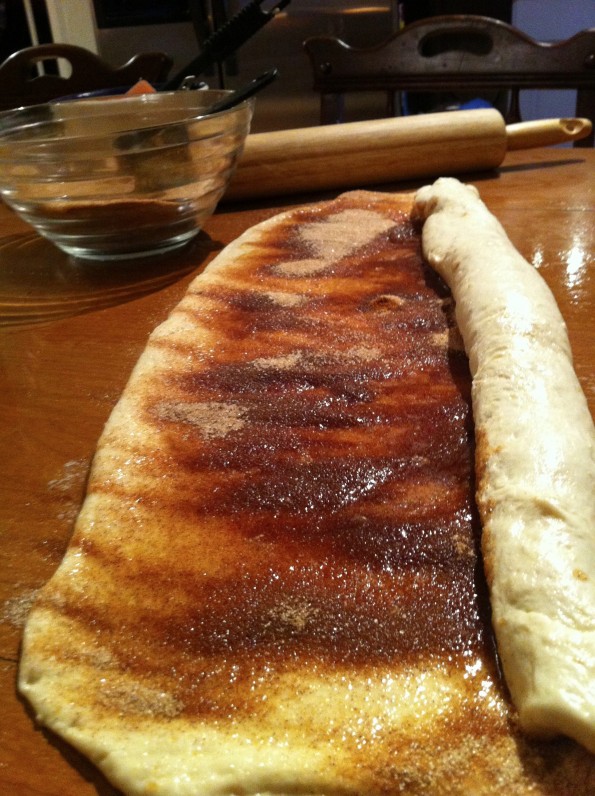
Step 2:  Divide dough into four equal pieces.  Spread a little oil across your rolling surface. Using one piece at a time, roll dough into a rectangle.  Generously spread melted butter (I like to use a cooking brush to “paint” it on) over entire area.  Cover with cinnamon/sugar mixture.

Almost ready to start rolling!

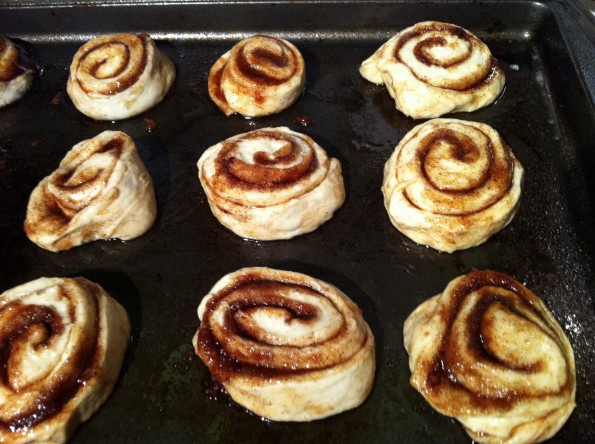
Step 3:  Roll dough lengthwise into one long roll. Be careful not to have any gaps in your roll or they may fall apart later.  Cut rolls horizontaly about 1 1/2 to 2 inches in thickness (using a pizza cutter makes nice, clean cuts).  Place the rolls on a greased pan or use parchment paper about 2 inches apart.

Be generous with your butter and cinnamon/sugar

Rolls placed about 2 inches a part on baking sheet, getting ready to rise again

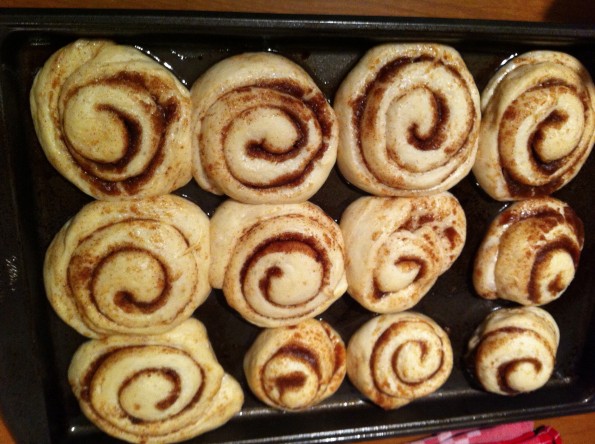
Step 4:  Cover rolls with a clean cloth and let the rolls rise until double again (30 – 45 min) or use the my quick rise method again.

When they are done rising they should be nice and plump and touching as you see here

Step 4:  Cook on 350 for about 12 minutes
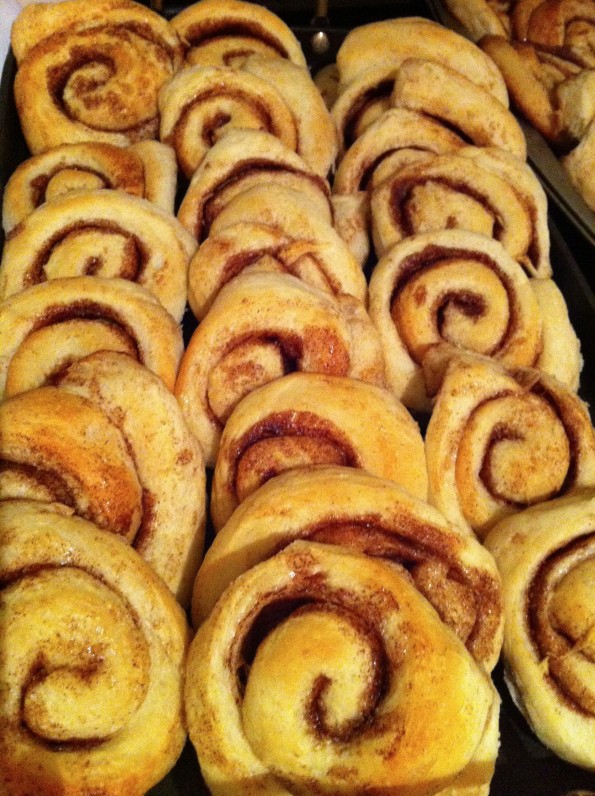
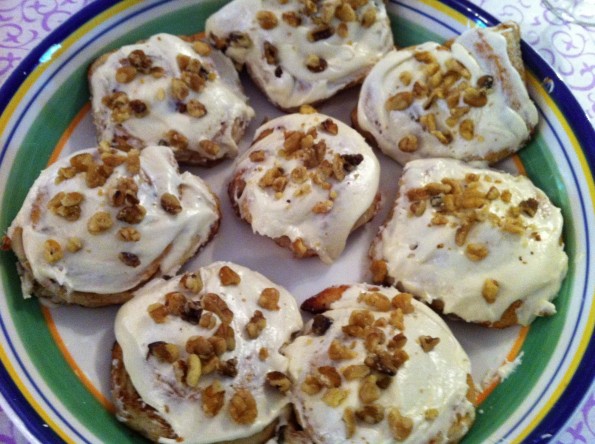
All done and ready to frost! My mom would tell you to let them cool before frosting, but I must admit I never follow that advice and can't wait to eat one warm from the oven with the frosting melting off it!

Frosting
Dont skimp on the frosting… I like to add extra to mine.  🙂
4 cups powdered sugar
1/4 t. salt
1/4 cup evaporated milk
1 t. vanilla
1/3 cup margarine
***Mix all ingredients together.  I often do a taste test here and sometimes add a little more butter or sugar until it I think its perfect.  🙂

Variations:  Add raisins or walnuts for an extra touch!  My mom recently made them using strawberry jelly instead of the cinnamon/sugar mixture… they were awesome!

I love, love, love the walnuts variation!!!!

These are best when stored in an air tight container and just like the directions on a Cinnabon box, heat them up in the microwave for 10 – 15 seconds  before eating!  Perfection!!!!

Crepes, Crepes, and More Crepes!

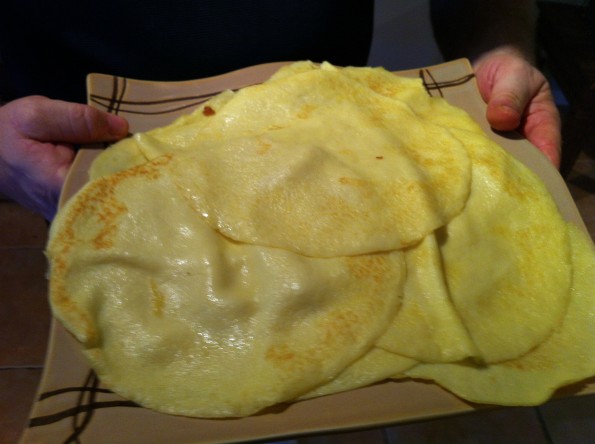
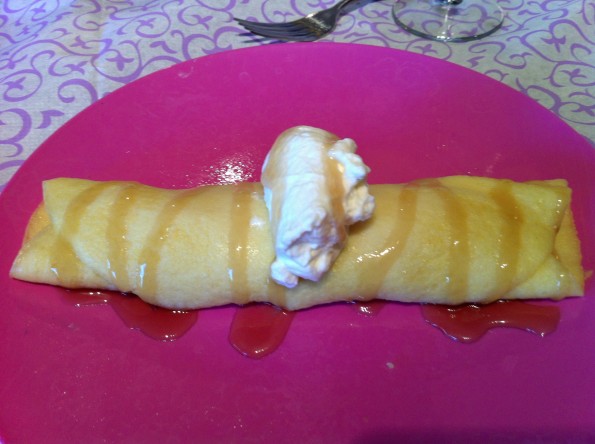
I love crepes!  Growing up crepes were always a unique passion my Dad and I shared…  I say unique because when you are one of seven children in your family having something that is just yours is REALLY hard to come by.  Crepes have always been a traditional food for me… My Dad is the crepe expert and always makes them on Christmas morning and other special occasions.  He makes them so much that he never uses a recipe anymore, but he did tell me he got his original recipe from the Lion House Cook Book.  The Lion House is a famous restaurant in down town Salt Lake City, Utah.  The building itself as been around since 1856 and the restaurant’s reputation is for serving good home cooked meals with fresh baked breads, rolls, and pies being their featured items.

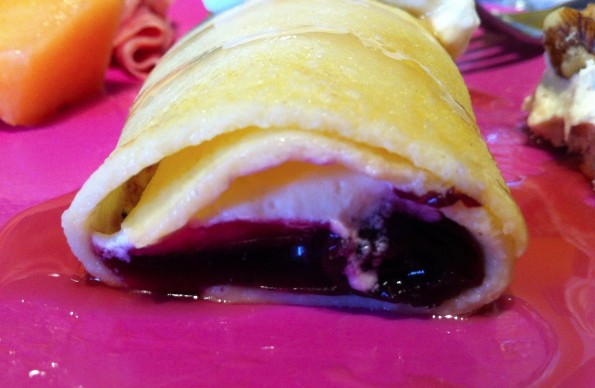
If I didn't prefer them filled with the sweet goodness of sugar, homemade whip cream, and pie filling I might be able to eat them more often!

Crepes are awesome because they can be served so many different ways.   They are no longer just a dessert or a breakfast food.  This past weekend I went to a little cafe owned by a couple from Paris while I was visiting the West Palm Beach area.  I am telling you these crepes were the most amazing things I have ever eaten!  I think the secret to great French crepes is the sauce.  The feature sauce at this little cafe was bechamel sauce.  It doesn’t really matter what you put in your crepe as long as you have bechamel sauce in it!  Not kidding!  You can have spinach, bacon, chicken, mushrooms… it doesn’t really matter, just mix it up with bechamel sauce and you are set!

Basic Crepes
From the Lion House Cook Book
3 eggs
1/2 Cup milk
1/2 Cup water
3 Tablespoon butter melted
3/4 Cup flour
1/2 teaspon salt

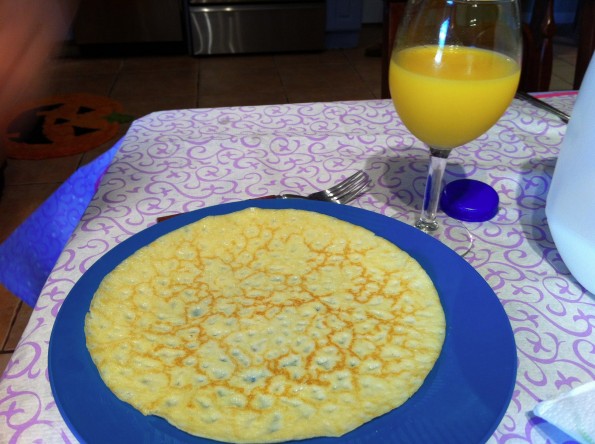
***Combine all ingredients and mix in a blender or with a high powered mixer for a minute or two. Refrigerate for 1 hour (we have never refrigerated ours and they always turn out perfect).  Poor 1/4 cup to 1/2 cup of batter into a round skillet pan.  The batter should be very thin.  Cook for just a couple minutes on each side.

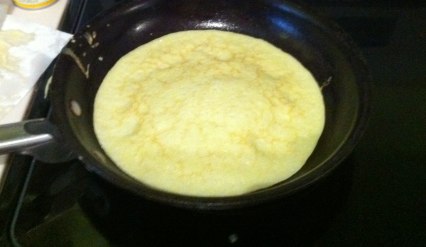
Here the crepe has been flipped once and is cooking in an 8-inch skillet pan

Bechamel Sauce
From www.frenchcookingfordummies.com
4 Tablespoons butter
4 Tablespoons flour
2 Cups milk
1/4 teaspoon nutmeg, grated
Salt and pepper

***Melt butter in a small sauce pan over low heat, but do not let it brown.  Add the flour and mix until completely combined.  Stir continuously for the next 4 to 5 minutes so that it does not brown at all.  Pour a little milk at a time while mixing, allowing the sauce to thicken as you go.  Season with nutmeg, salt and pepper.

Cute Handmade Dragonflies!

Last weekend we went to husband’s parents house.  It was a lot of fun!  I decided to look up pumpkin patches there.  They live in Virginia Beach and I only found one online!  So, we gave it a shot.  Ella had a lot of fun.  It was no cox farms, but it was close and a different type of fun.

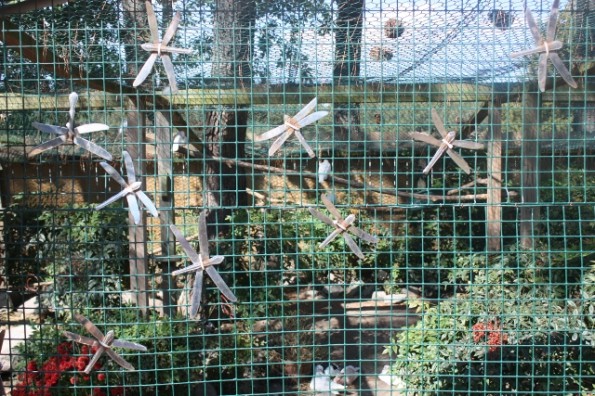
Something that really struck my attention was these really cute dragonflies made out of butter knives on the outside of a cage.

dragonflies made out of knives

Here they all are hanging on the outside of a cage of animals.

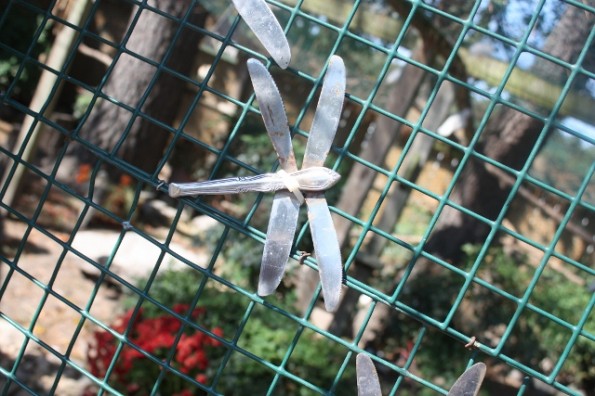
Here is the close up:

butter knife dragonfly

Close up picture of the four knives made into a dragonfly.

I thought this was an awesome DIY.  I would just go to a yard sale or even dollar store and pick up the butter knives.  Cut off four tops and super glue them to one bottom and wahhhhlaaaa.  I thought they would be so cute in a little girls room spray painted pastel colors!  Fun fun fun and very creative!!


An Ode to Cox Farms

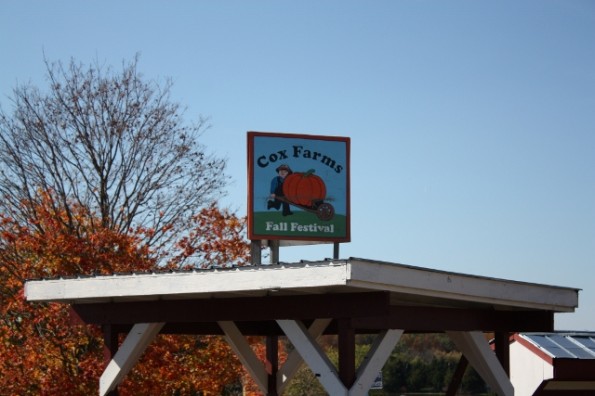
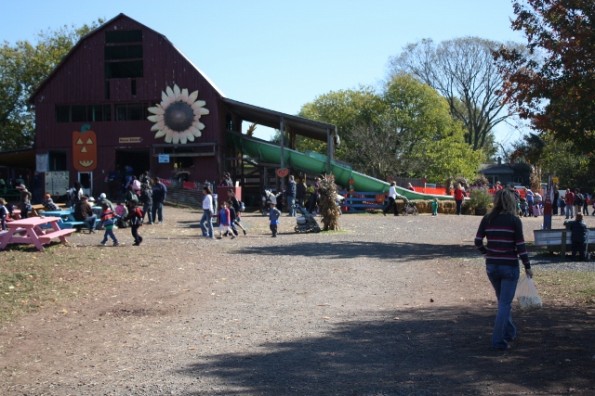
I was able to introduce my husband to my favorite fall place yesterday!  I talked Cox Farms up SO much to him that he didn’t think it could live up to my awesomesauce feeling.  I think if I talk about how awesome it is one more time, he might start to hate the place because I’m overly obsessed (I know I’m being REALLY dramatic)!  In the end though, he loved it just as much!  Here’s an introduction picture of this awesome place that is located in Centerville, VA:

sign for cox farms

This place is SO fun!

Why I LOVE LOVE LOVE Cox Farms:

  • There is so much to do that even when there are 20 school buses full of kids, it still doesn’t seem crowded.
  • Everything is reasonably priced.
  • Good food (fresh kettle corn, yum yum yum).
  • Free cider and apples while you are in the park AND each person gets to take a free small pumpkin with them on their way out.
  • Workers are SO incredibly nice and helpful.
  • Porta potties are clean and they are all over the place.
  • They have a ton of picnic tables set up and you can bring your own food in to eat wherever or buy food at all the different food stands.
  • It’s for kids of all ages.

First, let me tell you some of the things they have for kids.

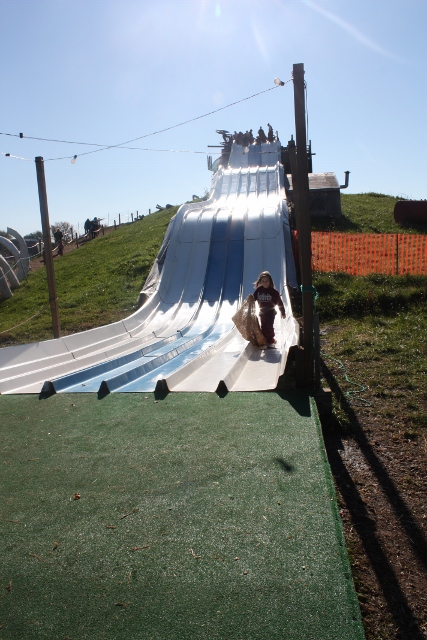
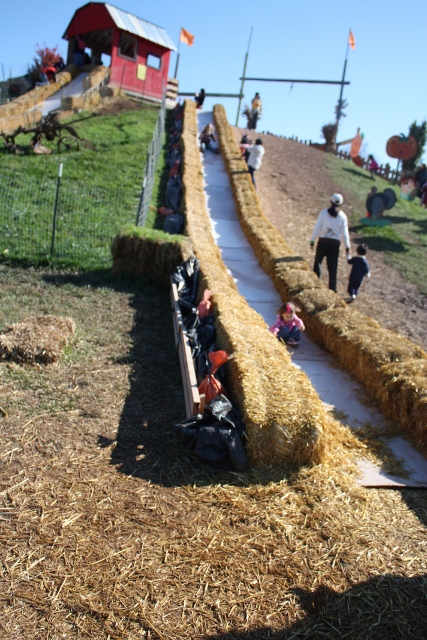
We started our day off at the HUGE slide

big slide at cox farms

It goes really fast. My two year old got her own burlap sack and rode down next to me. It's great for any age!

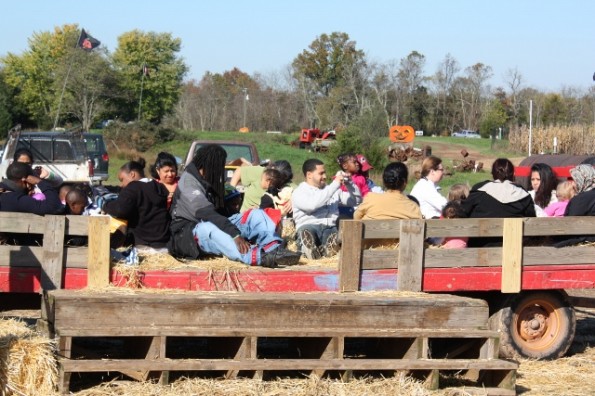
Then, we did the hayride that lasted about 15 minutes.  It had so much on it.  I don’t want to spoil it.  I wish that I got a better picture of it, but there is always next time.

hayride at cox farms

It can fit so many people on it. Each tractor pulls two of these and there was probably at least six tractors.

Next, we went to the awesome corn maze!  It took us a while, but it also had many fun things through it (an old school bus, an old little house, random doors).

corn maze at cox farms

Ella and my husband, Brian in the corn maze.

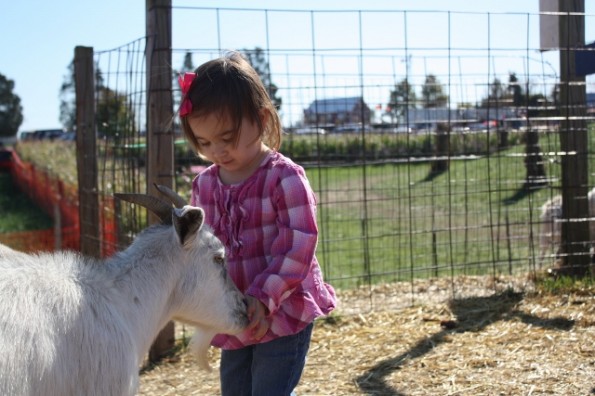
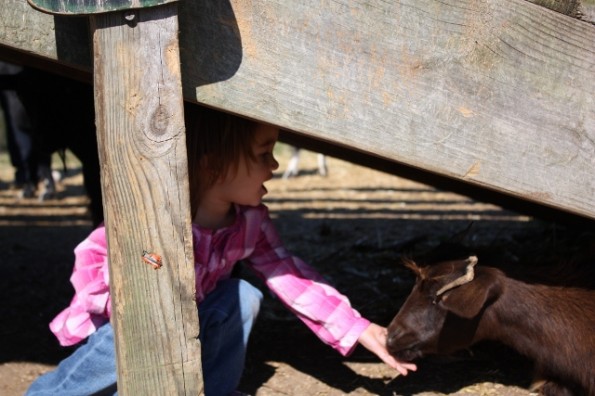
Then we hit up the petting zoo.  This was one of Ella’s favorites. You can buy an ice cream cone filled with goat food for $1.   Look at these pictures!

petting zoo at cox farms

Ella feeding the goats

goat at cox farms

Ella didn't want to leave this one out!

After this, we did many more slides and went to the kiddie area (awesome for little ones under three feet).

big slide at the farm

Castle Slide at Cox Farms (there are so many like this)

slide through barn at cox farms

This slide is going through a a barn.

cox farms slide

My two year old did all the slides by herself.

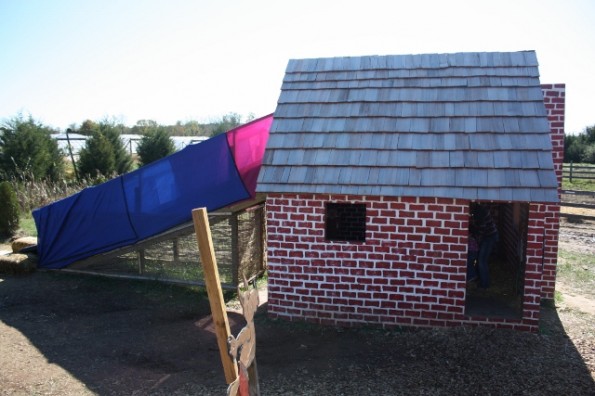
three little pigs house at cox farms

Here is a picture of the three little pigs brick house that they built. It had a slide coming out of it!

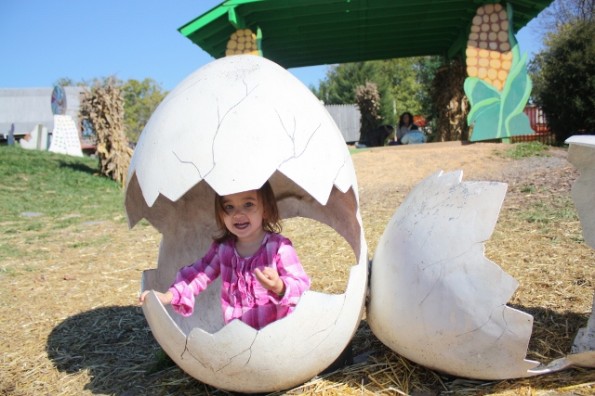
Ella in chick at cox farms

Here is Ella playing in the kiddie part at cox farms. It was a nice little break for her.

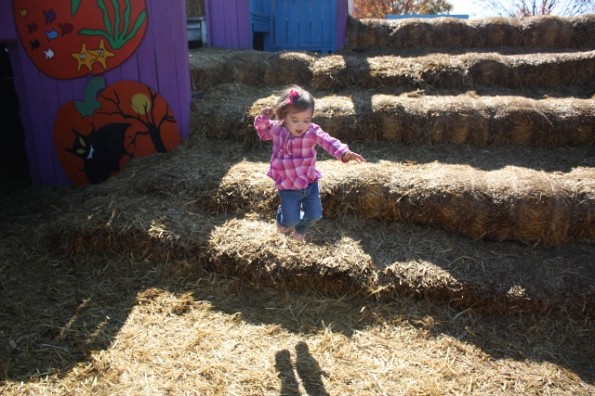
Lastly, we took Ella to the piled high hay bails and she loved jumping off of them.  There were tunnels that went through them.

Cox farm hay bails

Oh to be a kid again! Yes, she nailed the landing too!

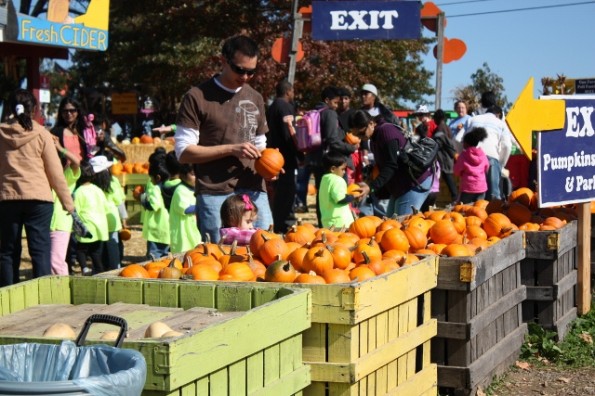
On the way out, you get a free small pumpkin.

free pumpkins at cox farms

Each person with a wristband (2 and older) gets a free pumpkin

On the way out to your car, there is a market that you can buy pies, pumpkins, local honey, kettle corn, cider, apples, candy and toys.  We didn’t buy a big pumpkin, but I wish we had because they are a lot better looking than the ones at the grocery store.  They were $.69 per pound.

Some things we didn’t even get to do.  They put on a little show where they milk a cow (it’s really cute, I saw it last year).  We also didn’t do the rope swings because Ella was too little and we didn’t get to do all of the slides because it was time to call it a day.  We played for about four hours.

Okay, I guess I’ve said enough and I hope I convinced you to take a trip to Cox Farms and feel my over-the-top happiness (if you’re in the northern VA area)!  If you’re not a NOVA person, find a fun pumpkin patch near you!


A Bunny-Farm Birthday Party!

This past weekend I went to my nieces 8th birthday party in West Palm Beach, Florida.  It was so well done that I felt like I needed to write about it! Even though it was at specific place, I think a lot of the ideas can be incorporated anywhere.

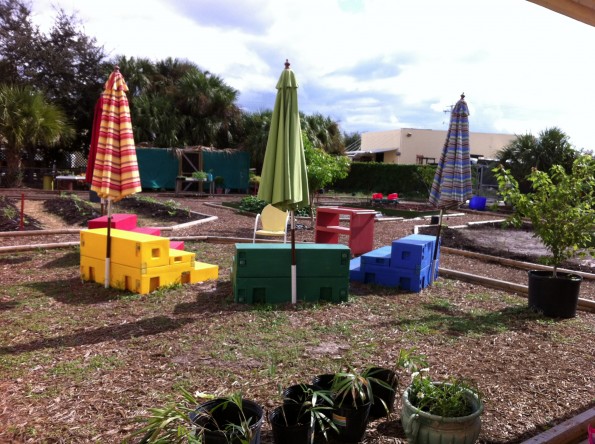
The party was at a place called the Edu-Garden.  It was made and designed by 7th grade students and their science teacher (my sister).  The middle school students plant vegetables and care for bunnies and chickens as part of their school science lab at a public charter school.

The Edu-Garden

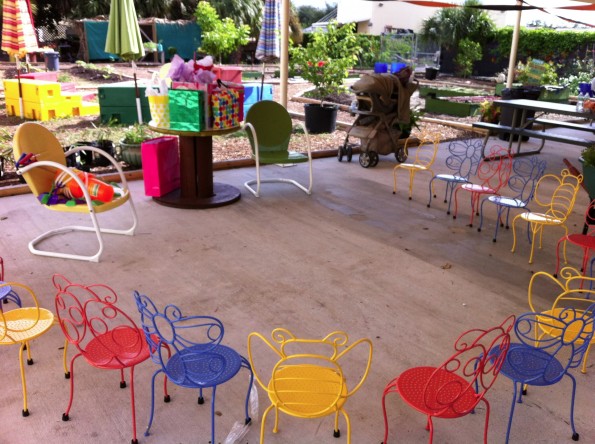
The party set up at the Edu-Garden patio

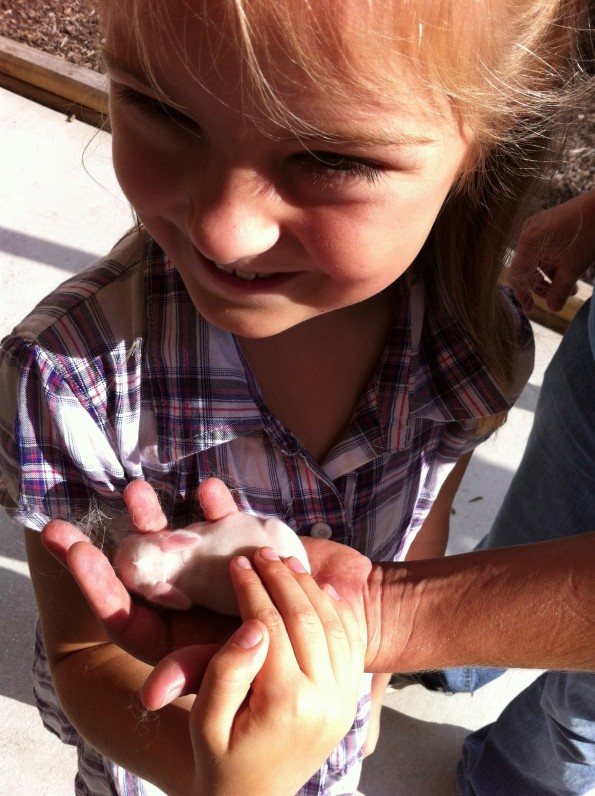
The party was a huge hit… and how could it not be when you can hold and play with real bunnies!!!  One of the bunnies just had babies so the kids got to see the little tiny baby bunnies as well.  They fed the bunnies lettuce and carrots and fed the chickens raisins.  The garden was huge and had a ton of hands on and educational stuff to do.

My niece, the birthday girl, with the baby bunny

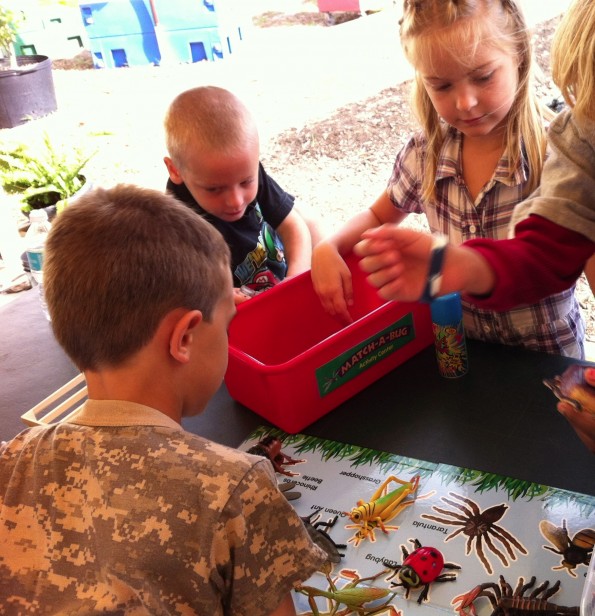
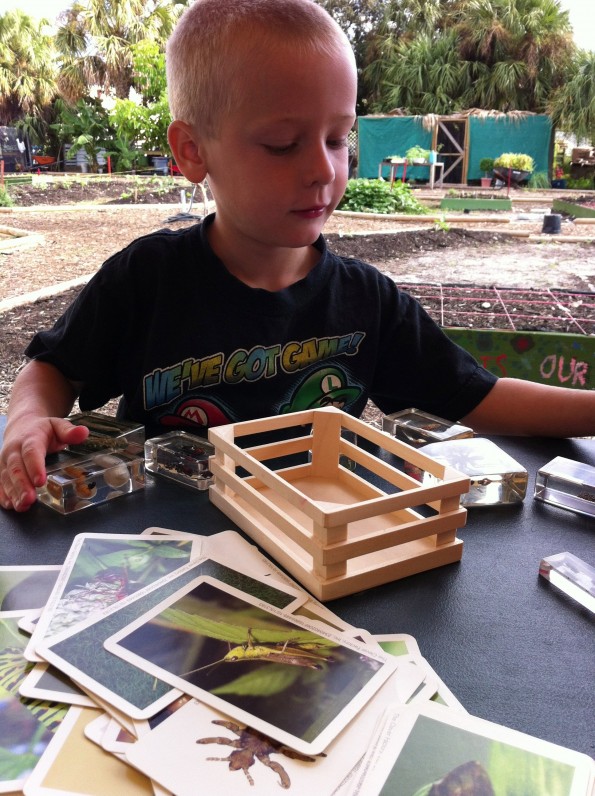
Besides the animals, the kids hunted for bugs then used identification cards to identify them.  They also had plastic critter puzzles the kids used to catagorize and match up different types of  bugs.

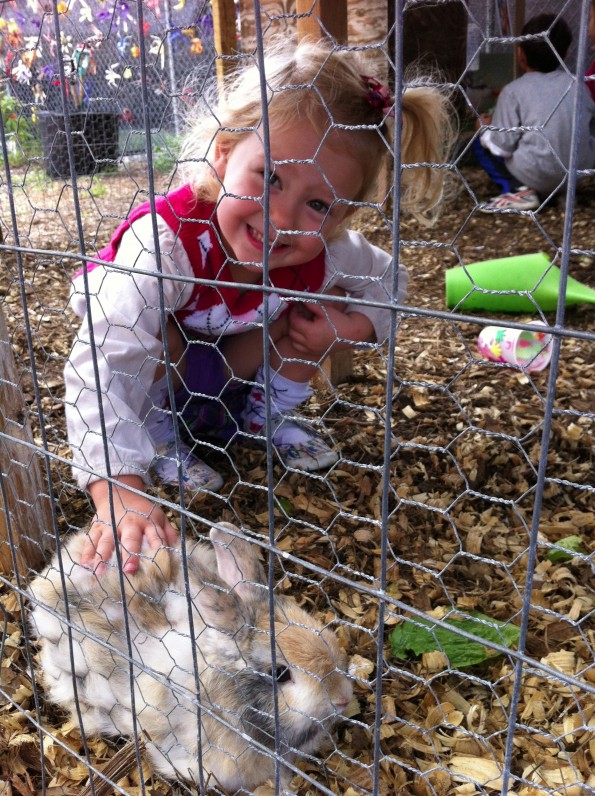
My 2 year old niece, chasing bunnies around. The bunnies sure got a good work out!

My nephew catagorizing bugs during the party

Critter categorizing puzzle

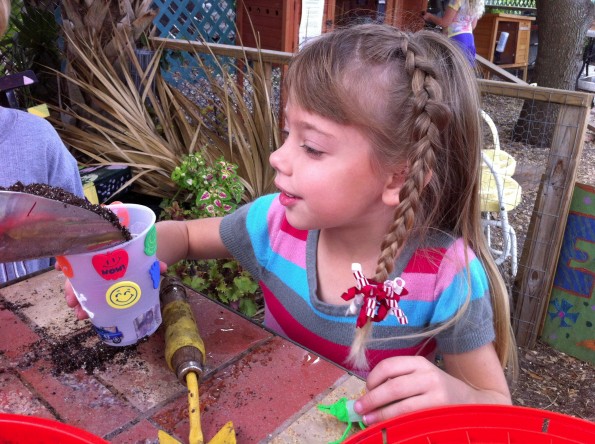
My niece planting her sunflower

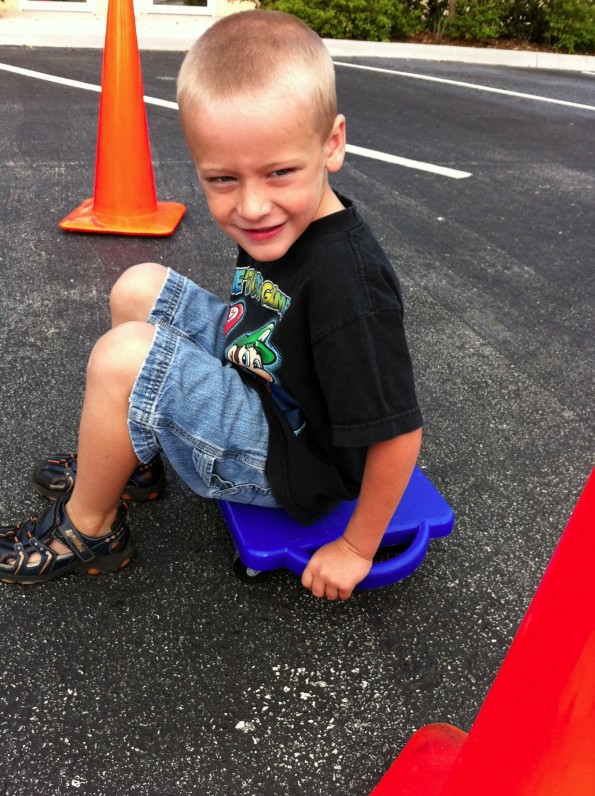
Basically, the kids had free reign of the garden where they could play with the bunnies, feed the chickens, plant a sunflower to take home, identify different bugs, and play with plastic bug puzzles.  They also had a gated parking lot where they set up relay race games using scooters.

The scooter relay races were a big hit!

The party ended with an adorable pair of bunny birthday cakes and party favors of plastic bugs and a sunflower they planted themselves.

It was all very cute and all the kids had a great time!

Decorating an Elephant Pumpkin

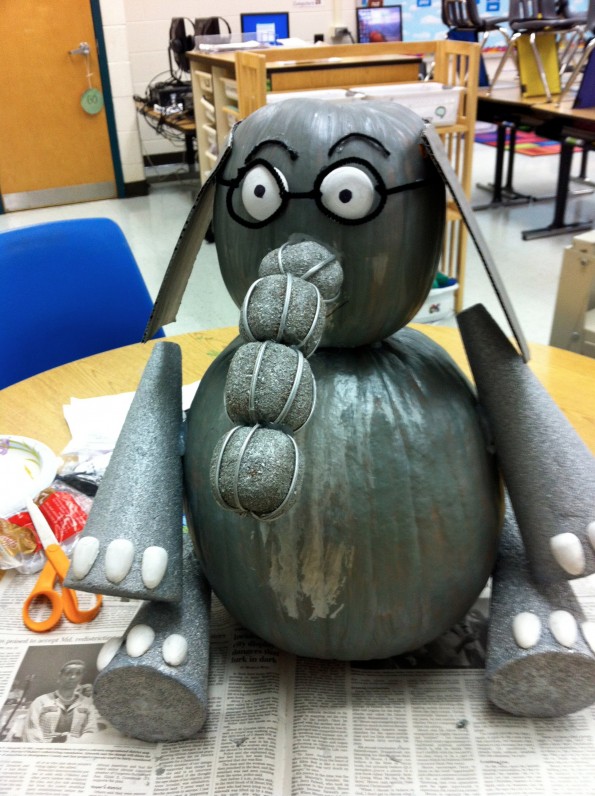
My son’s first grade teacher asked me to be in charge of their class pumpkin this year.  The class voted on one of their favorite book characters to create for the school pumpkin contest.  Gerald the elephant won the contest so I started up on google to see the best way to create an elephant pumpkin.

Gerald the Elephant Pumpkin – The final product

I got the idea from Michaels.com and loved it for a class project because it had so many different pieces to it that it was easy to get all 25 kids to help with at least one part.

This is the book character the 1st grad class voted to make

This is the book Character the class voted for

 Materials:

1 large tall shaped pumpkin (for the body)
1 small round shaped pumpkin (for the head)
4 Styrofoam cones about 9 inches long (for the arms and legs)
12 half wooden robin eggs (fingernails)
2 wooden circles (eyes)
Black yarn (eye brows)
Black pipe cleaner (glasses)
Sharpie (to draw the mouth and pupils on the eyes)
Strong Tooth picks (to secure pumpkin heads together and limbs to the pumpkin)
4 artificial pumpkins (to glue together to make the trunk)
Cardboard (to cut ears out)
White paint (for the fingernails and eyes)
Grey paint (for the pumpkins, legs, trunk, and ears)

 Instructions:

  • Paint the pumpkins, cylinders, artificial pumpkins, and ears grey
  • Paint the wooden half robin eggs and the wooden circles white
  • After the pumpkins are completely dry, place four or five toothpicks in the bottom of the smaller pumpkin about halfway in.  Carefully put the small pumpkin on top of the large pumpkin pressing the toothpicks into the larger pumpkin
  • Glue the artificial pumpkins together in the shape of a trunk, then use a tooth pick to secure trunk to the pumpkin face
  • Glue three fingernails to the large end of each cone and secure cones to the large pumpkin with toothpicks
  • Use a sharpie to draw a mouth on the pumpkin and and pupils on eyes
  • Use a hot glue gun or super glue to glue the eyes, eyebrows, ears, and glasses to the pumpkin

Best Looking Deviled Eggs on the Planet!

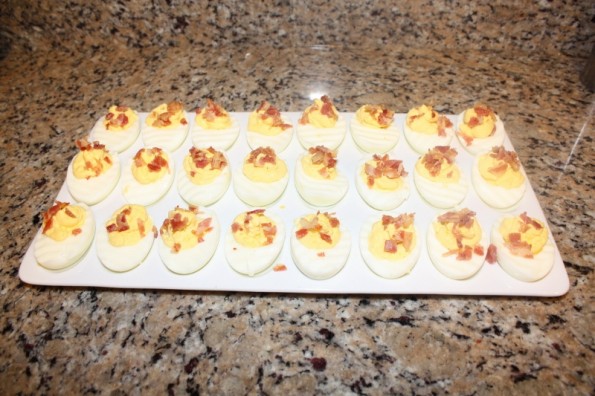
good looking deviled eggs

Aren't they amazingly beautiful?!

So, when you’re going to someone’s house for a BBQ and you want to bring a side, this is it!!!!  Not only do people love deviled eggs, you will get extra bonus points for making them look incredibly awesome and taste better than any before.  Always remember, people eat with their eyes.
Ingredients

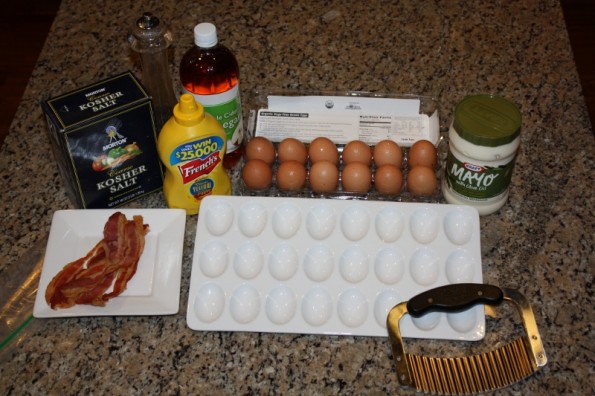
stuff for deviled eggs

This is what you need for awesome deviled eggs!
  • dozen eggs (I always make a couple extra in case they somehow get messed up)
  • 4 tablespoons mayo
  • 1 tablespoon mustard
  • 1/2 teaspoon salt
  • 1/4 teaspoon black pepper
  • bacon (approximately 5 strips)
  • 1 teaspoon of splenda or sugar (optional)
To make them look cool
  • crinkle cutter (this is another one of my favorite kitchen gadgets)
  • white deviled egg plate
  • large ziplock baggie
Directions
  • Get a large pot and fill with hot water.  Put eggs in pot with lid and bring to a boil.  Once it is brought to a boil, keep it at a low boil for 12 minutes.
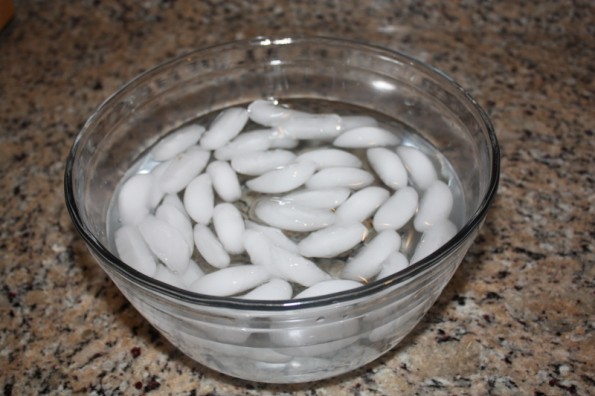
  • Remove from pan and place in large bowl of ice water for five minutes.
bowl of ice water

Make sure it has a lot of ice in it. This keeps the eggs from continuing to cook.

  • Leave in ice water for approximately 5 minutes
  • Crack eggs and take off the shells
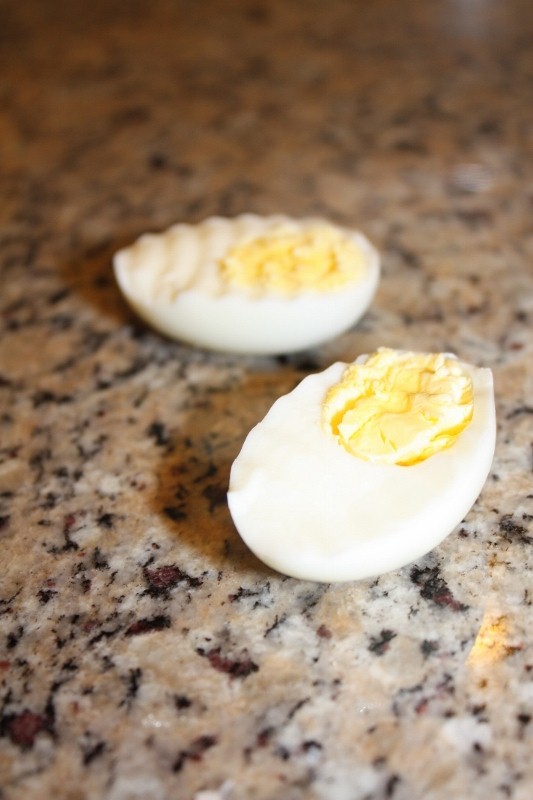
  • Cut egg in half with crinkle cutter
crinkle cut deviled egg

Isn't this a beauty?! Notice the inside is all yellow and not green or brown. It is perfect when you follow my boiling instructions!

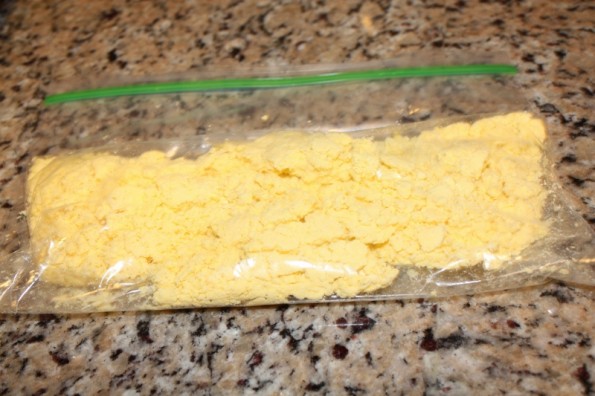
  • Take all of the hardened yolks out of the eggs and put them in your large bag.
  • Press on yolks with hand until the lumps are all gone.
hardboiled egg yolk

This is the hard yolk of eggs in bag and crumbled all together.

  • Add your mayo, mustard, salt (or bacon salt if you have it), pepper, vinegar and sugar
  • Mix all together well
  • Add more mayo if necessary
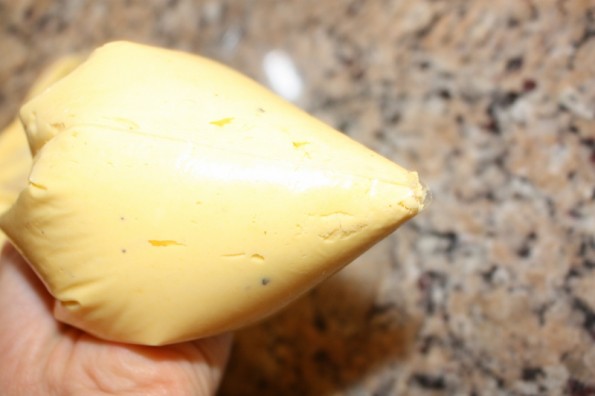
  • Cut the corner off the bag (start really small and keep cutting if you need)
filling of egg

This is about how much should be cut off the tip.

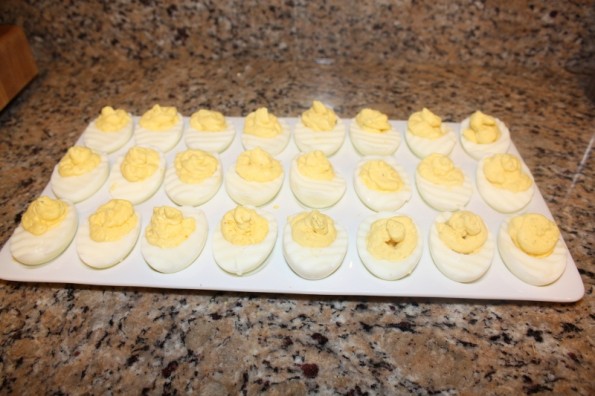
  • Fill each egg with mix and make a circular motion so your eggs look like these:
deviled eggs

The piping makes a big difference!

  • Chop up your bacon and sprinkle on top and wahlaaaaa, you’re done!
So, I never really paid attention to detail until I had a very detailed oriented husband.  It truly does make a difference!  Take the extra steps and everyone will be amazed!

How to Make Bacon Salt

I think everyone on the planet loves bacon, especially men (so make them this and they will LOVE you)!  Ever since I first read the story of the guys who created bacon salt a few years ago, I’ve been wanting.  Infused salts are nothing new, but the idea of easily infusing bacon flavor into almost anything seemed beyond amazing.  Bacon flavoring is not used often in grilling because it isn’t something people typically grill, so bacon salt would provide the perfect opportunity to add a kiss of bacon flavor to grilled steak, chicken, pork, and seafood.

Bacon + Salt = Bacon Salt

In concept, this should all be much, much more simple.  If you take some really crispy bacon and pulverize it, and add it to a bunch of salt, you get salt that tastes just like bacon.  In experimenting, we also added some black pepper into this to round it as a seasoning that could stand solidly on its own.

It's simple: Bacon, Salt, Pepper

We ground up the bacon using my favorite kitchen gadget again, the Magic Bullet, and further used it to mix in the salt and pepper thoroughly.  However, you don’t have to use the Magic Bullet to do this (although it is the best thing ever).  You could accomplish this with a food processor, a mini-food processor, a Morter and Pestle, or blender. A nice benefit to the Magic Bullet is that it has a sealable lid and also a ‘shaker’ lid so you can “shake it like a salt shaker”!

Here is the recipe:

Recipe: Homemade Bacon Salt

Ingredients

  • 6 Slices of Extra Crispy Bacon – almost blackened
  • 1/2 Cup Salt
  • 3 Tbsp Ground Black Pepper (optional)

Instructions

  1. Place the 6 slices of bacon into a grinding tool (Magic Bullet, Blender, Food Processor, etc)
  2. Process until there are no large chunks
  3. Add in the salt and process/mix until well blended
  4. Mix in the black pepper
  5. Transfer to an airtight container and store in the refrigerator when not in use

Preparation time: 5 minute(s)

The bacon ready to be ground up

The finished product

Shake it like a salt shaker!

A Few Tips for Success

There are a few things that can help you make this really perfect:

  1. You should use really, really cripy bacon.  In fact, it should just be turning black.
  2. Cook the bacon in the oven, low and slow.  For us, 40 minutes at 325 rendered most of the fat out.  For this purpose, you don’t want fat in the bacon.
  3. Use good quality salt.  When recipes require very few ingredients, you should really use the best you can get your hands on. So… skip the table salt.

What Do I Do With This?

Your options for this are really limitless.  Anywhere you would normally use salt, you can instead use your bacon salt!  Some delicious ideas to get you salivating include:

  • Almost every grilled piece of meat.  A nice steak would only be made better with some bacon flavor.
  • A fun topping for corn on the cob (or any other steamed vegetable)
  • Sprinkled over a caprese salad (tomato, mozzarella, and basil)
  • A nice alternative topping to deviled eggs (instead of paprika)
  • A secret ingredient in guacamole
OK, times up.  Go make bacon salt.  Like right now.

A Different Fun Fall Activity

Looking for a fun, exciting, and different fall activity?  Last weekend we took our three little monkeys to Kings Dominion for their annual Howl-o-Fest.  Besides the usual amusement park rides, they have a cute little pirate treasure hunt included with your regular admission. You pick up a treasure map and go to each marked location to pick up a piece of the “treasure.”  The treasure was different at each location and included, a pirate hat, a pirate bandana, an eye patch, a beaded necklace, a spyglass, a black pirate flag, and a pumpkin.   In the end, it was all the makings of a cute pirate costume.

The Loot! My kids have pretty much dressed up and played pirates every day since!

At one location you had to find your way to the end of the hay and corn maze to earn your prize.  At another, it was running through the “Seven Seas Foam Pit” made of waist high foamy soap bubbles.  There was also a great Charlie Brown Pirate Show, pumpkin painting, and all the staff in the children’s area dressed as pirates (some of them even walking on tall stilts).

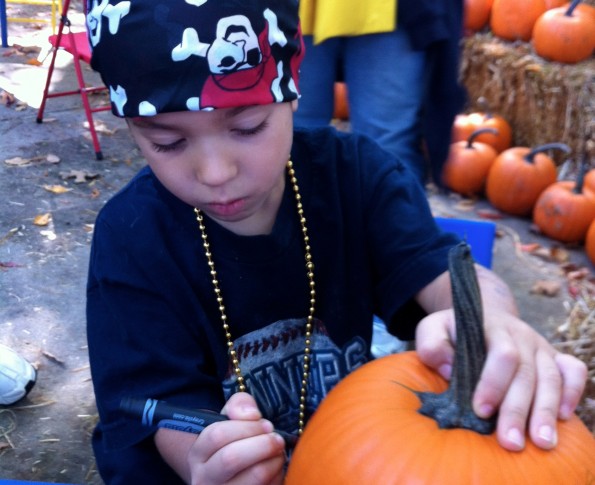
My 3 year old painting his pumpkin in the pumkin patch

The kids had a great time and so did we.  The staff was very enthusiastic and really made it a fun environment.   This was definitely something a little different, but so fun that we will be making a tradition out of it.

To see if there is a park near you, visit cedarpark.com.

You don’t have to go all the way to an amusement park to do this activity though.  Host a treasure hunt in your back yard for your kids.  We did this too and now my six year old is obsessed with hiding a toy somewhere in the house and giving his little brother or cousin a hand drawn map to find it.  So fun and keeps the kids busy for hours!

My six year old painting his pumpkin in the pumpkin patch.

Fashion Show, Fashion Show, Fashion Show at Lunch

I got the name of this blog post from this hilarious scene from the office:

This morning my poor 6 month old, Anna, was not feeling well.  I didn’t want to leave the house because I wanted her to rest well in her bed and not out and about.  Poor thing slept for 3.5 hours this morning (on top of her 13.5 hours of sleep she had last night). So….. Ella and I did a fashion show.  She didn’t quite understand exactly how it worked, but I made it seem so fun!

The first outfit, I told her she was so pretty and she kept saying “I’m very pretty, mommy.”  I let her jump on my bed to make it more fun and tried capturing some pics of her high jumps!  I got the red sweater at the consignment sale last weekend that I talked about in my previous post for $3 and it’s from baby gap!  Can you believe it?!?!?!?!

baby gap red sweater

Ella loving her fashion show! This is her $3 sweater from baby gap. She might be a future bball player!

Next, we got to pretend it was winter time and she was very cold!  This is her $8 winter coat from Old Navy.  WAY too cute to pass up.  It is a size 2T (yes, Ella is VERY tiny), but it can fit her again next year and then my sweet sweet Anna after that.  Here is a similar one on sale for $35.

old navy jacket

Isn't this $8 coat just adorable?!

I guess we were on the jacket fix, so here is a genuine kids oshkosh coat that I picked up for $4.  This is also a little big, but will definitely continue to fit!

genuine kids by oshkosh jacket

$4 coat find. Good as new!

The next outfit, she by far had the most fun with!  Ella got to pretend we were going out in the snow!  Hopefully we will see some snow this year because I got her this great snow outfit for $5 and these adorable boots for $2.

snow outfit pink

Even if it doesn't snow, she can have fun pretending it will!

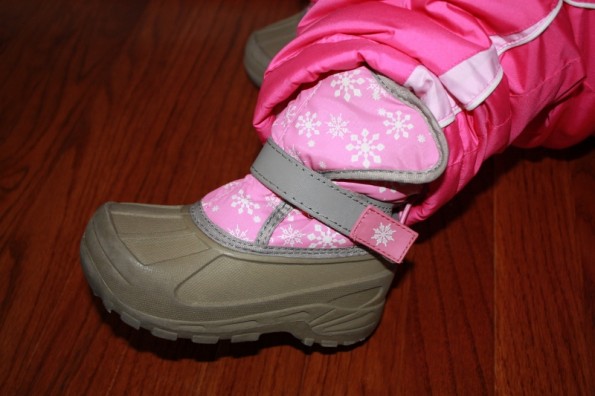
Here is a close up of the $2 boots.

$2 snow boots

AWESOME find! Look almost as good as new!

Now do you see why I love consignment sales?!  My kids can get everything they need for a fraction of the price and I get an amazing feeling when I get such good deals on cute stuff!