Enchanted Mommy

It’s a Recipe Party!

Yes, you got it!  I’m hosting a recipe party at my house and it’s in less than a week.  I got the idea from a dear friend and neighbor of mine that moved to Israel.  You might be wondering what exactly it is and I’m here to tell you!  You just invite a bunch of your girl friends over, they each bring a dish, you make a dish and have some “fun” drinks and let the night begin.

Well, that’s not exactly all it entails, but it’s supposed to be super fun!  Each person emails the host their five favorite recipes before the party, brings one dish of their five sent recipes and shows up for a childless great night!  I made sure to let people know that it’s supposed to be stress free, if they show up in sweats, no one will judge.

I’m still waiting for all of my RSVP’s to see what I am making.  I sent out an evite and asked everyone when they responded to put in the comment section what they were bringing.  That way I can fill the gaps (meaning I make a dessert or main course if no one else is bringing it).

I’m really excited to see what the night brings.  I will take lots of pictures and post some of the delicious recipes!  Yay for girls night — husband and babes are leaving too.  It’s just me and my favorite girl friends.  Excitement is an understatement!

Now, don’t be jeally, go host one of your own!

Harris Teeter’s Frugal Finds

Now that I’m a SAHM, we need to save in any way possible.  We try to eat out like never.  If we do, we mostly have restaurant dot coms, groupons or living socials.  I also try to save as much money as I can on groceries.

Let me tell you straight up… I’m no extreme couponer, but I do love getting good deals. This week, Harris Teeter will double all of their coupons up to $1.99 (meaning if you have a $1.50 coupon, it is now $3.00 off).

I did my research and clipped out a lot of coupons and printed a lot off coupons dot com.  I honestly hate signing up for subscriptions to get a coupon, it’s not worth it to me for them to fill my inbox and then me finally getting to it months later to unsubscribe.  So, this is my first trip this week.  I think Jamie is going too and I’m excited to see her finds!

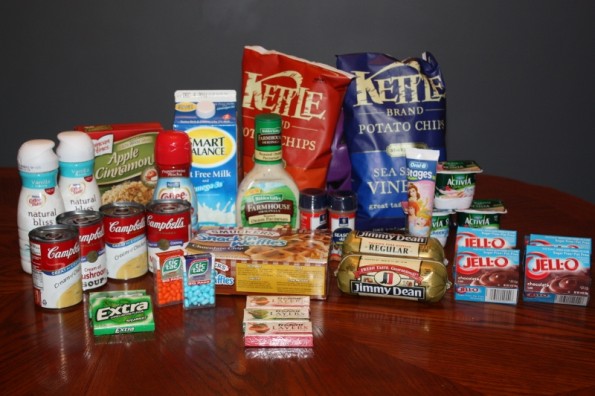
Groceries for cheap

Total for all of these groceries = $19.92

I got all of these groceries for $19.92.  Some of the free items were the jello, chips, tic tacs, and the extra gum.  All of these items were on sale at the store, plus I had the coupon.

Some of the great finds:
The two natural bliss creamers were $.29 each.
Dressing was $.14.
Activia was $1 for all three.
Season all was $.29 each

The rest was really good deals, just not crazy good deals like above.  My worst find was the sausage where I still spent $2.50 per sausage, so that is $5.00 of the bill right there.

If you don’t have a Teeter, I see blogs all over that use many of the other grocery stores as well (Publix, Bloom, Kroger, etc).  You can do it!  It takes effort, but you will be so happy you did it when you are all done shopping!

Too Much Chocolate Cake!

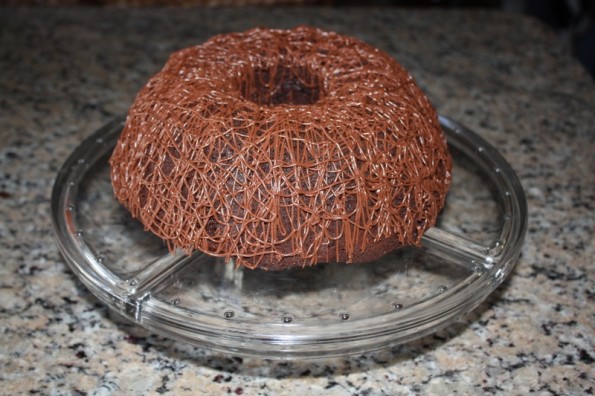
and here it is……

delicious chocolate cake

Doesn't this look amazingly awesome?!!

If you love chocolate, this is for YOU!  It is very rich, but oh so mmm mmm good.  I’ve had people ask me if I bought it from the store (I think it’s because of the bundt pan look).  I’ve taken it to a few people’s houses for dessert when they have invited us over to dinner.  It’s not that expensive to make and it’s so delicious.

I got this from all recipes dot com from here.

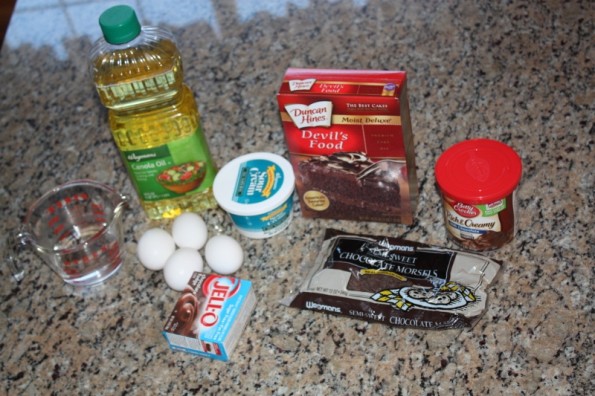
Here is what you need:

ingredients for awesome cake

Buy this stuff at the store and you will be in for an awesome treat!!!


  • 1 (18.25 ounce) package devil’s food cake mix
  • 1 (5.9 ounce) package instant chocolate pudding mix
  • 1 cup sour cream
  • 1 cup vegetable oil
  • 4 eggs
  • 1/2 cup warm water
  • 2 cups semisweet chocolate chips
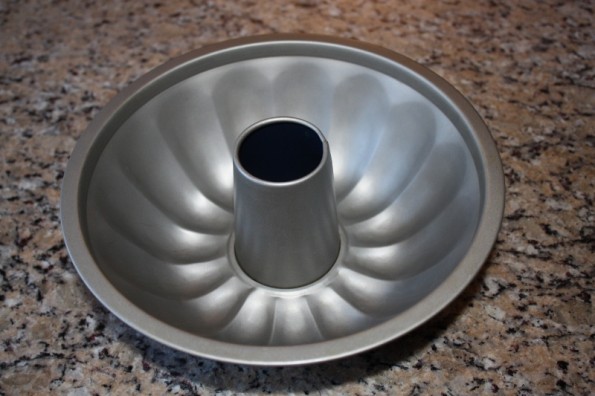
You also need a bundt pan.  In case you’re a clueless new baker, this is a bundt pan:
bundt pan

This is a bundt pan

Here are the directions:

  • Preheat oven to 350 degrees F (175 degrees C).
  • In a large bowl, mix together the cake and pudding mixes, sour cream, oil, beaten eggs and water. Stir in the chocolate chips and pour batter into a well greased 12 cup bundt pan.
  • Bake for 50 to 55 minutes, or until top is springy to the touch and a wooden toothpick inserted comes out clean. Cool cake thoroughly in pan at least an hour and a half before inverting onto a plate.
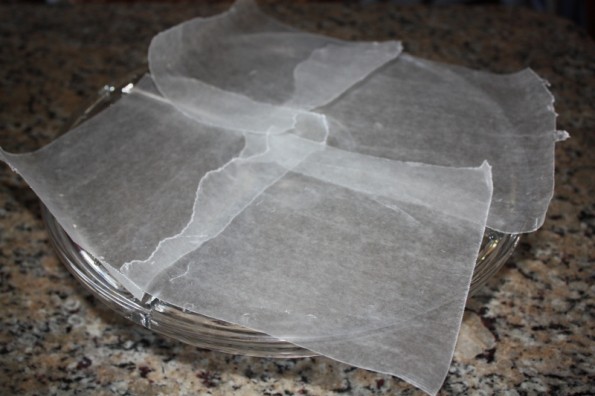
The next important step is to take wax paper and cut it into 4 pieces to put on your platter. This is important for the drizzling step (which you’ll see and understand why in a minute).
wax paper in preparation to drizzle

I used four pieces of wax paper so that you can easily pull them away.

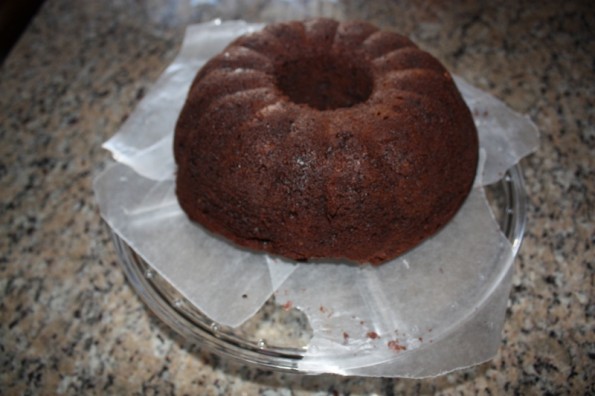
Once your cake is cooled, turn it over on your platter.  This is my cake after it cooled:
too much chocolate cake before drizzle

My pretty cake right after it cooled.

The next step is the drizzling!

  • Put your chocolate icing (about half of the container) in a zipper bag and push it to one of the bottom corners.
  • Microwave it for about 10-15 seconds.
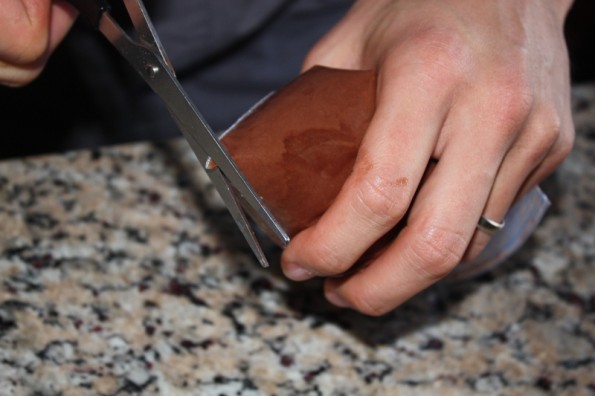
  • Cut a really SMALL opening in the bottom corner where you put the icing (remember you can always cut more).
  • Drizzle away!
about to drizzle icing

Make sure you cut a VERY small amount.

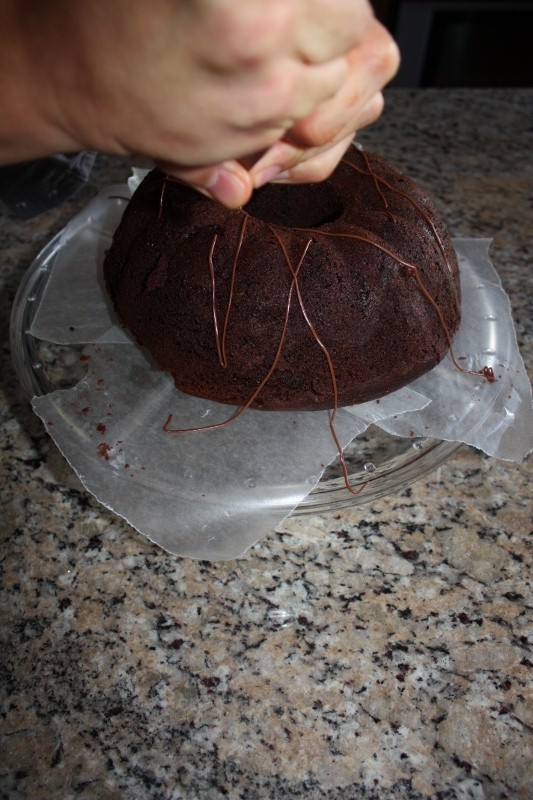
starting to drizzle on cake

He is starting to drizzle the cake.

He is just going back and forth and left to right.

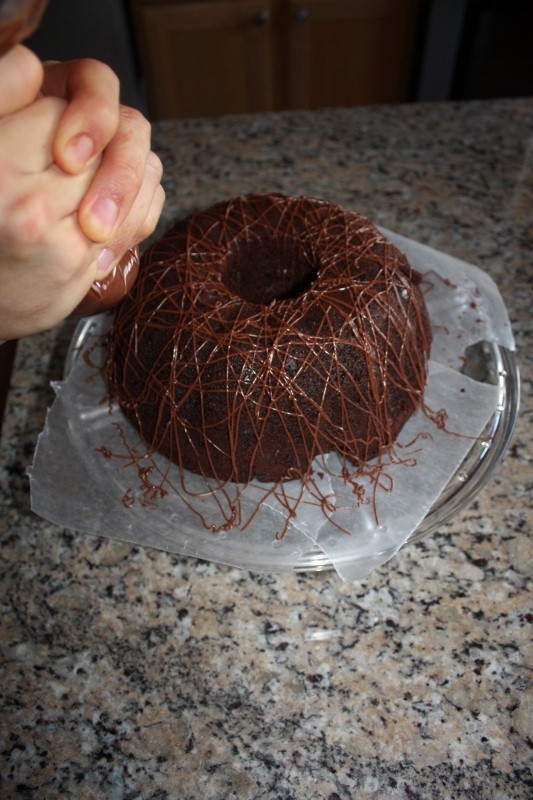
Drizzling almost finished

Drizzling all most finished. Notice he went back and forth all over the cake.

Pull away your wax paper and….. wahhhlaaaaa!  You’re done!  Doesn’t it look amazing?

Do it, go to store, pick up ingredients, make it, eat it, then run a couple of miles!!

Yummy White Chicken Chili with Bacon!

So I love chili… that is really all there is to it for me.  It is getting cold out, especially since that crazy October snow storm, which means I have had chili on my mind!  Unfortunately, my hubby just doesn’t share my enthusiasm for it.

I have been trying to find a recipe that Danny can get excited about to so that when he comes in after work and smells the chili cooking he doesn’t immediately scrunch up his face and say “Chili huh” in his obviously not so thrilled way.I decided that I should try adding different things to it that might make the chili a little more manly… I mean it did work with my spaghetti (he was very happy after I started serving it with huge chunks of sausage).  So I added bacon.  Bacon is so wonderful…  I am pretty sure you could add it to just about anything and it would be great! 

It was great!  It is still chili, but now it’s chili with bacon!  Definitely a manly step up.  I think next time I will also work in the Bacon Salt as an ingredient as well.

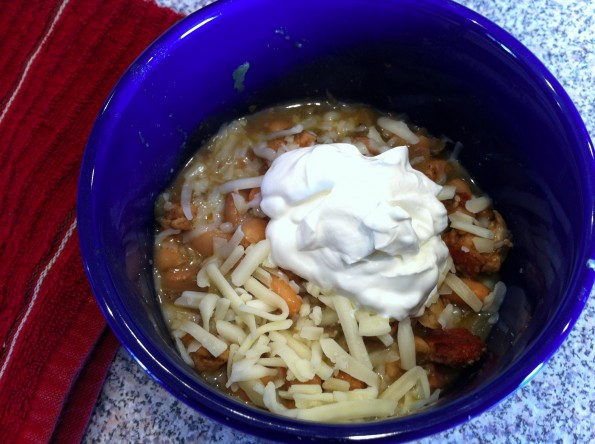
I like mine loaded with extra monterey jack cheese and sour cream

White Chicken Chili
1lb Great Northern Beans
2 lbs boneless skinless chicken breast, cooked and cubed
1 package of bacon, cooked and crumbled
2 medium onions
2 cans green chilies (4oz each)
4 garlic cloves minced
6 cups chicken broth (I like to use fat free)
2 Tb ground cumin
2 tsp. dried oregano
1/4 tsp. cayenne pepper
1/4 tsp. ground cloves
3 cups shredded monterey Jack Cheese

***Drain and rinse beans.  Add all ingredients including cheese to a crock pot and cook on low for several hours.  Serve with sour cream, shredded monterey jack cheese, and tortilla chips.  Cilantro makes a great garnish also.

Variation:  I sometimes like to dice up some tomatoes and use it as a topping with the cheese, chips, and cilantro.  Yummy!

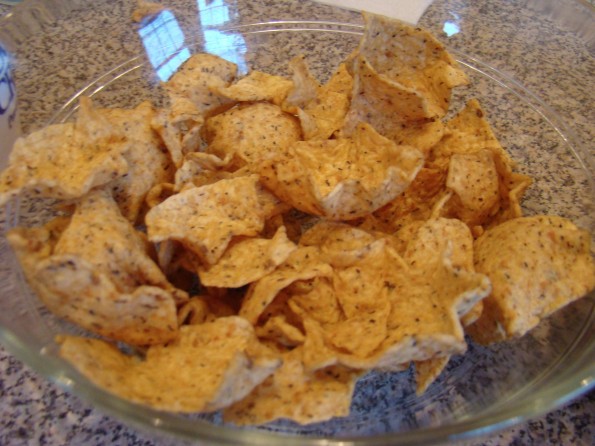
Don't forget the chips! They are great crumbled over the chili or dipped!

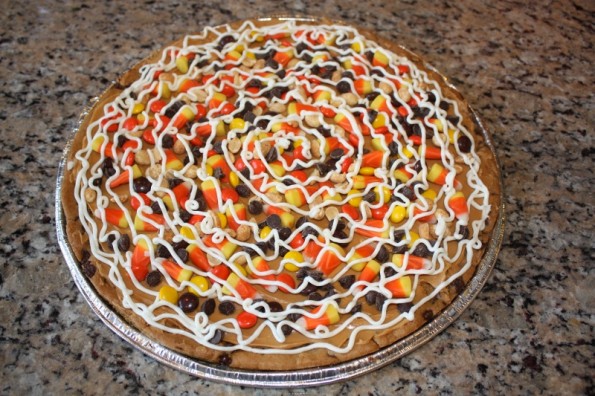
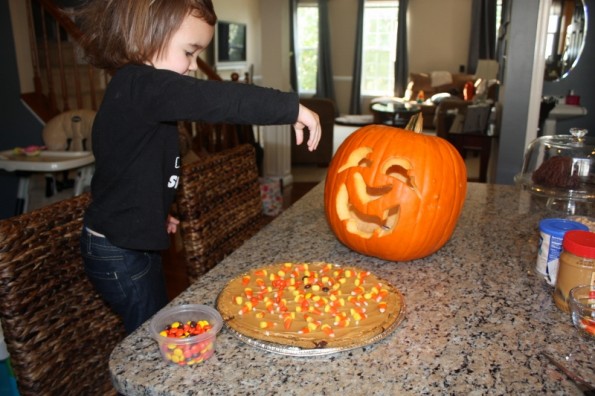
Fall Cookie Cake = Yummy

festive cookie cake

Don’t you just want to take a bite?!?!?!?!

Doesn’t this look so yummy?  My husband always says that you eat with your eyes.

I made this because we had some friends over for Halloween that have two girls that are the same age as ours.  It was our after trick-or-treating dessert!  Yummmmm.  The cool part about this dessert is that Ella really did help me make it!  I got the idea from pillsbury dot com which came from pinterest.

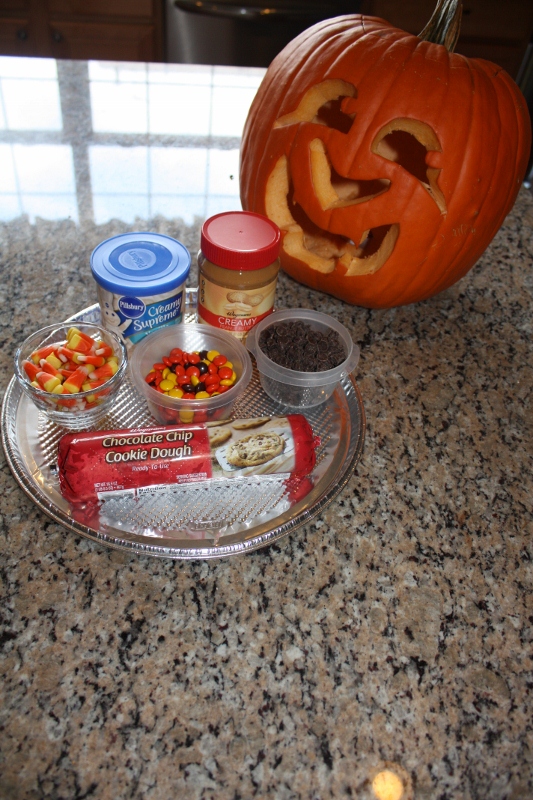
Here is what you need:

cookie cake fun

cookie dough, chocolate chips, reese pieces, peanut butter, white icing, candy corn and round pizza pan

1 roll (16.5 oz) refrigerated chocolate chip cookies
1/2 cup creamy peanut butter (I didn’t really measure)
1/2 cup reese pieces
1/2 cup dry-roasted peanuts
1/2 cup chocolate chips
1/2 cup candy corn
1/4 cup vanilla creamy ready-to-spread frosting
Directions
  • Heat oven to 350°F.
  • Line 12-inch pizza pan with foil; grease foil with shortening. Break cookie dough into 2-inch pieces; arrange evenly in pan. With floured fingers, press to form crust.
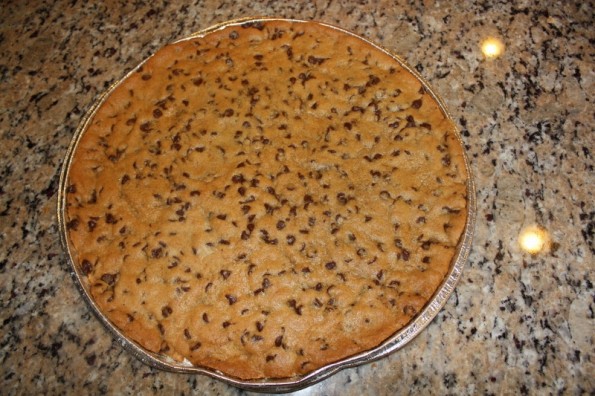
  • Bake 16 to 18 minutes or until deep golden brown. (I only baked 14 minutes)
plain cookie cake

The edges should be a little golden brown.

  • Cool completely, about 30 minutes.
  • Use foil to lift crust from pan. Carefully remove foil from crust; place crust on serving platter or tray (I didn’t have a serving tray big enough so I left it in the pan).
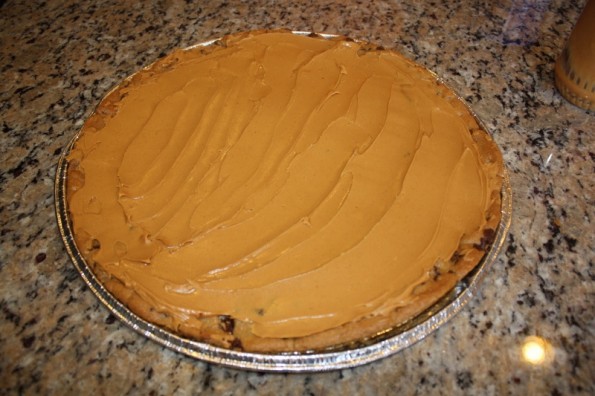
  • Spread peanut butter over crust. Sprinkle with chocolate candies and peanuts.
cookie cake with peanut butter

It doesn’t have to be smoothed perfect because there will be toppings all over it.

kid helping with cookie cake

Here is Ella sprinkling the toppings on the cake

  • In small microwavable bowl, microwave frosting uncovered on High 10 to 15 seconds or until thin enough to drizzle. Transfer to small resealable food-storage plastic bag. Cut small hole in 1 corner of bag; drizzle over cookie pizza.
You’re done!!  It’s so easy, so yum and oh so fun!
cookie cake helped by 2 year old

She’s proud of her work!

fall cookie cake piece

Can’t resist, huh?

I made my husband take the leftovers to work the next day and they were all gone before lunch!


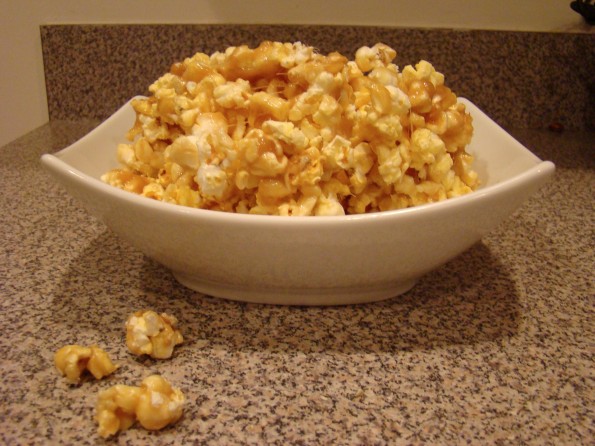
Oops! The best Caramel Popcorn Mistake!

You guys are going to love this!  In preparation for a movie night, I started making some chewy caramel popcorn from a recipe I have used a few times before.  It’s a simple recipe, but I was multi-tasking as mom’s tend to always be doing.  I mean really, since I have had kids have I ever been able to just do one task without simultaneously doing or thinking about several other things at once?!?!?!

Anyway, as I was making this yummy caramel to pour over the popcorn I didn’t quite have my head in the game.  I poured the sauce over the popcorn and started mixing, turned around and saw my key ingredient sitting on the counter unopened.  Dang!  It was too late to add it since it was supposed to be cooked in the saucepan before being poured over the popcorn. I am very happy to report that the popcorn was awesome anyway!  It was way different than the original recipe, but I loved it.  The caramel sauce didn’t quite cover all the popcorn leaving the salty butter portion exposed while still having the sweet caramel on some of it.   I am telling you, it is the perfect combination of sweet and salty!  So dang good that it didn’t last 10 minutes at my house between me and the kids.

Sweet, yet salty! Soft, yet crunchy! So so perfect!

I definitely plan to keep this recipe in the popcorn rotation!  It is too good not to!  Here is what I did…

Sweet and Salty Caramel Popcorn
Accidentally adapted from the-girl-who-ate-everything.com located here
1 bag of extra butter microwave popcorn
2.5 Tb of Butter
1/3 cup of light brown sugar
1/3 cup of light corn syrup

***Pop popcorn as usual.  Put the popcorn in a bowl, but make sure you remove all the unpopped kernels first.  Melt the butter in a small saucepan with the sugar and corn syrup.  Bring to a boil. Reduce the heat and cook for a 2 to 3 more minutes. Stir with a spatula constantly.  The longer you cook the caramel, the harder it becomes.  I like mine semi-crunchy without being too hard so 3 minutes was perfect for me.  Pour the caramel over the popcorn and mix well.  Delicious!


Trunk or Treat Party!

We took the kids to a Trunk or Treat party at our church last night.  It was so much fun!

The car parked next to us had a life size skeleton with motion sensors.  If someone walked close to it, the skeleton would play music and dance.  To say my barely two year old was obsessed with it would be an understatement!  He spent most of the night running to it and pointing, “Dance bad guy! Dance!” and then laughing and dancing with it.  It was hysterical to watch and I am so sad that it was too dark out to get a good video of it.

My three little guys waiting for the party to start!

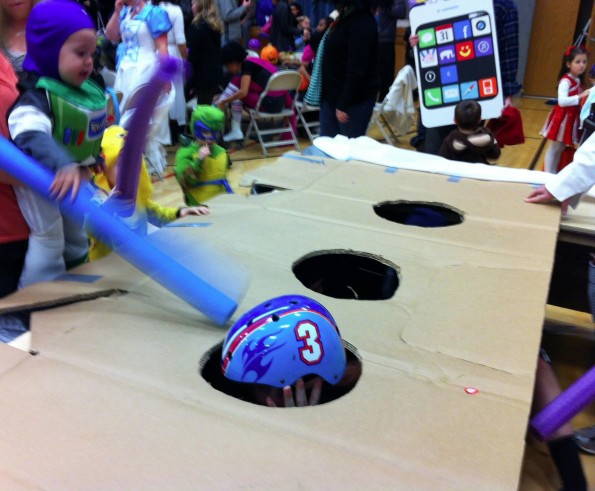
After the trunk or treating part we all went inside for some cupcakes (as if we didn’t already have enough sugar) and some fun and games.  The favorite game was Whack-A-Mole.  The line to play this game wrapped far around the table!  The wait was well worth it though!

You got the chance to WHACK some real moles (12 to 14 year old Deacons) with a water noodle!  The Deacons would poke their heads out of the holes and the kids would nail them!  I am not sure the kids will ever have so much fun again!  Even my two year old got in on that action!

My two year old ready to Whack some Deacons!

The youth also put on a haunted house as they do every year, but this year I actually thought it was pretty good.  They some how found a way to turn off the emergency fire lights this year so the room was completely dark before the strobe lights started flashing! My hubby was helping work the spook ally so I felt pretty good about letting my almost three year old (yes, I have a 2yr old, 3yr old, and a 6yr old… all boys) go through it with me.

He loved it!  Someone would jump out at us with a scary mask on and he would yell the fakest “AAAAHHHH” you have ever heard.  It made everyone in the spoke alley laugh.  Although, I was a bit embarrassed after we came out the exit when my three year exclaimed with glee, “I saw Daddy dead!”  Maybe I shouldn’t desensitize him so soon!

Here’s to a fun Halloween!!!

Daisy Hair Bow Tutorial!

Because I have two girls, I’m an accessory addict!  I just love them matching.  However, even before I had my first daughter (but knew she was a girl), I was making different types of hair bows for her.  This style is a newer design, but I think it is so cute!

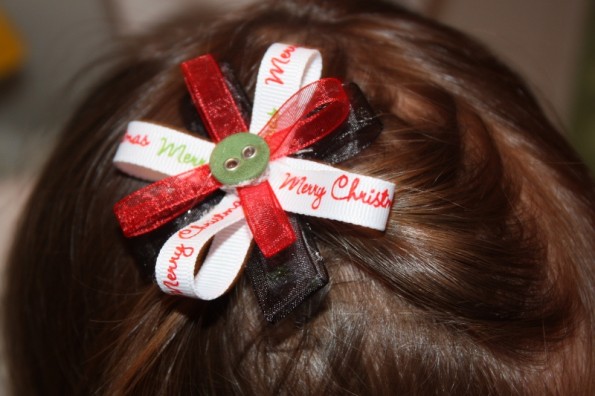
christmas daisy bow in hair

Bow in my 2 year old's hair

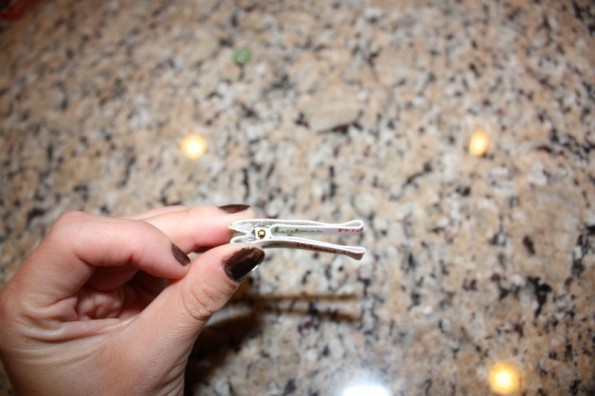
First, I take the alligator clip and wrap it with ribbon all the way around it.  This helps with it staying in fine hair (which most little girls have) and it makes it so the silver doesn’t show.

alligator clip wrapped with ribbon

wrap one of the ribbons all the way around the alligator clip

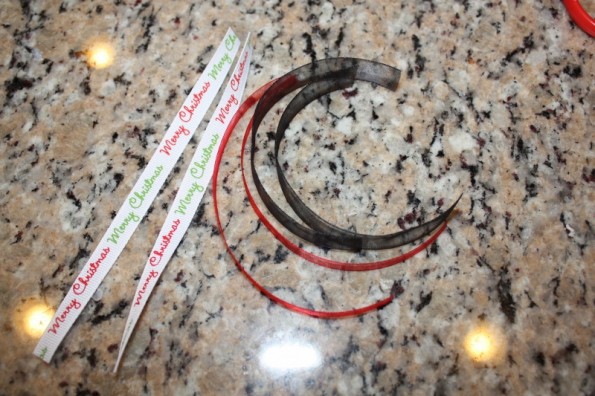
Next, I take three different types of ribbon and cut it into about 6 inch pieces
**you can choose the length, just remember the width of your bow will be about half of the length you cut the ribbon.

ribbon cut for daisy bow

my 6 pieces of ribbon

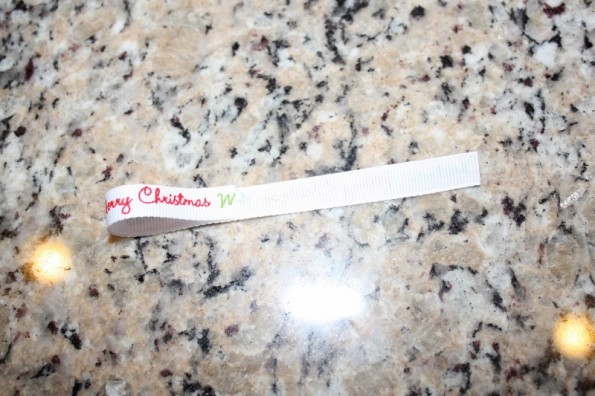
Then, you fold the ribbon in half (so you know where the center is) and you put glue across the fold.

folded ribbon for daisy bow

fold ribbon to halfway and glue it down

Repeat with the other side.

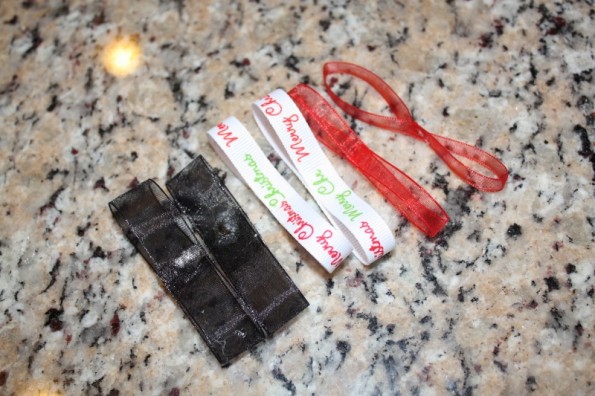
Fold and glue all of your ribbons.

glued ribbons for daisy bow

*all of the ribbons glued in the middle

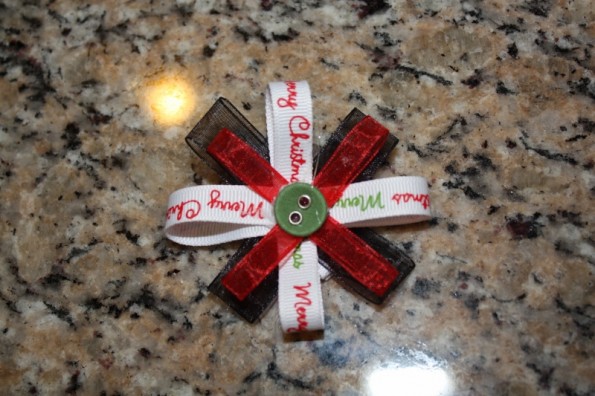
Next, I glued the black ribbons in an x-shape and then the Merry Christmas ribbon and then the red.  I put them on top of each other with the button on top and glue the bottom ribbon to the alligator clip and wahlaaaaa, we have ourselves a bow.

Christmas Daisy Bow

Finished bow!

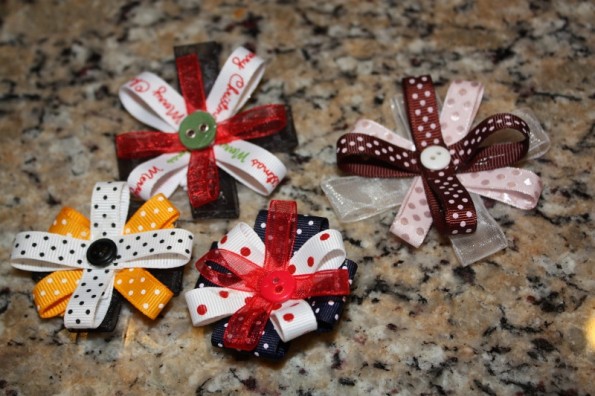
Here are some of the others I have done for the girls!

Different daisy bows

A few of the Daisy bows that I have made

Couple of side notes:

  • You can get all of the supplies at any craft store.
  • You can use all types of ribbon for this bow.
  • Sometimes I use thicker ribbon on the bottom.
  • Play with different designs!
  • Save your extra buttons from clothes!!

Cinnamon Rolls From Scratch!!!

When I asked my hubby what memories makes him think of family, in particular his mom, he told me he remembers how his house smelled of yummy food cooking when he came home from basketball practice or from a friends house.  For some reason, the smell of delicious food baking gives us that warm comfort feeling of home.

The best cooking in my family comes from my Grandma.  My siblings and I (there are seven of us kids) would cheer when we found out we were going to visit grandma because she is the super hero of cooking.  Now that we are all grown (the youngest of us is now 20 years old) we have been begging for all the memorable meals we remember having at Grandma’s.

We must have finally put enough pressure on her because she finally put together her own cook book of her most trusted and go-to recipes she has used over the years.  It is family recipe book now that she gave each of us grand kids for Christmas.

My sisters and I always laugh because sometimes recipes in my grandma’s book have strange instructions we feel are unnecessary, but every time we choose not to follow them to the exact detail the recipe is off just a bit.  Trust me… Grandma knows best when it comes to cooking and baking!

So this Cinnamon Rolls recipe can be found in this oh-so-coveted book of recipes.  I am told it is not an original recipe of my Grandma’s, but one she got from someone who got it from someone else, who may have gotten it somewhere else.  My mom has been baking them for years now and has taught me all the tricks!  Mom’s best advice:  It’s all about how much flour you add.  If you add too much the rolls will be too dense and stiff.  The key is to add just barely enough (the lease amount of flour you can get away with without the dough being too sticky to work with), so that you rolls will be soft, chewy, and fluffly.
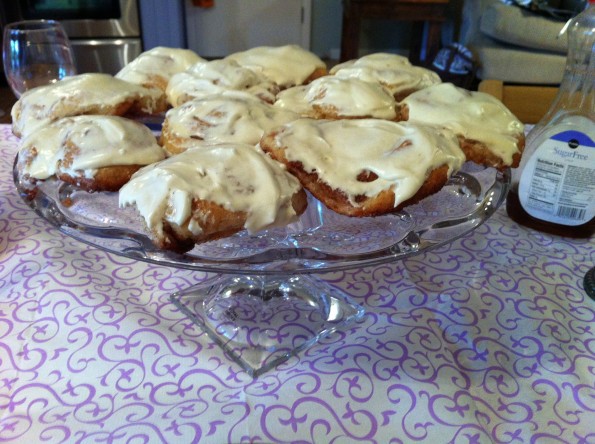
By the way, this recipe makes 4 to 5 trays of cinnamon rolls (48 or so rolls) so if you don’t have a big crowd to feed (with seven kids and all the friends coming in and out we always did!) I would strongly recommend cutting this recipe in half.

Cinnamon Rolls
Makes 48+ rolls

  • 1/2 Cup sugar
  •  2 T yeast
  • 2 C warm water (not too hot or you will ruin your yeast)
    ***let this mixture stand 5 minutes until it looks a little frothy from the yeast
  •  2 Cups scalded milk (or 2/3 Cup powdered milk with 2 cups warm water) -my mom prefers to use powdered milk, although I have never been sure if that was a Mormon thing (recycling her food storage) or a baking thing, either way I have been trained to use the powdered milk.
  • 1/3 Cup oil
  • 1 1/2 T salt
  • 1/2 – 3/4 cup quick oats
  • 9ish Cups flour
    ***Mix in all ingredients but the flour.  Using your dough hook, add one cup of flour at a time, mixing well (on the lowest speed) between each cup.  Once you get up to 5 cups or so, pay very careful attention while you add your flour.  You want to add enough so that the dough is soft, but not sticky.  It is a good sign that you are close to the desired flour amount when you see that the dough is all staying together and no dough is left on the sides or bottom of the bowl.  Knead dough in mixer with dough hook for about 7 minutes (yes my mom and grandma use to always do the kneading by hand, but even they agree that it just isn’t necessary to do it that way anymore).
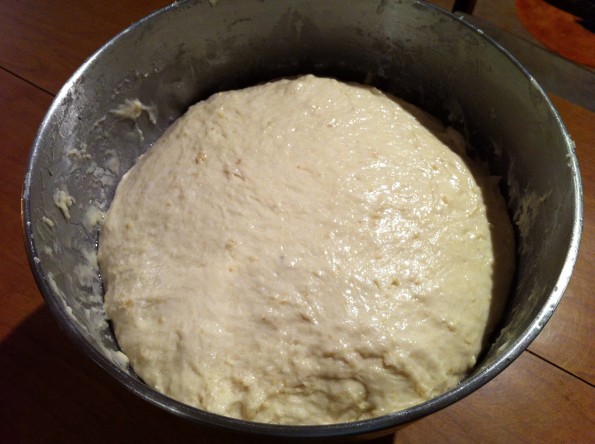
Here is the soft, but not stick dough ready to start rising

Step 1:  After you have your dough ready, put about a tablespoon of oil on it and softly spread it across the surface of your dough.  Try to get it on the sides and bottom of the dough as much as possible.  Put a clean cloth over the top and let it rise until it is about double the size (30 – 45 minutes).  If it is a cold day or you are in a hurry you can use my quick rise method.  I put my oven on the warm setting until it is preheated, then turn it off and put the rolls in the oven where is it perfectly warm for them to rise.
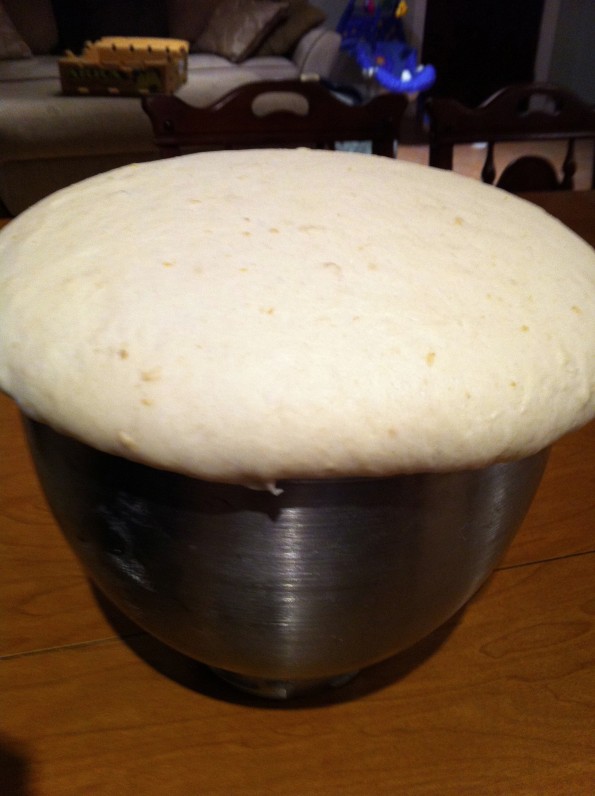
This is what it looks like after it is done rising when you use the smaller sized kitchen aid bowl

Step 2:  Divide dough into four equal pieces.  Spread a little oil across your rolling surface. Using one piece at a time, roll dough into a rectangle.  Generously spread melted butter (I like to use a cooking brush to “paint” it on) over entire area.  Cover with cinnamon/sugar mixture.
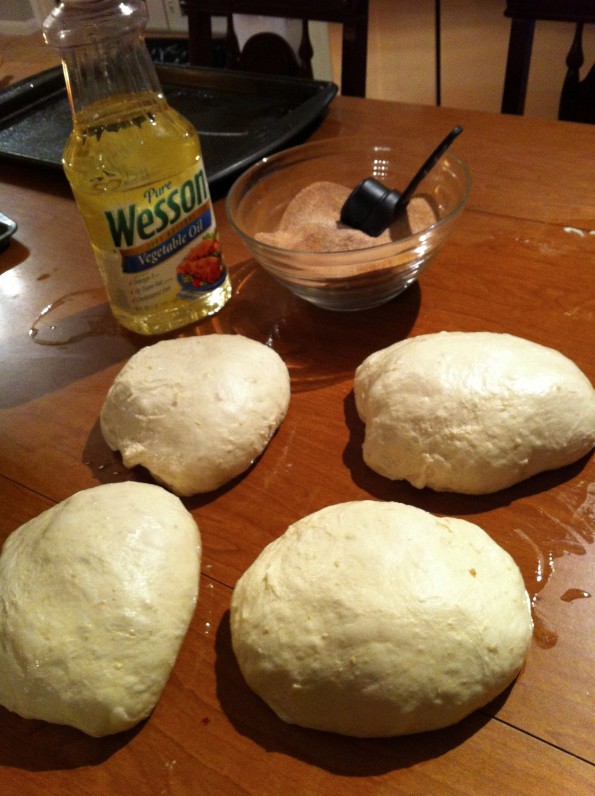
Almost ready to start rolling!

Step 3:  Roll dough lengthwise into one long roll. Be careful not to have any gaps in your roll or they may fall apart later.  Cut rolls horizontaly about 1 1/2 to 2 inches in thickness (using a pizza cutter makes nice, clean cuts).  Place the rolls on a greased pan or use parchment paper about 2 inches apart.
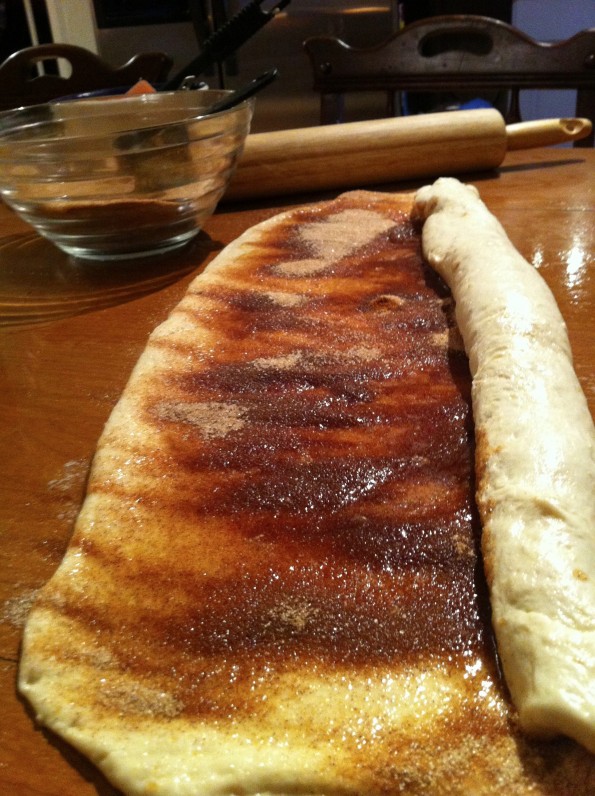
Be generous with your butter and cinnamon/sugar

Rolls placed about 2 inches a part on baking sheet, getting ready to rise again

Step 4:  Cover rolls with a clean cloth and let the rolls rise until double again (30 – 45 min) or use the my quick rise method again.
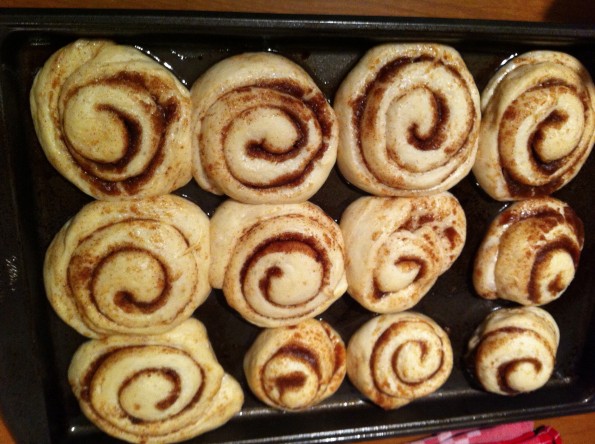
When they are done rising they should be nice and plump and touching as you see here

Step 4:  Cook on 350 for about 12 minutes
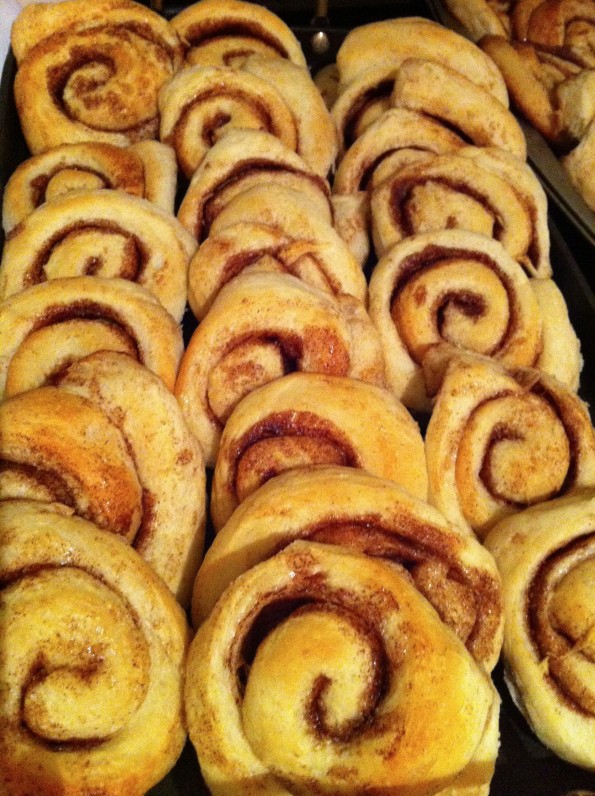
All done and ready to frost! My mom would tell you to let them cool before frosting, but I must admit I never follow that advice and can't wait to eat one warm from the oven with the frosting melting off it!

Frosting
Dont skimp on the frosting… I like to add extra to mine.  🙂
4 cups powdered sugar
1/4 t. salt
1/4 cup evaporated milk
1 t. vanilla
1/3 cup margarine
***Mix all ingredients together.  I often do a taste test here and sometimes add a little more butter or sugar until it I think its perfect.  🙂

Variations:  Add raisins or walnuts for an extra touch!  My mom recently made them using strawberry jelly instead of the cinnamon/sugar mixture… they were awesome!
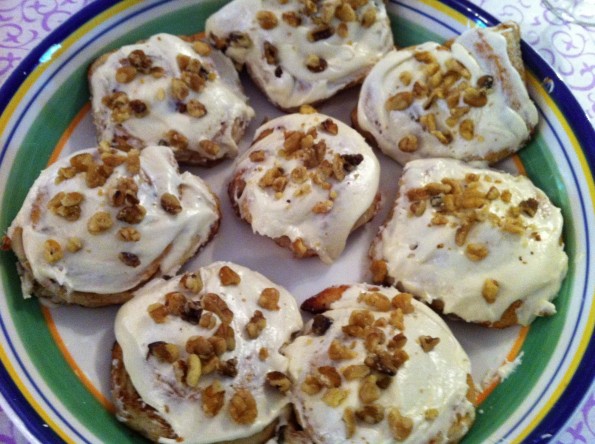
I love, love, love the walnuts variation!!!!

These are best when stored in an air tight container and just like the directions on a Cinnabon box, heat them up in the microwave for 10 – 15 seconds  before eating!  Perfection!!!!

Crepes, Crepes, and More Crepes!

I love crepes!  Growing up crepes were always a unique passion my Dad and I shared…  I say unique because when you are one of seven children in your family having something that is just yours is REALLY hard to come by.  Crepes have always been a traditional food for me… My Dad is the crepe expert and always makes them on Christmas morning and other special occasions.  He makes them so much that he never uses a recipe anymore, but he did tell me he got his original recipe from the Lion House Cook Book.  The Lion House is a famous restaurant in down town Salt Lake City, Utah.  The building itself as been around since 1856 and the restaurant’s reputation is for serving good home cooked meals with fresh baked breads, rolls, and pies being their featured items.

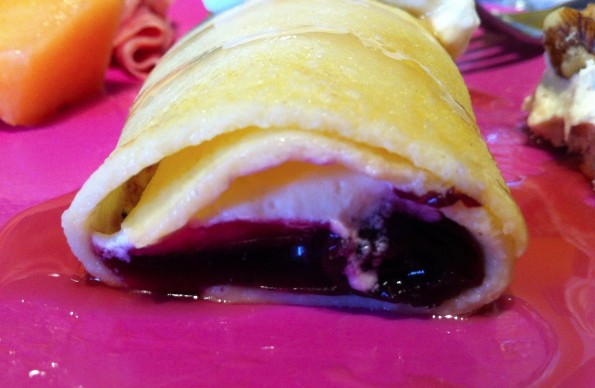
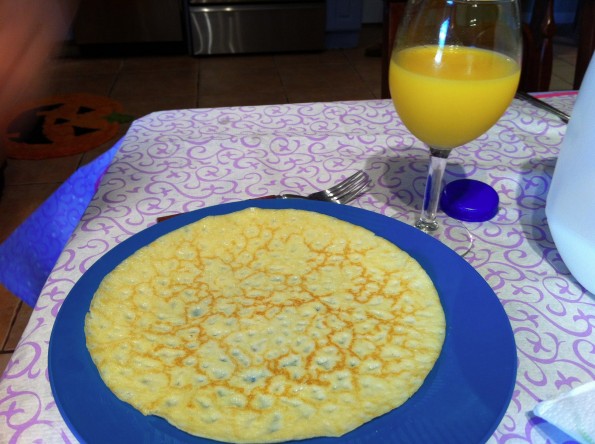
If I didn't prefer them filled with the sweet goodness of sugar, homemade whip cream, and pie filling I might be able to eat them more often!

Crepes are awesome because they can be served so many different ways.   They are no longer just a dessert or a breakfast food.  This past weekend I went to a little cafe owned by a couple from Paris while I was visiting the West Palm Beach area.  I am telling you these crepes were the most amazing things I have ever eaten!  I think the secret to great French crepes is the sauce.  The feature sauce at this little cafe was bechamel sauce.  It doesn’t really matter what you put in your crepe as long as you have bechamel sauce in it!  Not kidding!  You can have spinach, bacon, chicken, mushrooms… it doesn’t really matter, just mix it up with bechamel sauce and you are set!

Basic Crepes
From the Lion House Cook Book
3 eggs
1/2 Cup milk
1/2 Cup water
3 Tablespoon butter melted
3/4 Cup flour
1/2 teaspon salt

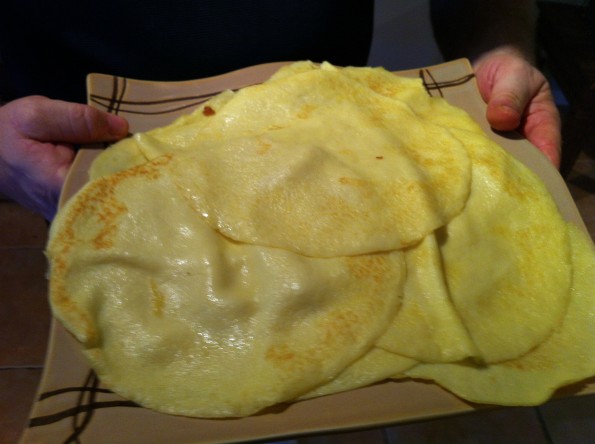
***Combine all ingredients and mix in a blender or with a high powered mixer for a minute or two. Refrigerate for 1 hour (we have never refrigerated ours and they always turn out perfect).  Poor 1/4 cup to 1/2 cup of batter into a round skillet pan.  The batter should be very thin.  Cook for just a couple minutes on each side.

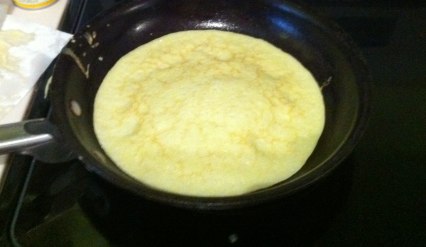
Here the crepe has been flipped once and is cooking in an 8-inch skillet pan

Bechamel Sauce
From www.frenchcookingfordummies.com
4 Tablespoons butter
4 Tablespoons flour
2 Cups milk
1/4 teaspoon nutmeg, grated
Salt and pepper

***Melt butter in a small sauce pan over low heat, but do not let it brown.  Add the flour and mix until completely combined.  Stir continuously for the next 4 to 5 minutes so that it does not brown at all.  Pour a little milk at a time while mixing, allowing the sauce to thicken as you go.  Season with nutmeg, salt and pepper.