My very creative sister came up with this cute Halloween snack to bring to her daughter’s Kindergarten party. It is very easy and was a big hit with the kids. All you need is a package of plastic spiders from the dollar store, some clear plastic cups, and some orange colored jello. Make the jello as usual and put the spider in so it looks like it is climbing out of the jello before it chills in the refrigerator.Now you have a cute and festive snack that cost almost nothing and took no time to do.
Kids can be so funny… there were a few kids in the class that said they thought the spider went potty in the jello. Random thoughts of some five and six year old kids! Gotta love it!
We took the kids to a Trunk or Treat party at our church last night. It was so much fun!
The car parked next to us had a life size skeleton with motion sensors. If someone walked close to it, the skeleton would play music and dance. To say my barely two year old was obsessed with it would be an understatement! He spent most of the night running to it and pointing, “Dance bad guy! Dance!” and then laughing and dancing with it. It was hysterical to watch and I am so sad that it was too dark out to get a good video of it.
My three little guys waiting for the party to start!
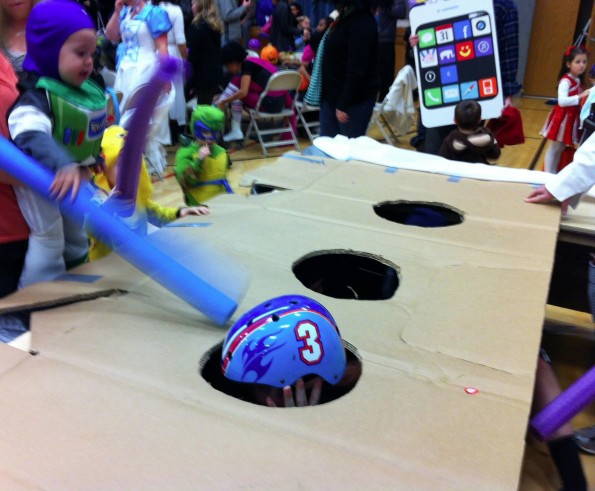
After the trunk or treating part we all went inside for some cupcakes (as if we didn’t already have enough sugar) and some fun and games. The favorite game was Whack-A-Mole. The line to play this game wrapped far around the table! The wait was well worth it though!
You got the chance to WHACK some real moles (12 to 14 year old Deacons) with a water noodle! The Deacons would poke their heads out of the holes and the kids would nail them! I am not sure the kids will ever have so much fun again! Even my two year old got in on that action!
My two year old ready to Whack some Deacons!
The youth also put on a haunted house as they do every year, but this year I actually thought it was pretty good. They some how found a way to turn off the emergency fire lights this year so the room was completely dark before the strobe lights started flashing! My hubby was helping work the spook ally so I felt pretty good about letting my almost three year old (yes, I have a 2yr old, 3yr old, and a 6yr old… all boys) go through it with me.
He loved it! Someone would jump out at us with a scary mask on and he would yell the fakest “AAAAHHHH” you have ever heard. It made everyone in the spoke alley laugh. Although, I was a bit embarrassed after we came out the exit when my three year exclaimed with glee, “I saw Daddy dead!” Maybe I shouldn’t desensitize him so soon!
My son’s first grade teacher asked me to be in charge of their class pumpkin this year. The class voted on one of their favorite book characters to create for the school pumpkin contest. Gerald the elephant won the contest so I started up on google to see the best way to create an elephant pumpkin.
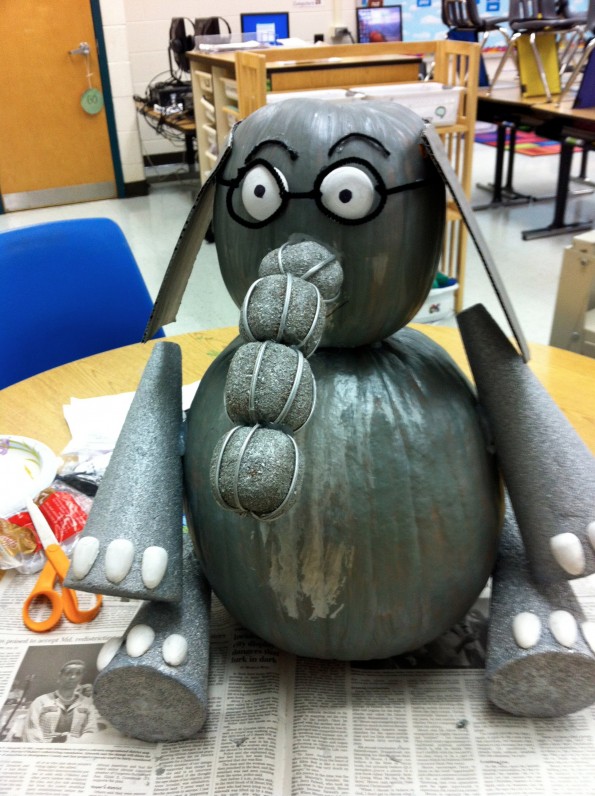
Gerald the Elephant Pumpkin – The final product
I got the idea from Michaels.com and loved it for a class project because it had so many different pieces to it that it was easy to get all 25 kids to help with at least one part.
This is the book Character the class voted for
Materials:
1 large tall shaped pumpkin (for the body)
1 small round shaped pumpkin (for the head)
4 Styrofoam cones about 9 inches long (for the arms and legs)
12 half wooden robin eggs (fingernails)
2 wooden circles (eyes)
Black yarn (eye brows)
Black pipe cleaner (glasses)
Sharpie (to draw the mouth and pupils on the eyes)
Strong Tooth picks (to secure pumpkin heads together and limbs to the pumpkin)
4 artificial pumpkins (to glue together to make the trunk)
Cardboard (to cut ears out)
White paint (for the fingernails and eyes)
Grey paint (for the pumpkins, legs, trunk, and ears)
Instructions:
Paint the pumpkins, cylinders, artificial pumpkins, and ears grey
Paint the wooden half robin eggs and the wooden circles white
After the pumpkins are completely dry, place four or five toothpicks in the bottom of the smaller pumpkin about halfway in. Carefully put the small pumpkin on top of the large pumpkin pressing the toothpicks into the larger pumpkin
Glue the artificial pumpkins together in the shape of a trunk, then use a tooth pick to secure trunk to the pumpkin face
Glue three fingernails to the large end of each cone and secure cones to the large pumpkin with toothpicks
Use a sharpie to draw a mouth on the pumpkin and and pupils on eyes
Use a hot glue gun or super glue to glue the eyes, eyebrows, ears, and glasses to the pumpkin


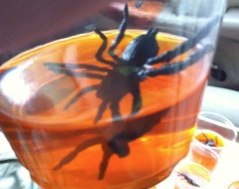 All you need is a package of plastic spiders from the dollar store, some clear plastic cups, and some orange colored jello. Make the jello as usual and put the spider in so it looks like it is climbing out of the jello before it chills in the refrigerator.
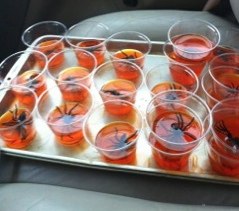 Now you have a cute and festive snack that cost almost nothing and took no time to do.