Enchanted Mommy

My Top 10 Favorite Baby Items

Of course these are my opinions, but I would swear that these are the best out there!  I will explain each one.

1. Huggies Baby Wipes
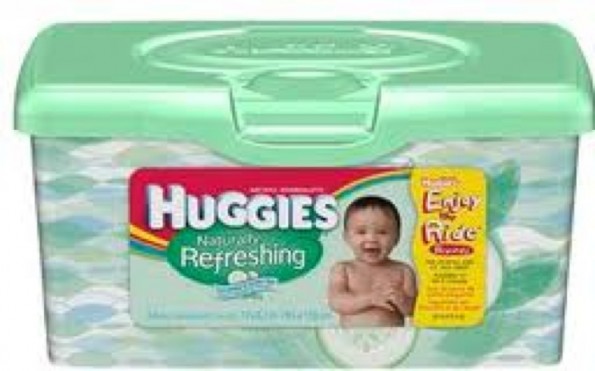
Huggies Wipes

Huggies Wipes

I’ve tried Huggies, Pampers, Sam’s Club brand, Parent’s Choice, Target brand and Wegmans brand.  These are by far my favorite for a few reasons.  They are thick, so they get all the poopie off with one or two.  I also LOVE the way they come out of the dispenser.  You can rip one off at the time.  I also love the cucumber scent.  LOVE THESE!  I’ve found the best price at Sam’s Club.


2. Vick’s Warm Mist Humidifier

good for colds

Vick's Warm Mist Humidifier

Every mom must own a humidifier.  I use mine all the time, especially in the winter.  This one is my favorite.  I’ve also tried the frog one (they also make a cow and a duck I believe), didn’t do it for me.


3.  Pampers Baby Dry Diapers

Pampers Baby Dry Diapers

Best Diapers!

I use these once they grow out of the swaddlers– use those for sure at first.  I’ve tried just about every kind of diaper out there.  I am not a diaper snob by all means.  My first daughter did okay with some different kinds of diapers, but not my second.  I even somehow (how I don’t know) washed one of these and it came out totally fine, none of the little beads busted out.


4.  Desitin Butt Cream
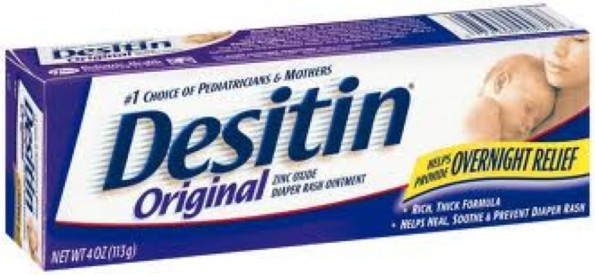
Desitin

Desitin

My favorite butt cream is desitin original.  I’ve tried them all (A&D, balmex, butt paste, petroleum jelly).  For some reason my kids are BIG poopers, it even goes all the way up their back (tmi right???).  This has worked the best for me.


5. Travel Swing
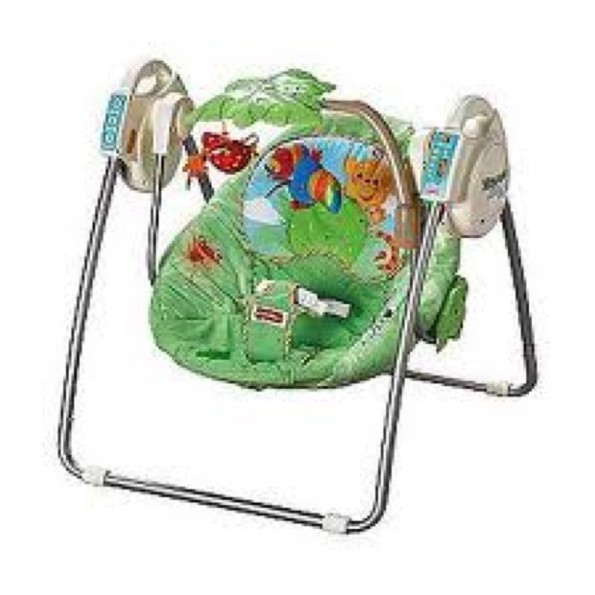
Travel Swing

Travel Swing

These are a must!  You can easily take it anywhere you go or even keep it on a different level of the house.  I kept this in our bedroom and the bigger one in the family room.  Definite lifesaver.  I could shower!


6.  Carters Sleepers

Carters Sleeper

So soft!

Carter’s makes awesome and soft sleepers.  It’s so weird to me to see any baby under 6 weeks in anything else.  These are so comfy for them and very inexpensive.  Remember, newborns aren’t made to show style yet!  I chose this image because my girls wore this same one!!

7.  Avent Bottles

Avent Bottles

Avent Bottles

I am an advocate of breastfeeding, but sometimes it doesn’t work out (I only lasted 6 weeks with my first).  I like these bottles because there aren’t a kagillion parts and they are good quality.  You can also buy handles for them later on when you are teaching your baby to hold them.

8.  Halo SleepSack

Halo SleepSack

Halo SleepSack

I used to be a big fan of the kiddopotamus sleepsacks, but once I heard it didn’t help with hip dysplasia, I moved to these.  They are a little pricey, but they help your baby feel warm and swaddled like they are in the womb.  My advice is to get 3 for washing purposes!

9.  Lasinoh Lanolin Cream
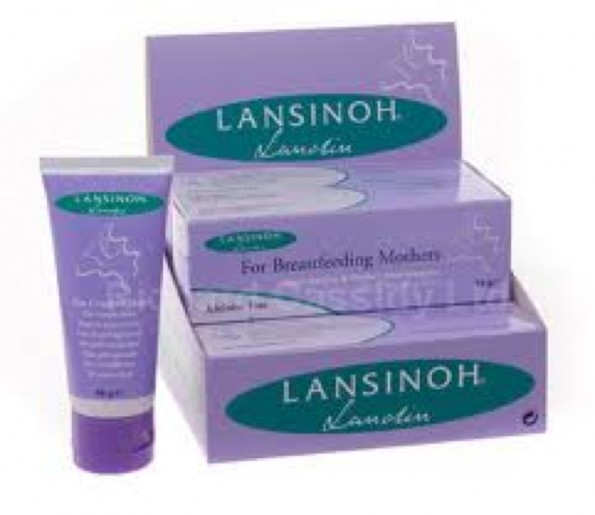
Lasinoh

Lasinoh Cream

Okay, this was a lifesaver for me.  It totally helped with cracking while breastfeeding.  Use this EVERY single time after you breastfeed for the first two weeks and you will not crack or bleed.  Trust me on this.  Some people even use it before having the baby so your nipples are softer and ready to feed.

10.  Jumperoo

Rainforest Jumperoo

Jumperoo

Both of my girls loved this.  I could spend 30 minutes getting things done while they jumped.  I also believe it really helps with leg strength.  Talk about awesome!


Now, I wish I was Oprah and could give each of you my favorite things.  Bummer.  At least you can register for all of these!  Happy babies make happy Mamas!

Chicken Spaghetti

You know how much I love recipe parties.  Last year, my neighbor had one and gave away this recipe.  It is so delish and there are always plenty of leftovers for lunch the next day.  This is also a great recipe to take to a brand new mom (always do something for your new mom friends).

chicken spaghetti

yum yum


All you need is:

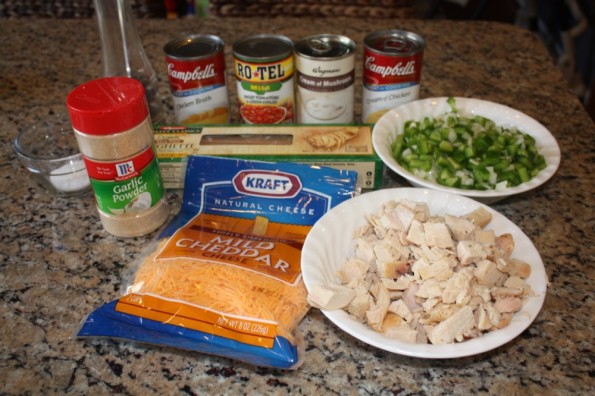
chicken spaghetti ingredients

can of rotel, cream of mushroom soup, cream of chicken soup, chicken broth, thin spaghetti, cheddar cheese, 1 lb chicken tenders, 1/4 cup chopped green peppers, 1/4 cup chopped onions, 1 1/2 cups water, salt, pepper, garlic salt

1 10 oz. can chopped Rotel
1 can cream of mushroom soup
1 can cream of chicken soup
14 oz. thin spaghetti
1 cup of grated cheddar cheese
1 pound of chicken tenders (I cut mine up)
1/4 cup chopped green peppers
1/4 cup chopped onions
1 1/2 cups water or chicken broth
salt, pepper, garlic salt (to taste)


Directions:

Bake chicken on baking sheet in oven: 350 degrees for 1 hr 15 minutes– cut up into bite size pieces.
Heat Rotel, soups, broth, onion, bell pepper and seasonings. Add 1/2 cup cheese.

spaghetti chicken on stove

cooking all together

Cook spaghetti.
Mix chicken, sauce and spaghetti.  Put into 9 x 13 baking dish.  Sprinkle remaining cheese on top.  Cook on 350 for 30 minutes.

Wahlaaaaaaaa.

delicious chicken spaghetti

so delish!


Delicious Slow Roasted Beef Brisket

Last year I ordered one of those grass-fed steers from a local farm in my area.  Seriously, one of the best things we ever did.  We got A LOT of fresh beef at a cost that was better than what you pay per pound out a grocery store and the meat was fresher, leaner, safer, and much better tasting.

I looked in the freezer last week to see what I could make and noticed my  last piece from this order in there.  It was a beef brisket.  I had never cooked brisket and didn’t really know what to do with it… hence it was the last piece.  So I set up to research the best way to cook brisket and the best recipe.  I checked lots of websites and talked to my brother who has worked at a fresh bbq joint for years now.

I don’t want all that research to go to waste so I figured I would let you all piggy back on the research I did and tell you the best brisket recipe out there!  I used a combination of information to come up with this recipe.  It turned out perfect!  It was tender, juicy, and delicious!
All the information I came across told me a dry rub was best and not to add any liquid to the pan as it roasts.  The brisket is fatty enough on its own that you really don’t need to add any liquid to it.  Also, if you are picking out a brisket, do not get the corned-beef brisket.  You wil not have the same results.

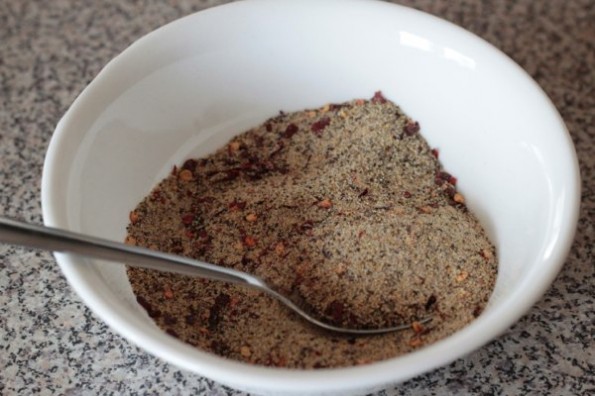
Here is what I came up with for the dry rub:
DRY RUB:
2 Tb salt
2 Tb black pepper
1/2 Tb red pepper flakes
2 Tb garlic powder

OTHER INGREDIENTS YOU WILL NEED:
1 large onion
2-3 sweet potatoes
2 cups of baby carrots

You want quite a bit of spice for your dry rub. Use every bit of it.

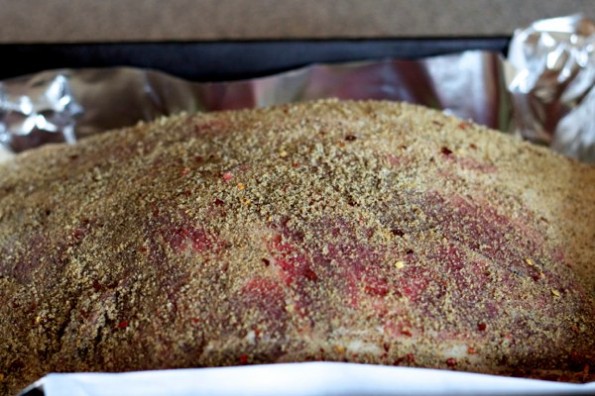
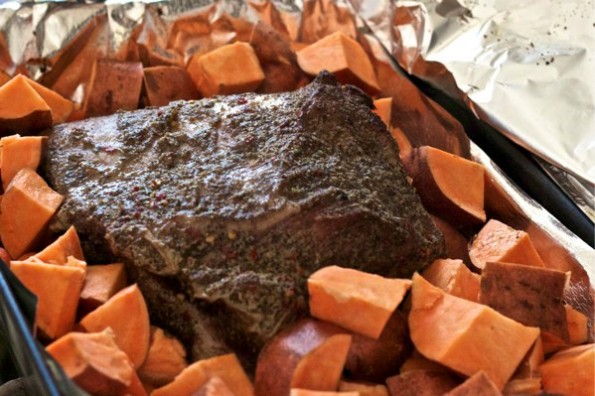
Rub the spices over every piece of the meat, even crevices. As you can see, it is a lot of spice! Don’t be scared!

INSTRUCTIONS:  
You do not need to brown the brisket as you would with tradition beef roasts.  The trick to the brisket is to cut up 1 whole onion and place it in the middle of your roasting pan in one big pile.  Lay the brisket directly on the onions with the fattiest side facing up.  This allows the juices from the fat to drip through the meat and keep it tender and flavorful.  Cover the pan tightly with tinfoil and slow roast on 250 degrees for 5 to 6 hours.  This is for a 5-6 lb brisket.  You will need to adjust the time for larger or smaller cuts.  Let the brisket sit for 20 minutes before carving.  This allows the juices in the meat to redistribute and gives you a much more flavorful taste.

WHAT TO DO THE LAST HOUR:
Add some freshly cut vegetables the last hour of baking.  Some recipes said it was fine to leave them in the entire time, but I feel like the vegetables always turn to mush.  I like my vegetables tender, but not to soggy or mushy.  I added freshly cut sweet potatoes and carrots sprinkled with salt, paper, and onion flakes.  Then I covered it back up with the tinfoil and let it roast for one more hour.  The vegetables were perfect.  They absorbed the juices and spices from the  brisket and had a great flavor to them.

Sweet potatoes cut and ready to go in for the last hour of roasting

Carrots and sweet potatoes are placed all around the roast so they can absorb the juice and flavor from the brisket.  I always put the carrots towards the bottom as they are a much firmer vegetable and can cook better at the bottom.

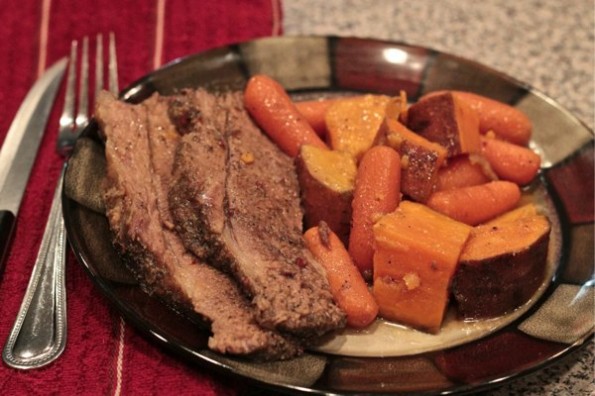
Perfection! Add a small side salad to this and you are set! This is a great meal to have with company!


Find Fun Things To Do In The Winter

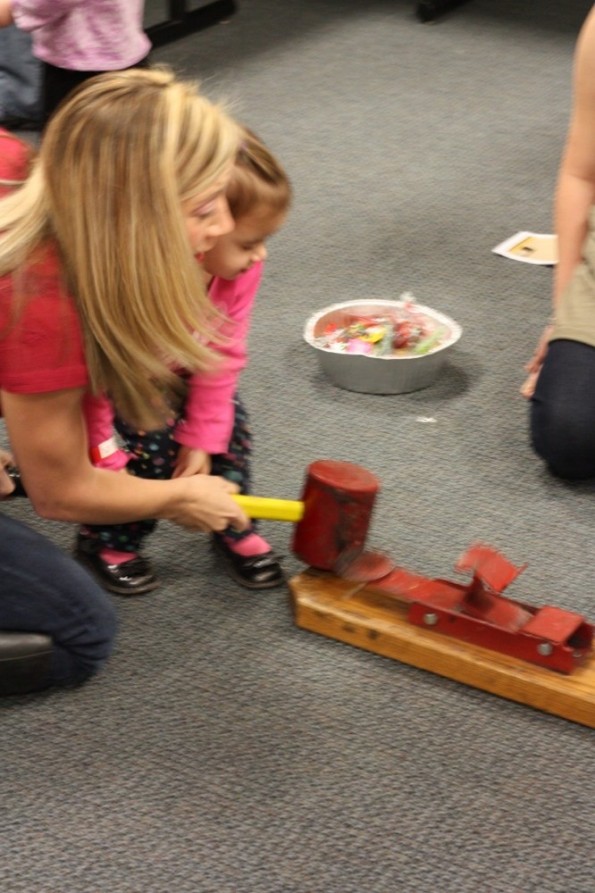
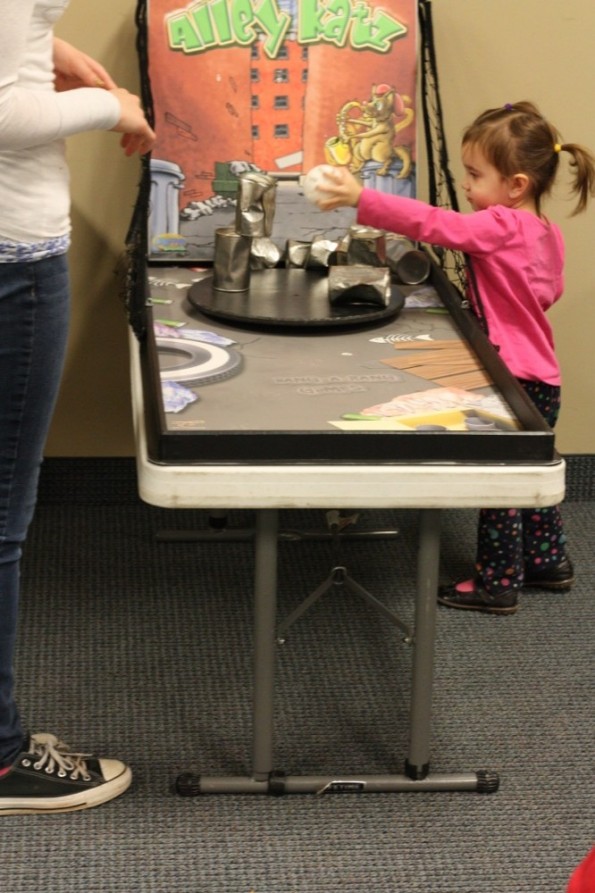
If you think winter is hard on you, imagine being an active kid.  I’m always looking for things to do with my over-the-top energetic 2 year old.  It’s almost impossible to take her outside in the winter while also having a 10 month old.  So, we try to find things to do inside.  Last weekend we took the girls to a chocolate festival at a church.  My girls had a lot of fun!  I feel like churches are always advertising fun things they do to reach out to the community.  This event was raising money for a missions trip and it cost only $5 for each child.  This included balloon animals, 2 bounce houses, lots of games and candy.  They also tried raising money by selling baked goods and served lunch, but you could just get away with the $5 per child.  So cheap and such a great outing.

bounce house

Having fun in the bounce house!

Balloon with baby

They even had balloons!

Games at a winter activity

Even the parents helped!

2 year old at church function

Having fun playing a game.

My advice is to get out and see what the community has to offer.  Most of the time it’s very affordable and your kids will be worn out for that AWESOME afternoon nap.

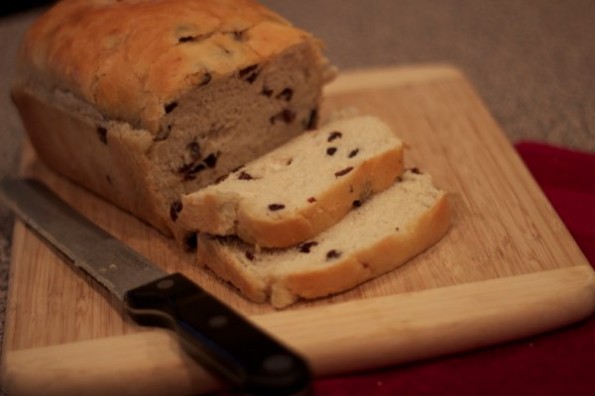
Homemade English Muffin Raisin Bread

Fresh from my Grandmother’s own recipes is a the most delicious english muffin raisin bread.  I always get a craving for it on cold winter days.  I dont know what it is, but the smell of freshly made bread floating through your home gives such a wonderful comfortble feeling… for me it really is the feeling of home itself.

Im sure I’ve said it before but, my mom is the master of homemade breads and rolls.  She has her own recipes, most of which were passed on to her by her mom.  I love that kind of history with recipes.  It is so fun to know I am baking recipes that my mother and grandmother grew up making.  Although I will never be able to bake as well as them, I do like to try.  I found with baking any breads or rolls… it really is an art.

You have to get a feel for your dough and know when to stop adding flour and when your dough is done rising.  I can tell I am getting better with each batch.  When I first starting making rolls and breads I added way to much flour and had dense/thick bread instead of fluffy and soft bread.  The trick is to add as little flour as you can get away with without it being too sticky to be able to form your bread/rolls.

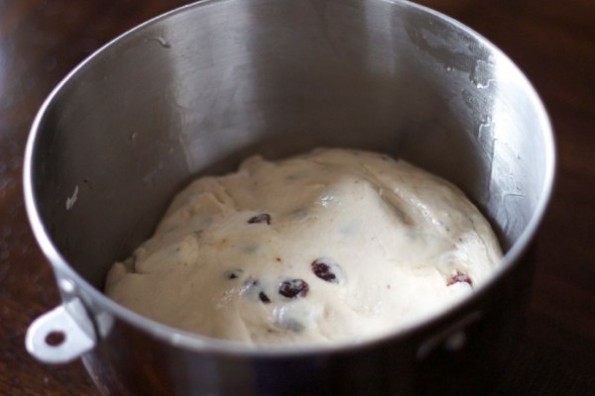
This is what it looks like before it starts to rise

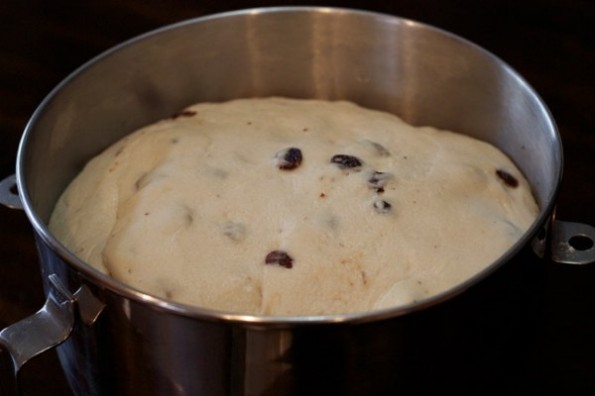
This is the dough after it has been left to rise

So I am going to share my grandmother’s recipe with you, but keep in mind I did modify it.  My mom and Grandma can practically make this in their sleep so whenever I am using their recipes I have to sort of fill in the blanks.  Also, my mother had seven children and my grandmother had six so all of their recipes have been meant to feed a crowd.  Since I very rarely need to make 6 loaves at a time, or 5 trays of cinnamon rolls, I have to trim them down.  I know it sounds easy, but if you saw their recipes written down as I do you would know what I mean.

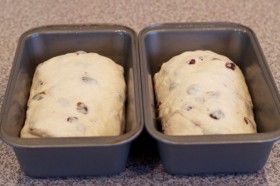
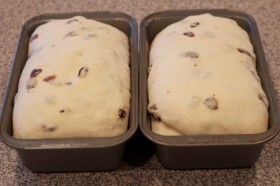
Bread in the pans before rising

Bread in the pans after rising

English Muffin Raisin Bread
Makes 2 loafs
3 cups warm water
2.5 Tb dry yeast
1/3 cup cornmeal (whole grain if possible)
3/4 cup sugar
1 Tb salt
2 cups raisins
6 – 8 cups flour

1.  Sprinkle the dry yeast across the surface of the warm water in your mixing bowl and let sit for a few months until the yeast is mostly absorbed and a bit frothy around the edges of the bowl.
2.  Add the cornmeal, sugar, and salt and mix briefly
3.  Add 3 cups of flour and then your raisins and  mix using a bread hook
4.  Gradually continually adding flour until your dough is soft, but still slightly sticky (not sticky enough that you can’t work with it).
5.  Knead dough for 5-6 minutes using your bread hook (Yes grandma, I cheat and no longer Knead by hand…  hope you still love me)  🙂
6.  Put about a capfull of vegetable over the soft surface of the dough making sure to coat the bottom of the dough as well.  Let rise until double (about 30 minutes).
7.  Punch down, divide dough in half and form dough into two loaves.  Coat pans with non-stick spray before putting dough in.
8.  Let rise again until double (about 30 minutes)
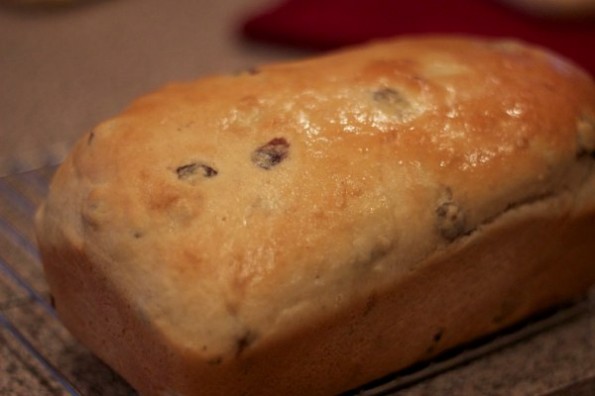
9.  Bake on 350 degrees for 25 – 30 minutes.  I put tinfoil over mine the last 10 minutes so the tops do not brown too much.  Remove from pans immediately and let cool completely on wire rack before wrapping up.  Brush to tops with melted butter for better presentation.

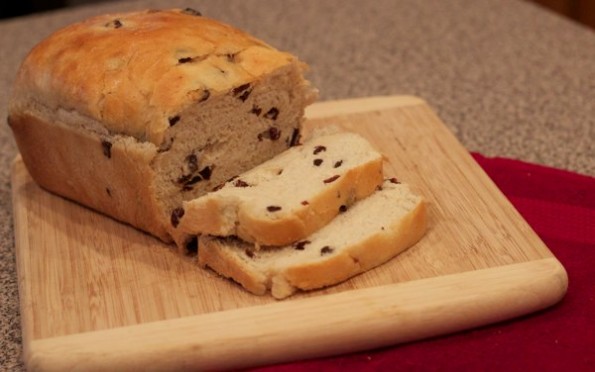
This is bread is absolutely delectable with honey butter or even cinnamon and sugar toast!  The key to honey butter is equal parts butter to honey.  🙂  Enjoy!  I know you will be making this one for years… it is a keeper.


Preschool: Letter K

I found some fun letter K activities to do with the kiddos when it was my turn to teach preschool last month.  Don’t ask why I am just not posting them… life just gets busy!

Anyway, we read the story of Humpty Dumpty during circle time after we had talked about the letter K.  It wasn’t the basic nursery rhyme, but a more detailed story with lots of fun pictures.  I told the kids before the story to listen for someone important in the story who started with the letter K.  The kids are still mostly 3 year olds and needed a few hints before coming up the with the King as the important person I was referring to.

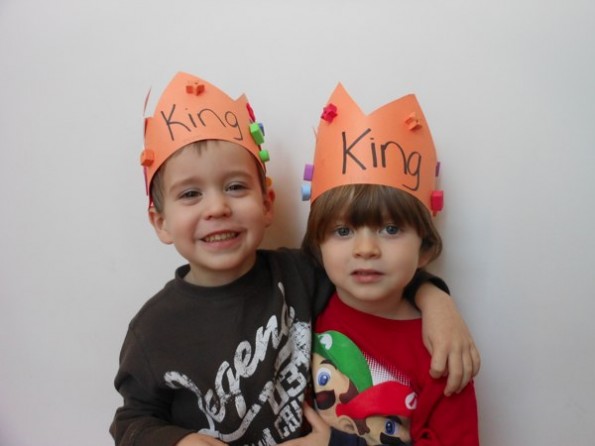
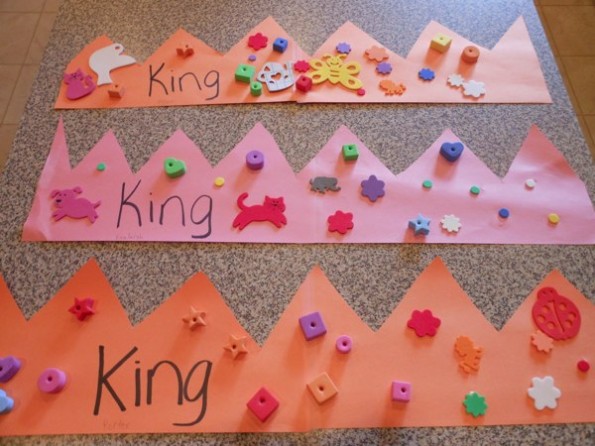
So we made ourselves Kings by cutting and decorating our own crowns and then walking around the house pretended to be Kings.   The kids really had fun with it.

Love these little Kings!

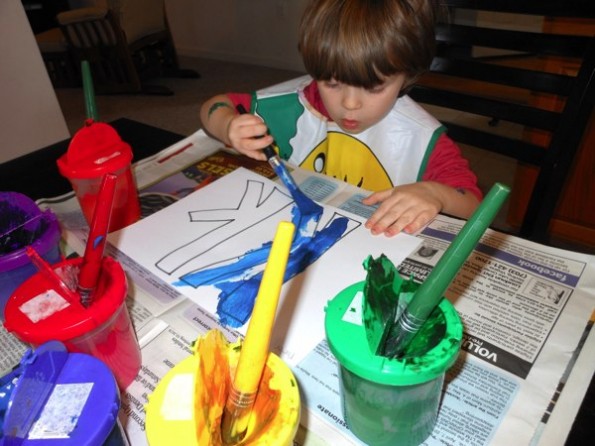
We also painted uppercase and lowercase K’s for our alphabet book.  For each letter we make a nice project that can represent that letter to put in our binders.  When we finish the alphabet we will have our very own home made books to help us remember all our letters.

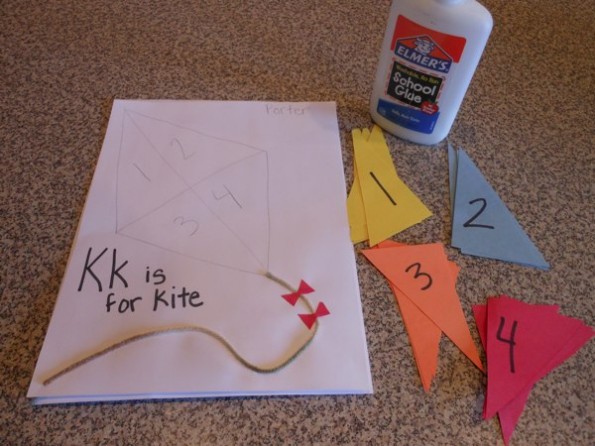
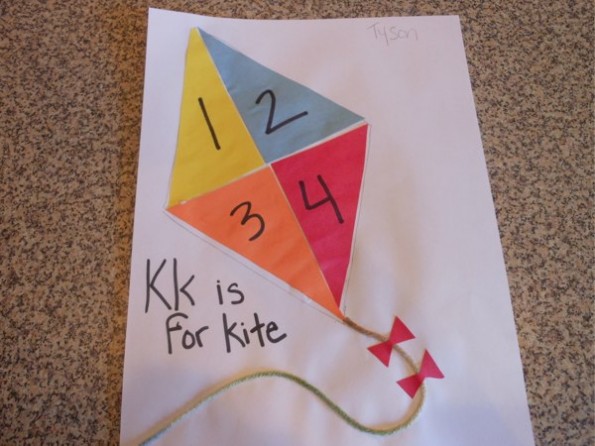
One of the cross curricular activities we did was a kite puzzle.  Along, with reinforcing the letter K and its sound, the kids matched the shapes and numbers to make the kite.  They also counted the pieces to the kite.

Painting our K's

The kite puzzle

Peanut Butter Frosted Chocolate Chip Cookie Dough Brownies!

So it’s my Dad’s birthday and I am in charge of bringing the cake.  Yeah!  Good thing, because I have really been craving some peanut butter chocolatey goodness and I am certain no ordinary cake would quench it.  So how to encompass all the baked yumminess into one cake?  Well, just that…. combine it all!  Peanut butter, chocolate,  cookie dough, brownies…  did I miss anything???  Oh wait, lets make that chocolate chip cookie dough!  I think we got it now!

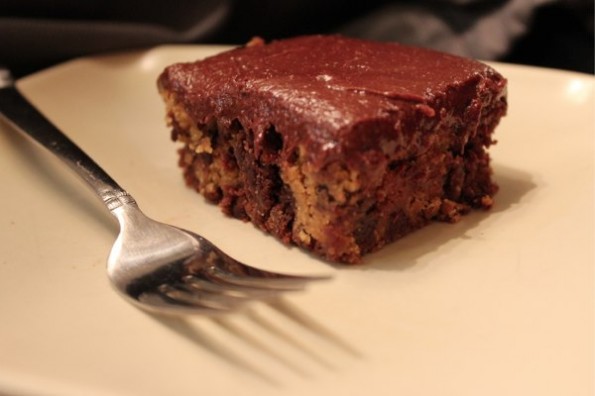
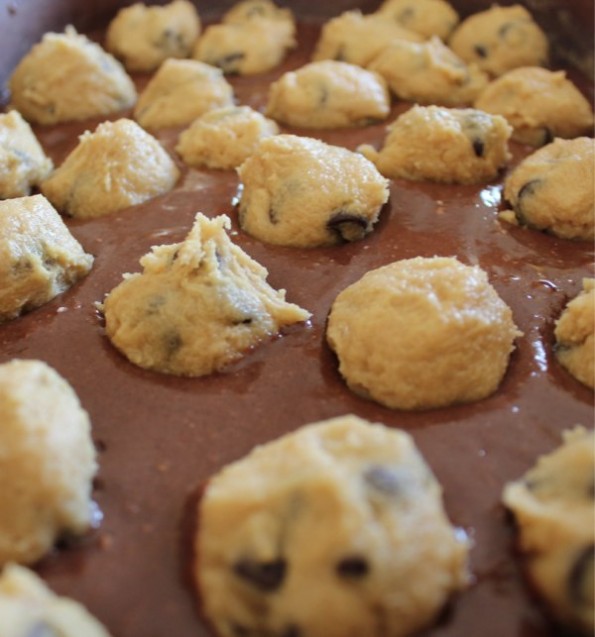
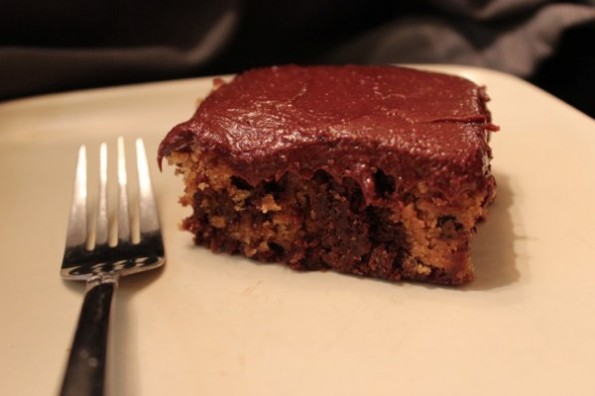
And here it is in all its goodness!  It is essentially, chocolate brownies with chocolate chip cookie dough balls, frosted first with fluffy peanut butter frosting and then lathered over with yummy chocolate frosting.  Hold on while I wipe the drool from my chin… you might want to do the same! 🙂

Can you blame me for being tempted to eat it just likes this and skipping the baking altogether???

Oh and don’t hate on me for using mixes… remember how I have three adorble, yet completely out of control monkeys boys hanging on me constantly!  I just don’t always have the time to make up the real deal from scratch.

PB Frosted Chocolate Chip Cookie Dough Brownies (Wow, that’s a mouthful!)
Improved on, but inspired by bettercrocker.com
1 package brownie mix (or if you are cooler than me, make them from scratch)
Chocolate Chip Cookie Dough (use your favorite recipe or cheat and buy premade dough or a mix)
Whatever ingredients you need to make your brownies
Chocolate frosting (again I used a Betty Crocker container…. don’t judge)  🙂

PB Frosting
1/2 cup butter, softened
1 cup creamy peanut butter
3 Tb milk (or as needed)
2 cups confectioners sugar

*Mix the brownie batter as directed and pour into 9 x 13 pan.   Drop rounded teaspon balls of cookie dough  evenly into your brownie mix.  Bake at 350 degrees for 35-45 minutes or until toothpick comes out almost clean.  Mine was done in less than 40min.  Let cool for 30 minutes or so on a wire rack.

*Make the PB frosting by beating peanut butter and butter together.  Add sugar and mix again.  Add milk as needed to get desired consistency.  Make sure to beat for at least 3 minutes to get it nice and fluffy!

*Frost the brownies first with the PB frosting then cover it with the chocolate frosting.  Doesn’t’ get better than that!  It gets a little gooey spreading the chocolate, but it looked nice and smooth when I was done. So good!

You should have heard and tasted the compliments I got on this from my family while celebrating my Dad’s 57th birthday!  So good… It is definitely a keeper!

So, so perfect!


Bad Days Are Inevitable

I get a kick out of people’s Facebook posts.  Some are always stating how perfect their kids and life are.  Ain’t that some bull.  I actually pity them for feeling like they need to cover up the hard days of motherhood.  It’s not always easy…. remember that.  Being a stay at home mom is especially hard sometimes because you don’t get a break.

Some days consist of your kids throwing tantrums, not listening, crying for no reason, skipping naps, fighting with siblings, spilling drinks or just wanting to be held all day.  Trust me, the list goes on and on….. and on.

I recently read a post that I could actually relate to and it was real:

there are magical days when the baby wakes up in a good mood, everyone is smiling, games are played, crafts are made, things get done around the house, and there are even a few moments of “me time” to do whatever I want…

today is not one of those days.

I loved the punch line.  It’s so true.

Here’s my advice: Once the kids are in bed and you’ve gained your sanity back, go check on them.  That’s what I do.  Trust me, your difficult day is suddenly refreshed.  I did this the other day and look what I found:

10 month old sleeping

My 10 month old sleeping.

two year old sleeping

My energetic two year old sleeping.

Heck, you will probably look back when they’re grown and wish you had those bad days all over again.


My Valentine Surprise

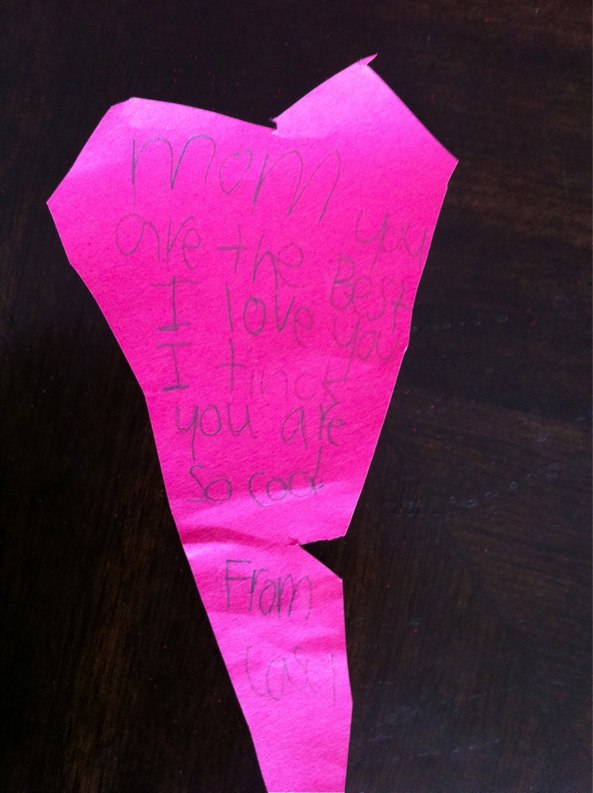
I have the best six year old ever!  He woke me up today at 630am… yes you read that right.  6:30am!!!!  He snuck into my room when it was still dark out.  I heard him whispering over to me, “Mom, I made you a Valentine.  It has a note on it, but you can’t see it in the dark.”  He slipped a cut out heart he had made from construction paper into my hand.  In my drowsy state I saw him sneak over to his Daddy and do the same thing.  He also put a hand cut out flower he made on top of his four year old brother (who happened to have snuck into our bed unnoticed last night).

Seriously…. how cute is this little note!  I am in shock that he thought to do this all on his own and woke up early while the rest of us slept to make us each a Valentine.  In all honestly I didn’t think he though of much besides skateboarding, climbing trees, and learning stunts on his bike.  He is a true boy through and through so this gesture of his really made my day.

Translation: “Mom you are the best I love you I tinck you are so cool. From Casey”

There are definitely days when I wonder where these little monsters of mine came from, but on days like today I think how really incredibly awesome my kids are.  What a cool kid!

On another note, a friend gave me this tray of marshmallow fudge this morning.  So yummy!  Love sweet friends like this… I need to do more things like this for people because it really has made my day!

Thanks for the yummy treats Sherri!

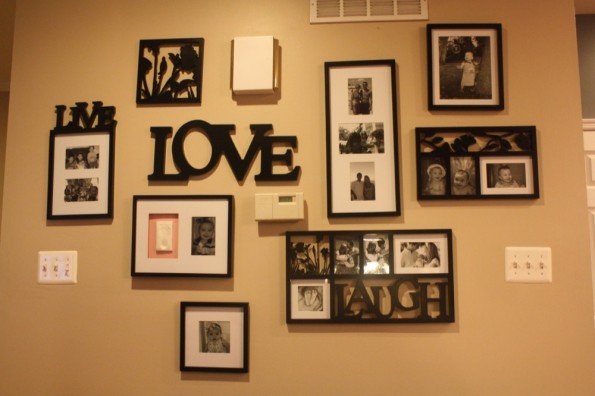
Making Wall Art Around 5 Things on a Wall

This wall was blank for a while.  I had a sofa table on the wall with a lamp and picture frames on it.  The thermostat and ugly door bell stood out .  Why would the builder seriously do something so stupid?  We couldn’t move anything around, so we had to figure out a way to make it work.  So, I began to see picture collages and my husband sent me a link a while back (it was like 3 years ago, definitely don’t know where credit is due) of a wall collage.  It was a great idea and it hid all the needed switches, door bell, thermostat and vent.  It is also a focal point in between two rooms and a great way to cherish moments.

My neighbor had the same stuff on her wall.  She went and did the same thing!

picture wall

Okay... find the thermostat, door bell, two light switches and vent.

HAPPY MONDAY!